
Blazor is a front-end web frameowork supporting both client and server sider rendering using a single programming model.This allows as decribed in Blazor documentation
- Create rich interactive UIs using C#.
- Share server-side and client-side app logic written in .NET.
- Render the UI as HTML and CSS for wide browser support, including mobile browsers.
- Build hybrid desktop and mobile apps with .NET and Blazor.
WHAT IS THREE-TIERED ARCHITECTURE?
It divides application into three interconnected layers.
-
- Presentation Layer: The user interface where the end-user interacts with the system (e.g., a web browser or a mobile app).
-
- Logic Layer: The middle tier of the architecture, also known as the logic tier, handles the application’s core processing, business rules, and calculations.
-
- Data Layer: Manages the storage, retrieval, and manipulation of the application’s data, typically utilizing a database.
Advantages
-
- Allows for scalability since each tier can be scaled independently to meet changing performance demands.
-
- Highly flexible; tiers can be updated or replaced with newer technologies without disrupting the entire application.
-
- Maintainability is enhanced, as modifications to one tier often have minimal or no effect on other tiers.
-
- Improved security, as multiple layers of protection can be implemented to safeguard sensitive data and business logic.
FINAL PRODUCT
Project source code download URL: BlazorCRUDThreeTiered- Source Code
The first step is to create the Project structure then deal with the backend details that will include the Data Access, Business Logic and Part of the presentation layer which is the WEBAPI.
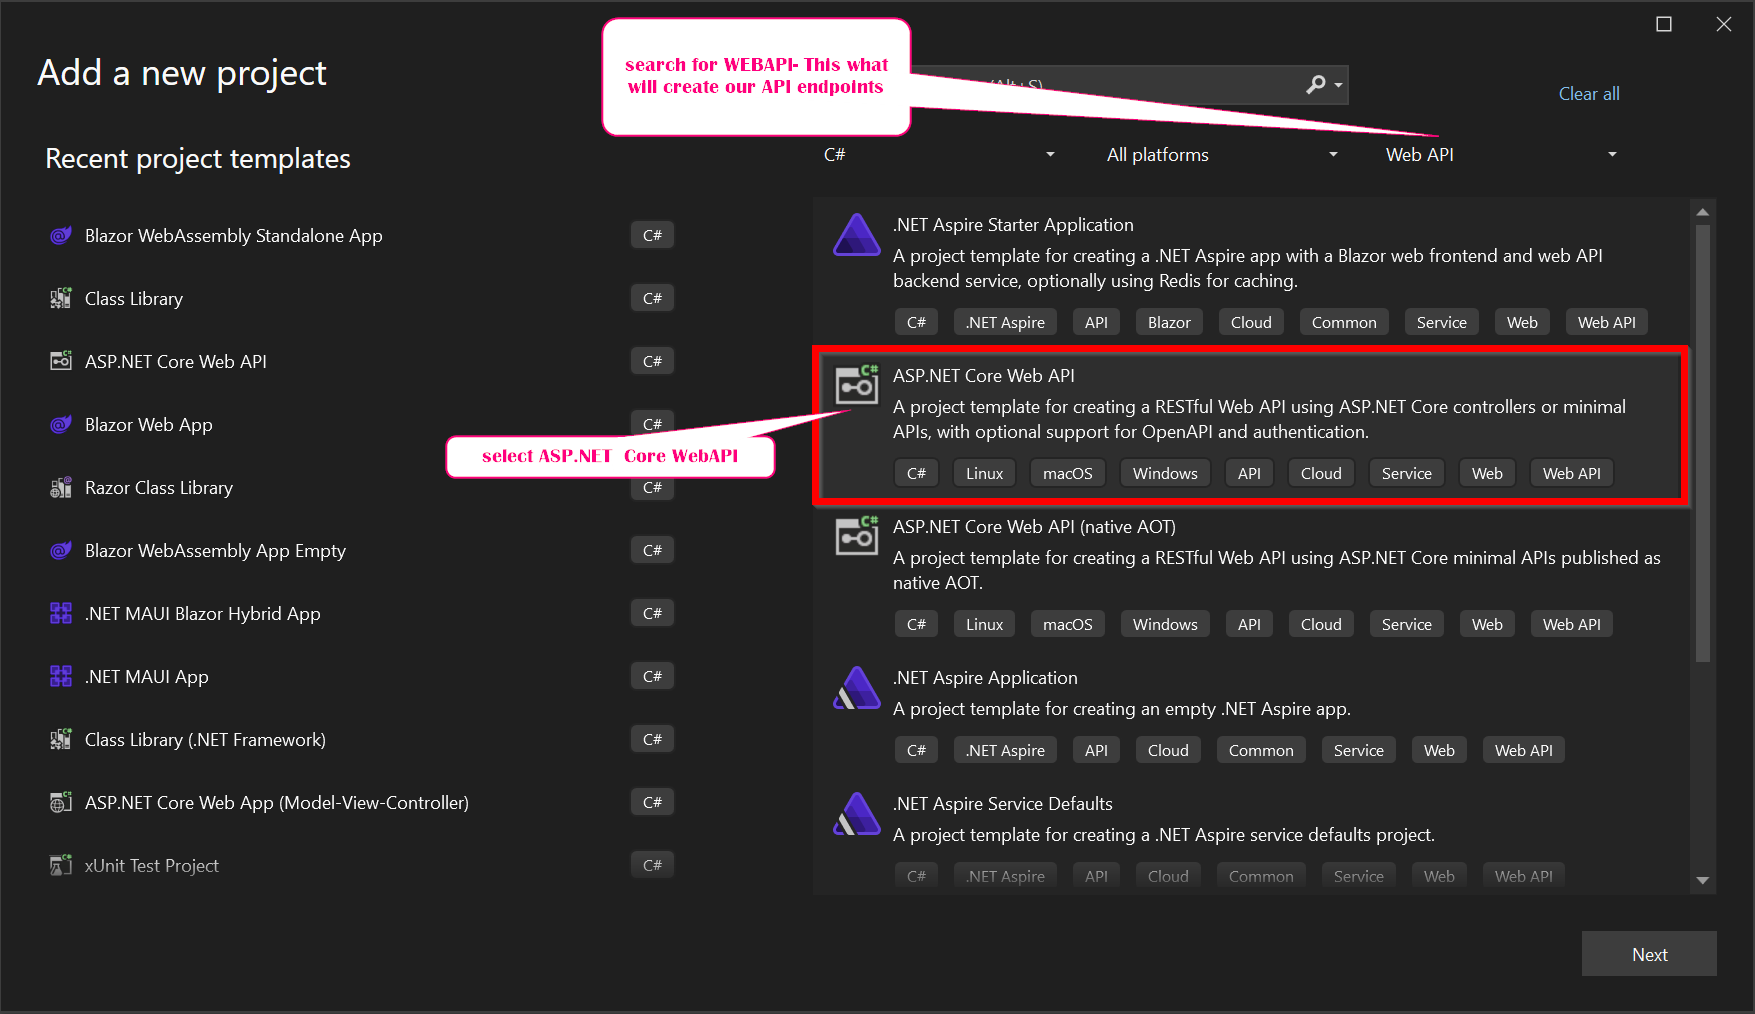
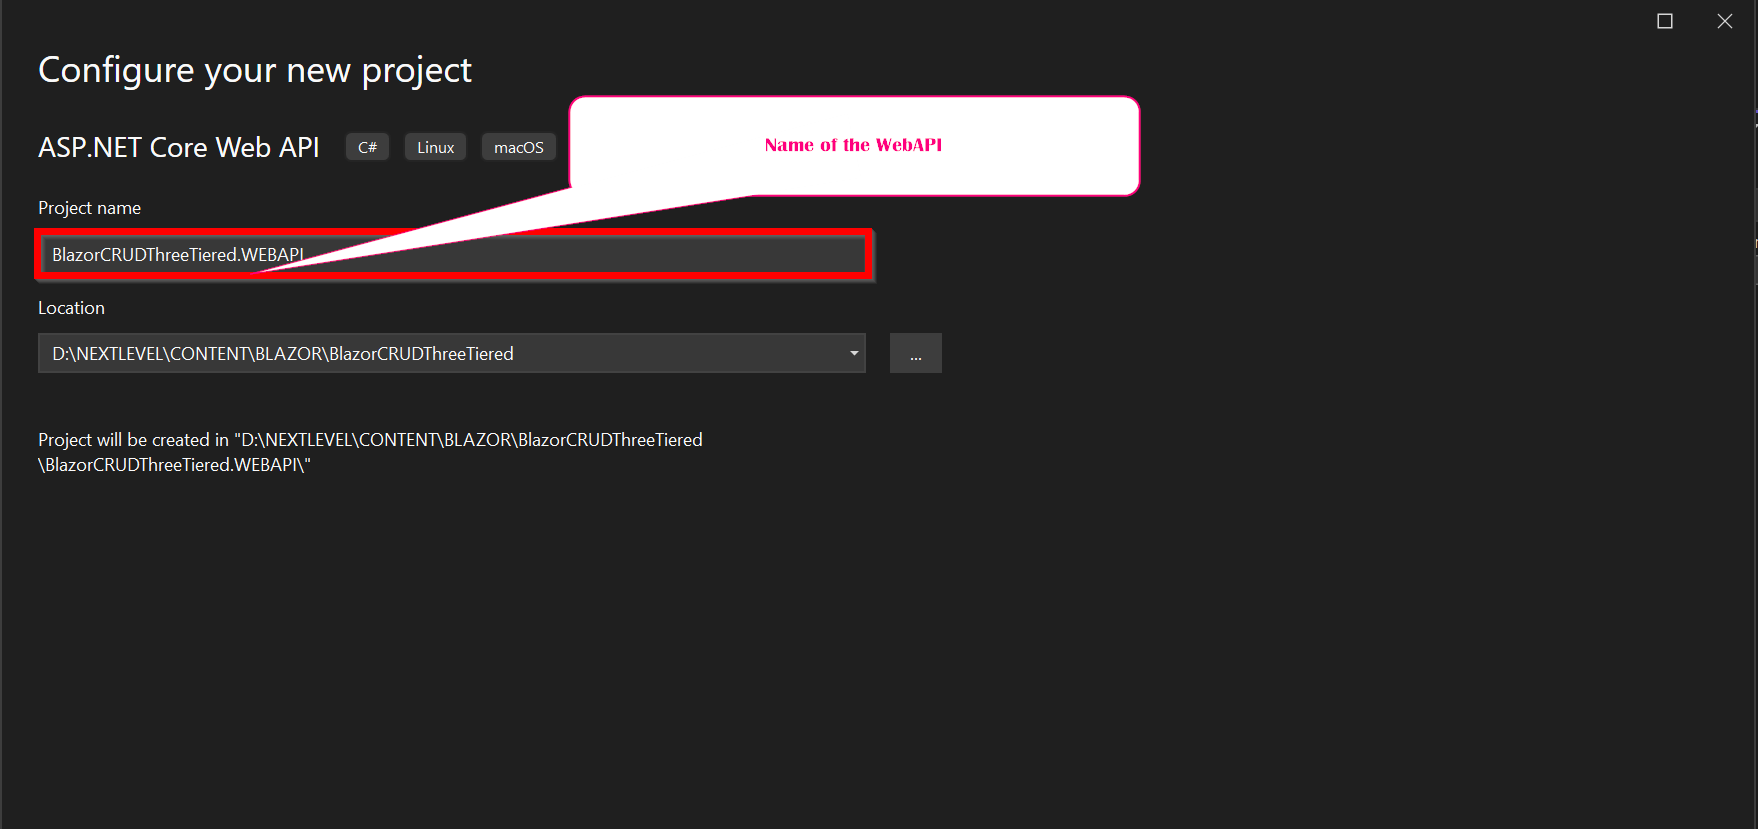
Create blank project in Visual Studio 2022 and save it in a location of choice:
Add the required project structure details
Add presentation layer folder that will include the WEBAPI and Blazor Web Application
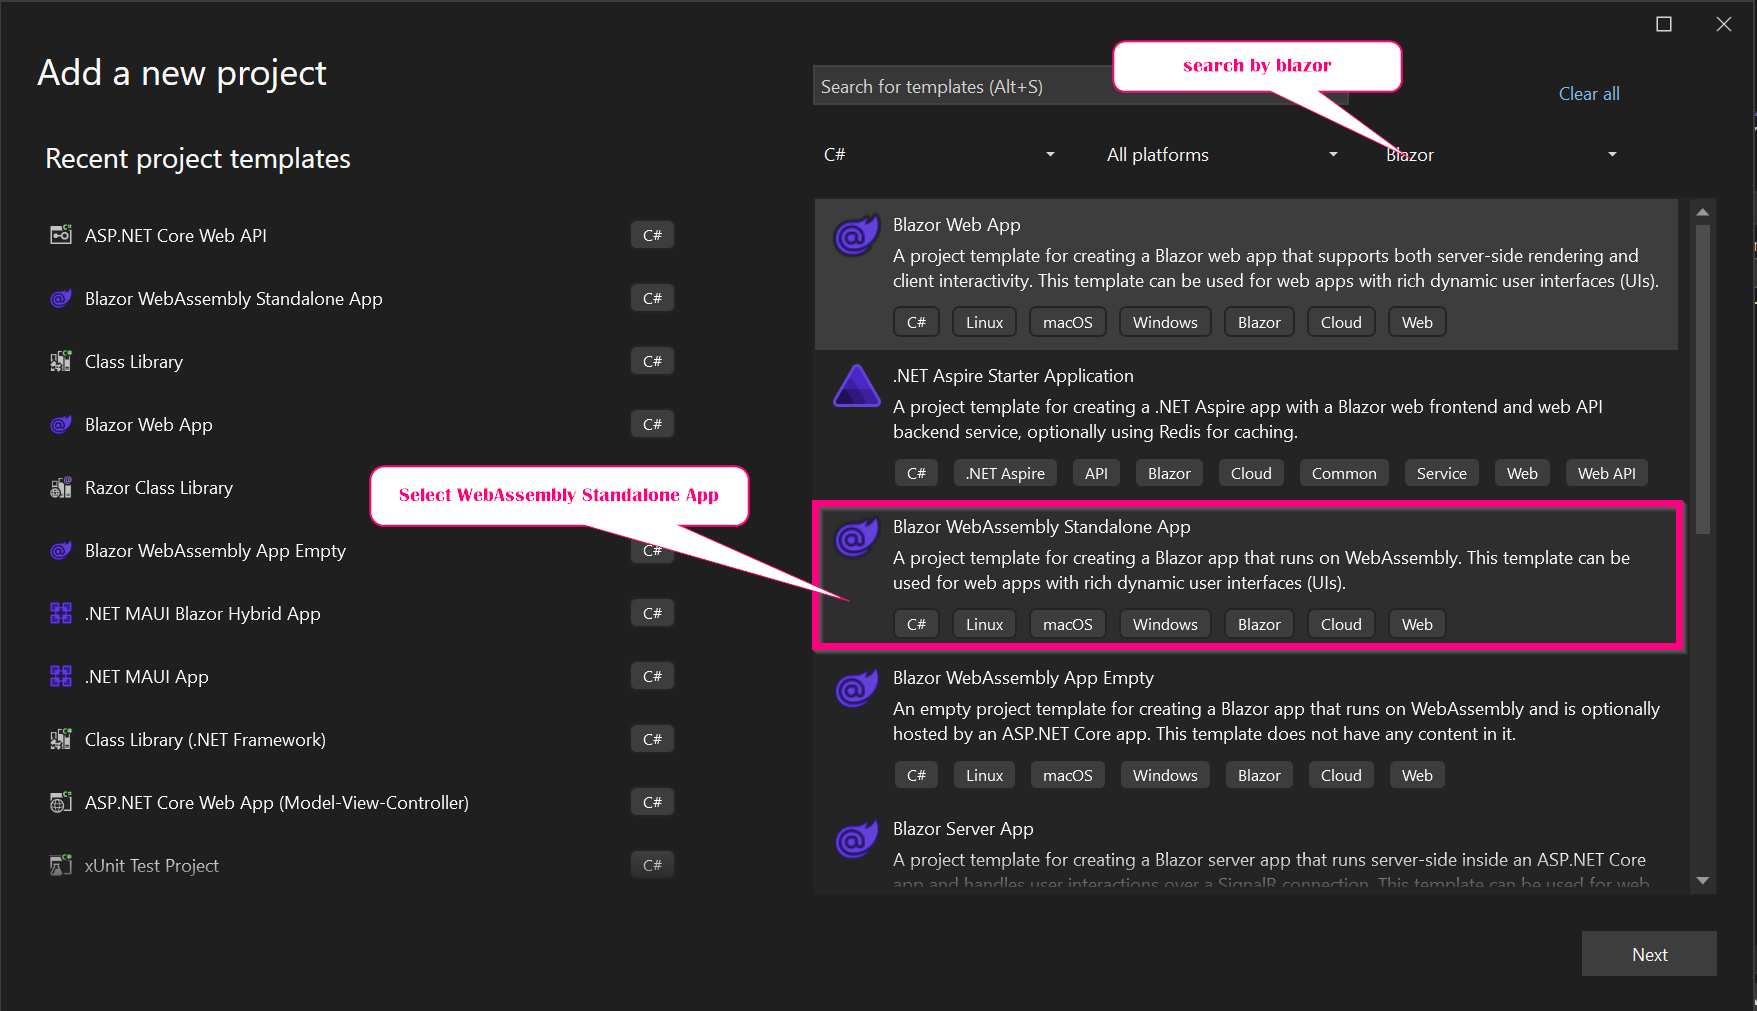
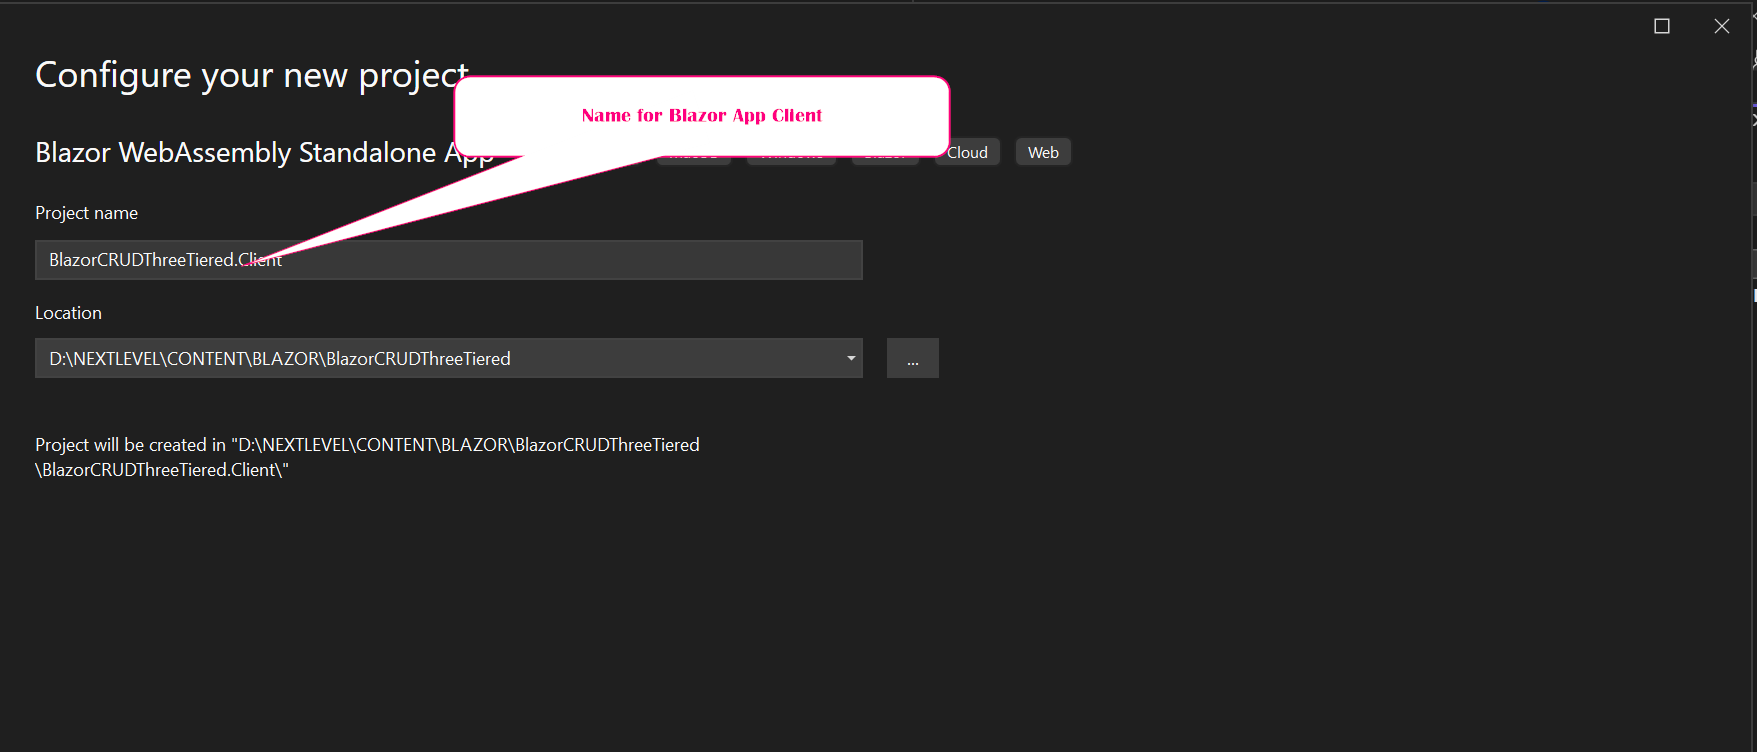
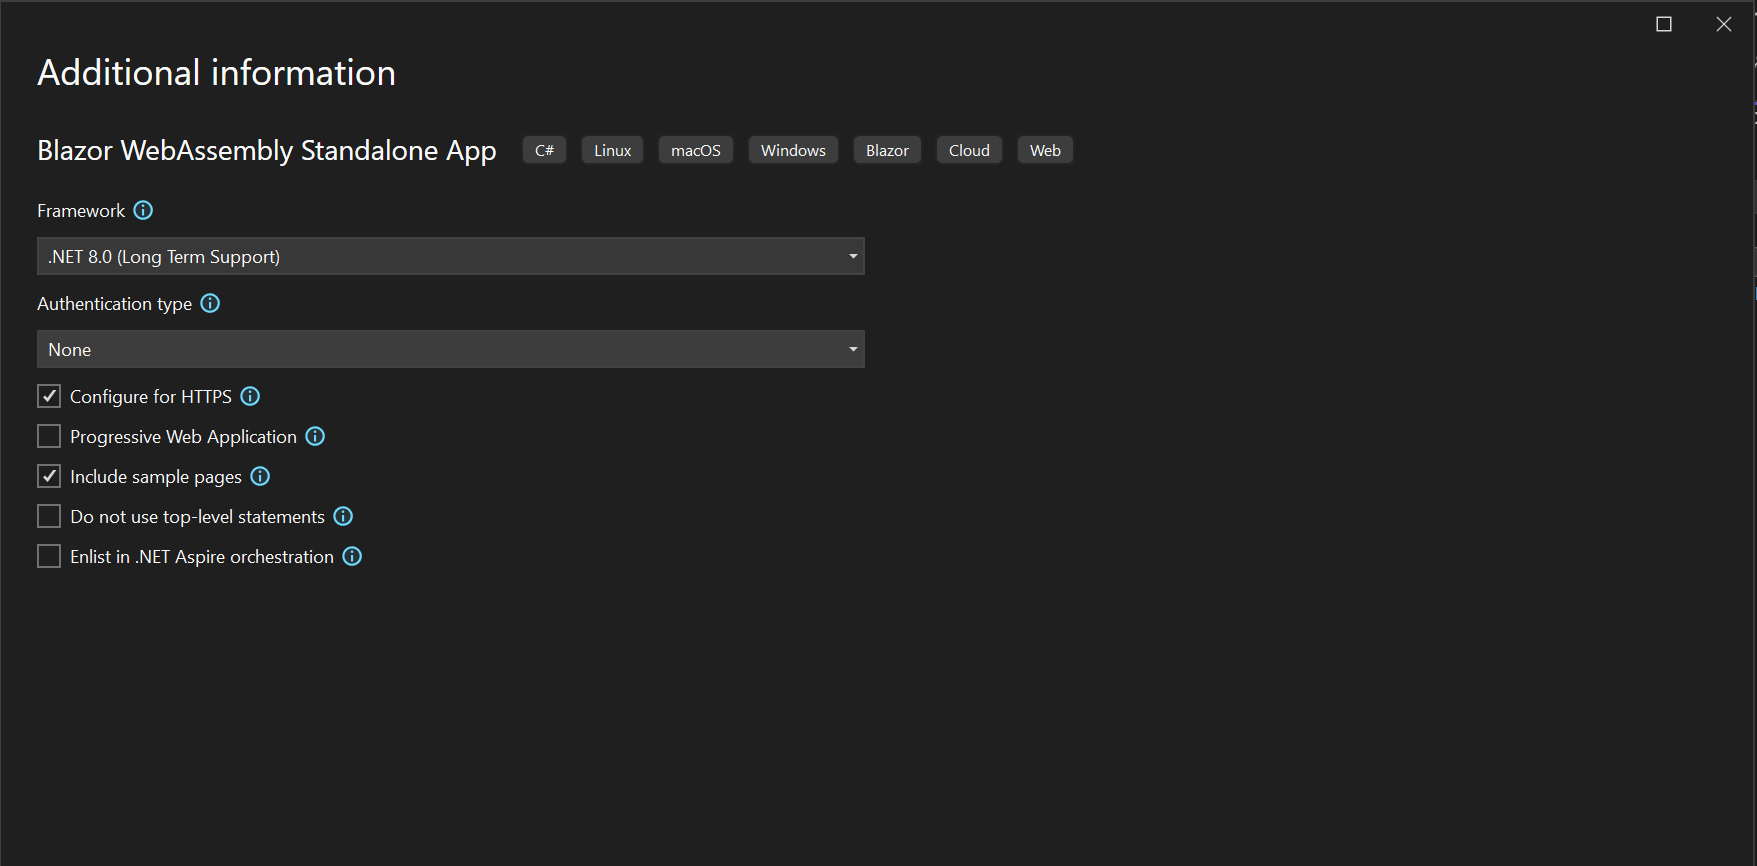
Create Blazor web application with the below steps
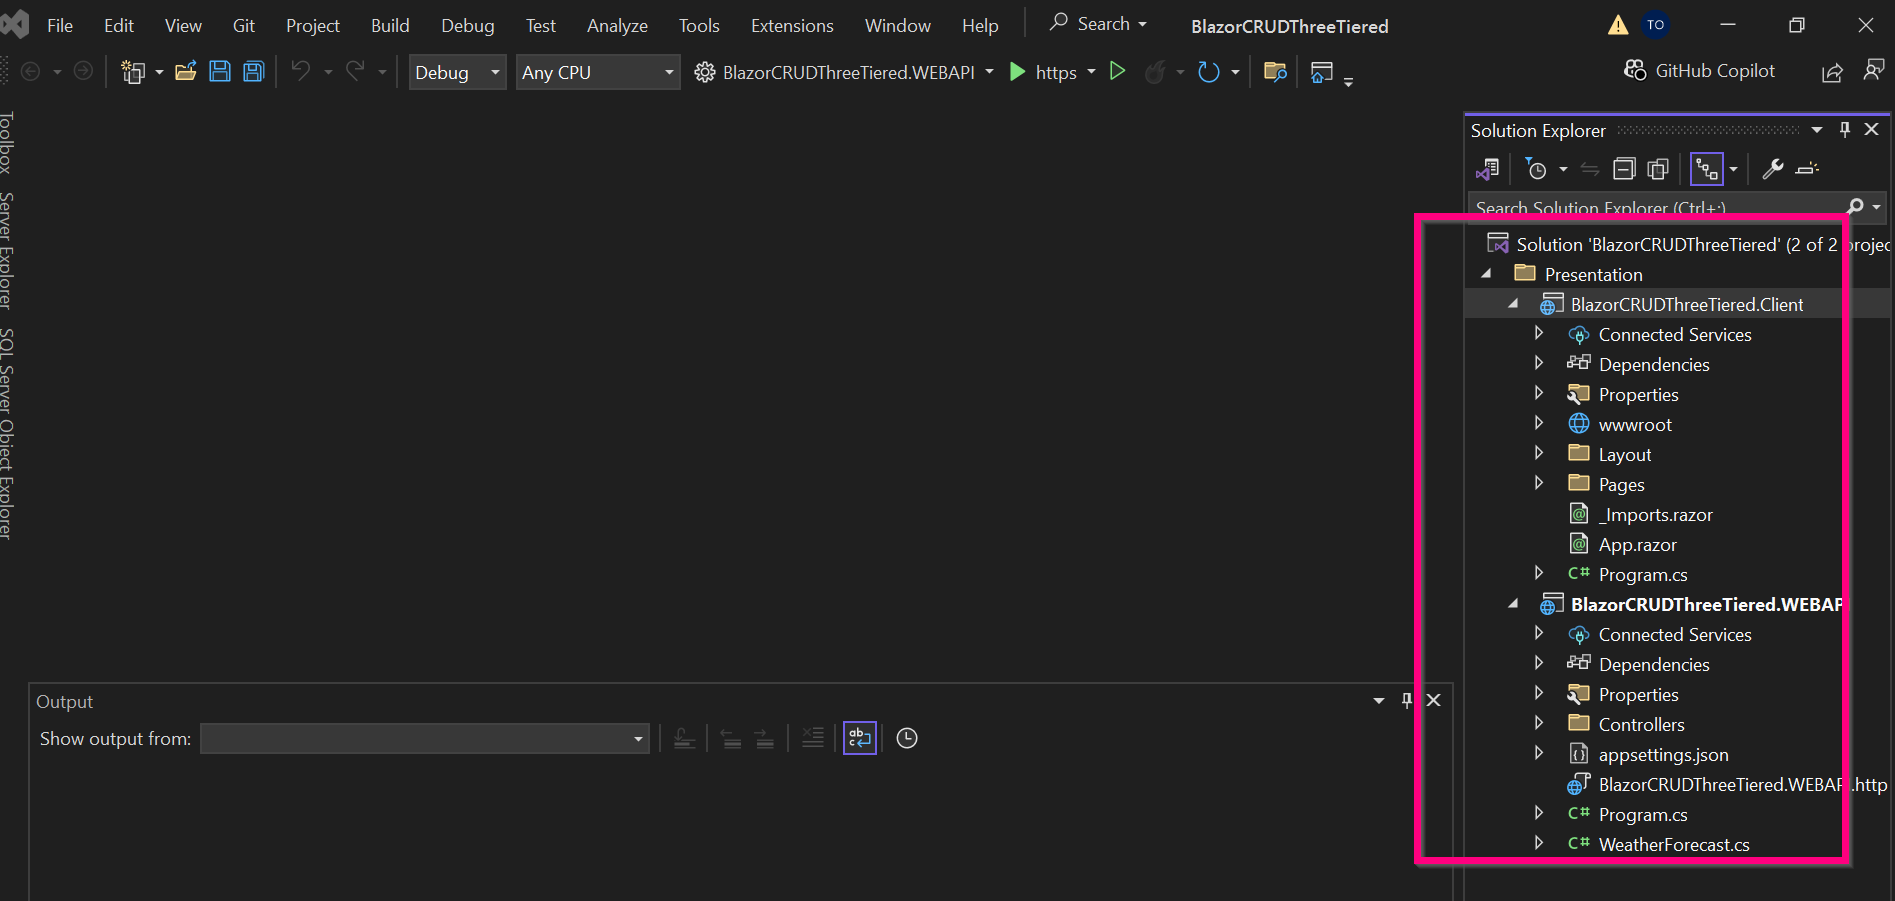
Final project structure will be as displayed below:
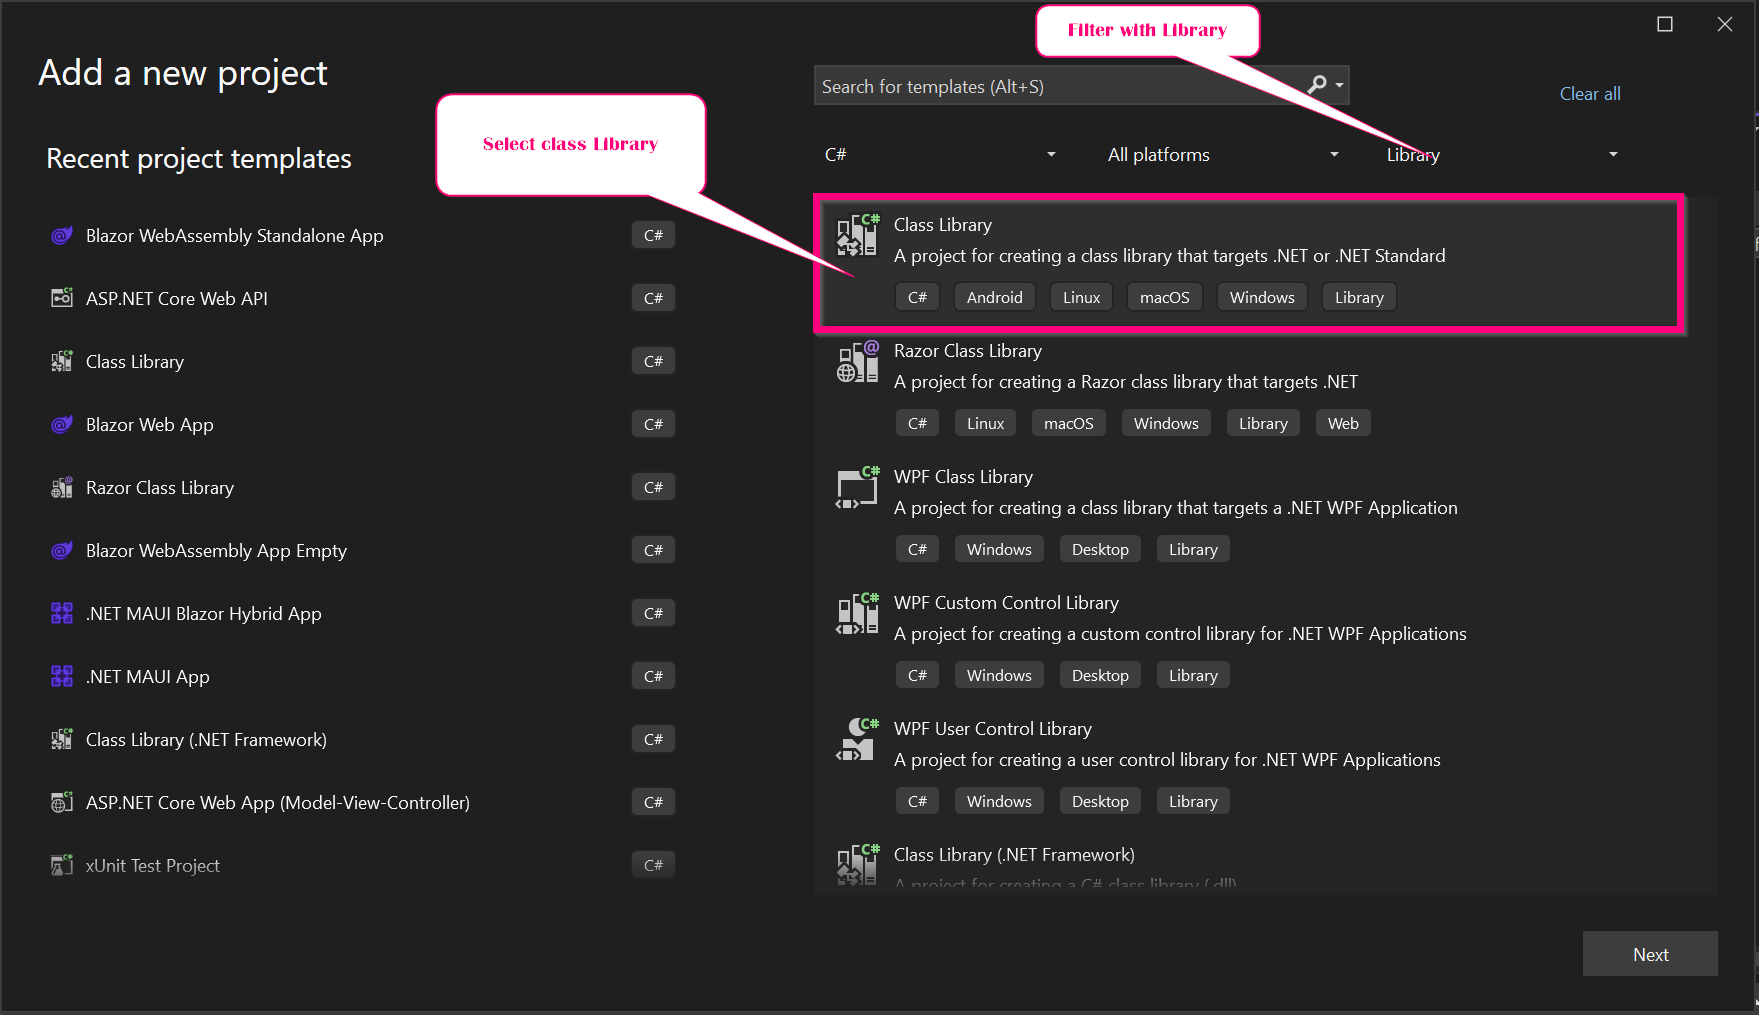
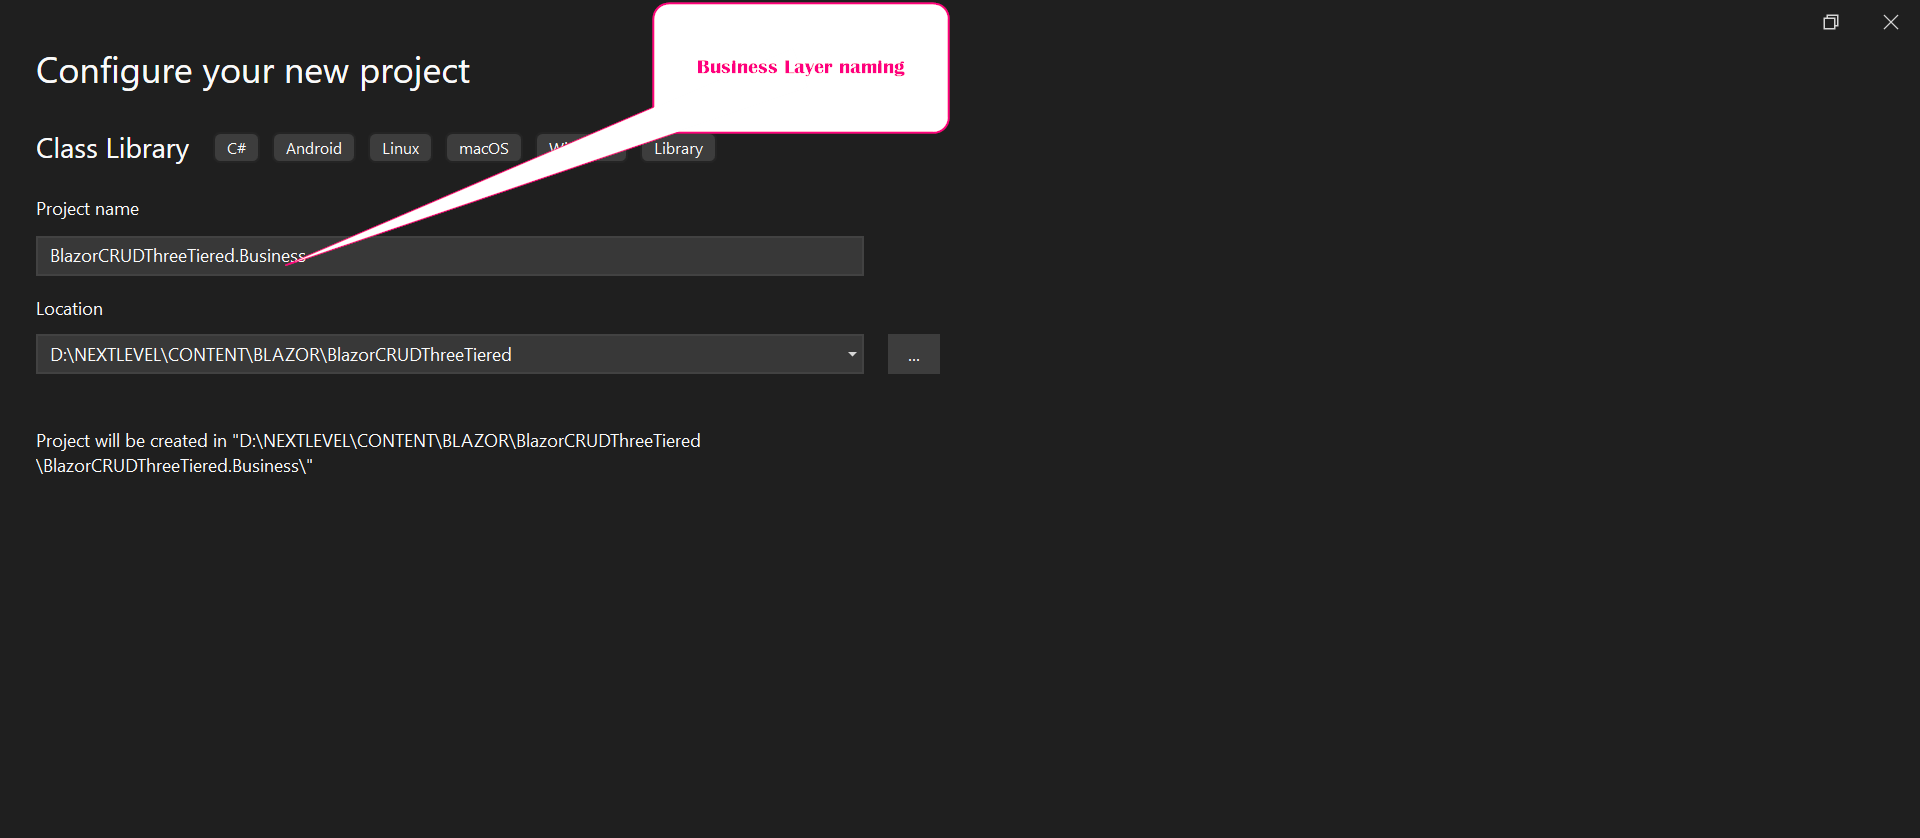
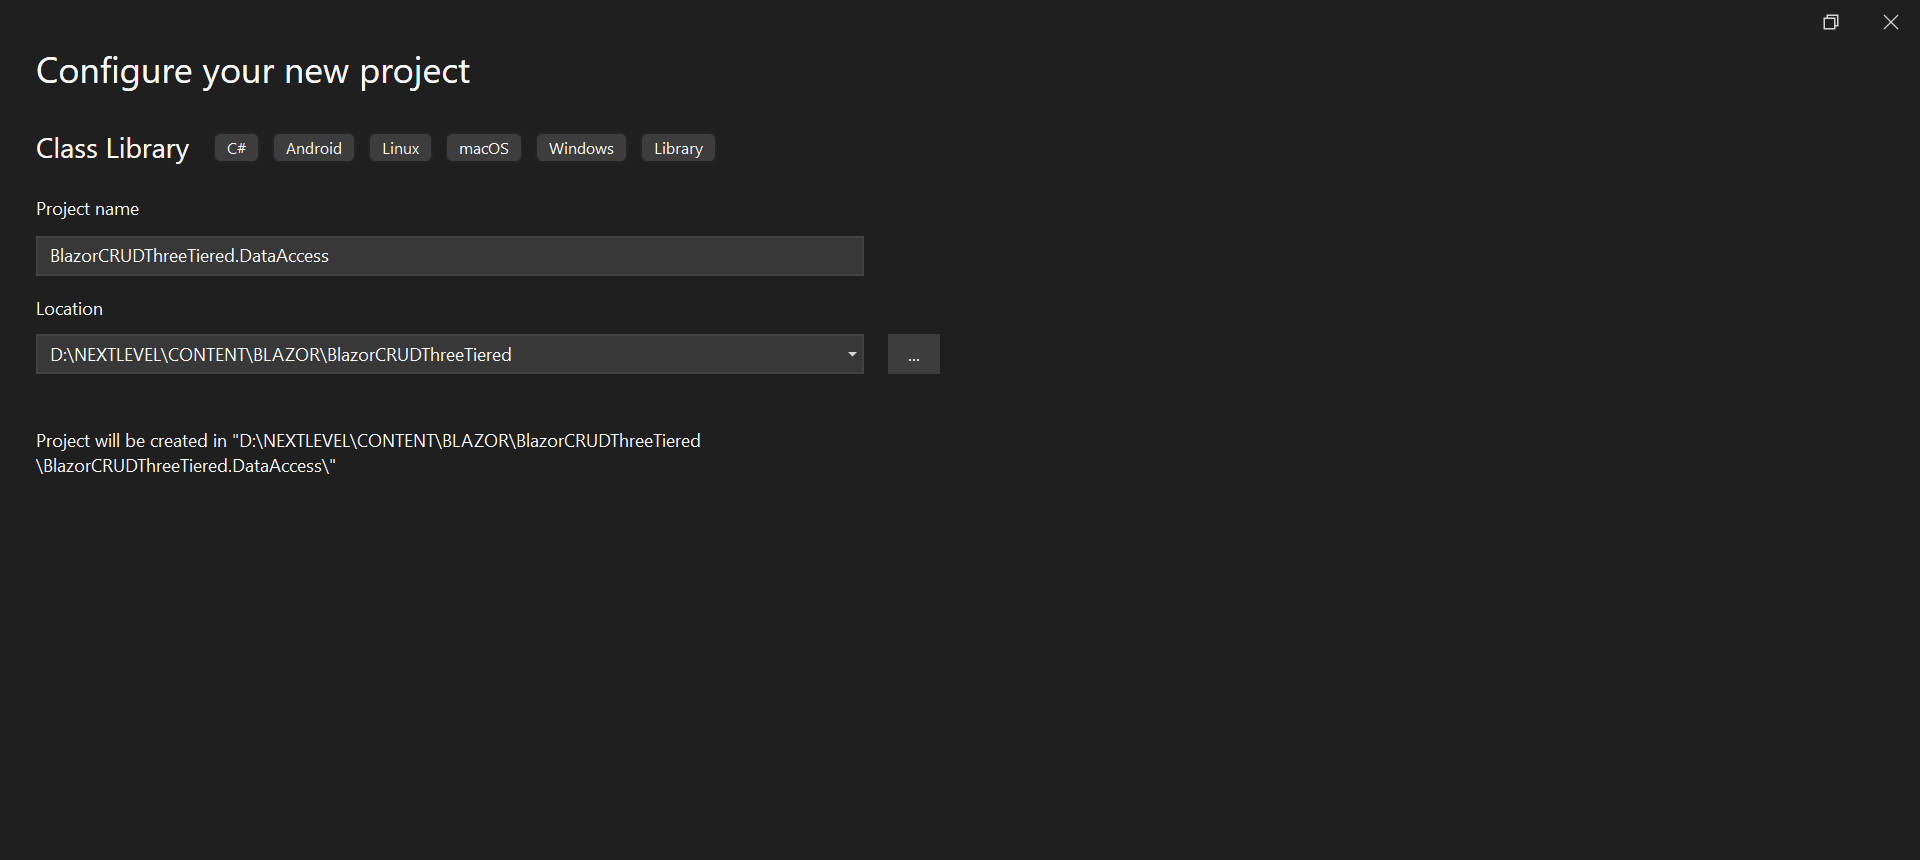
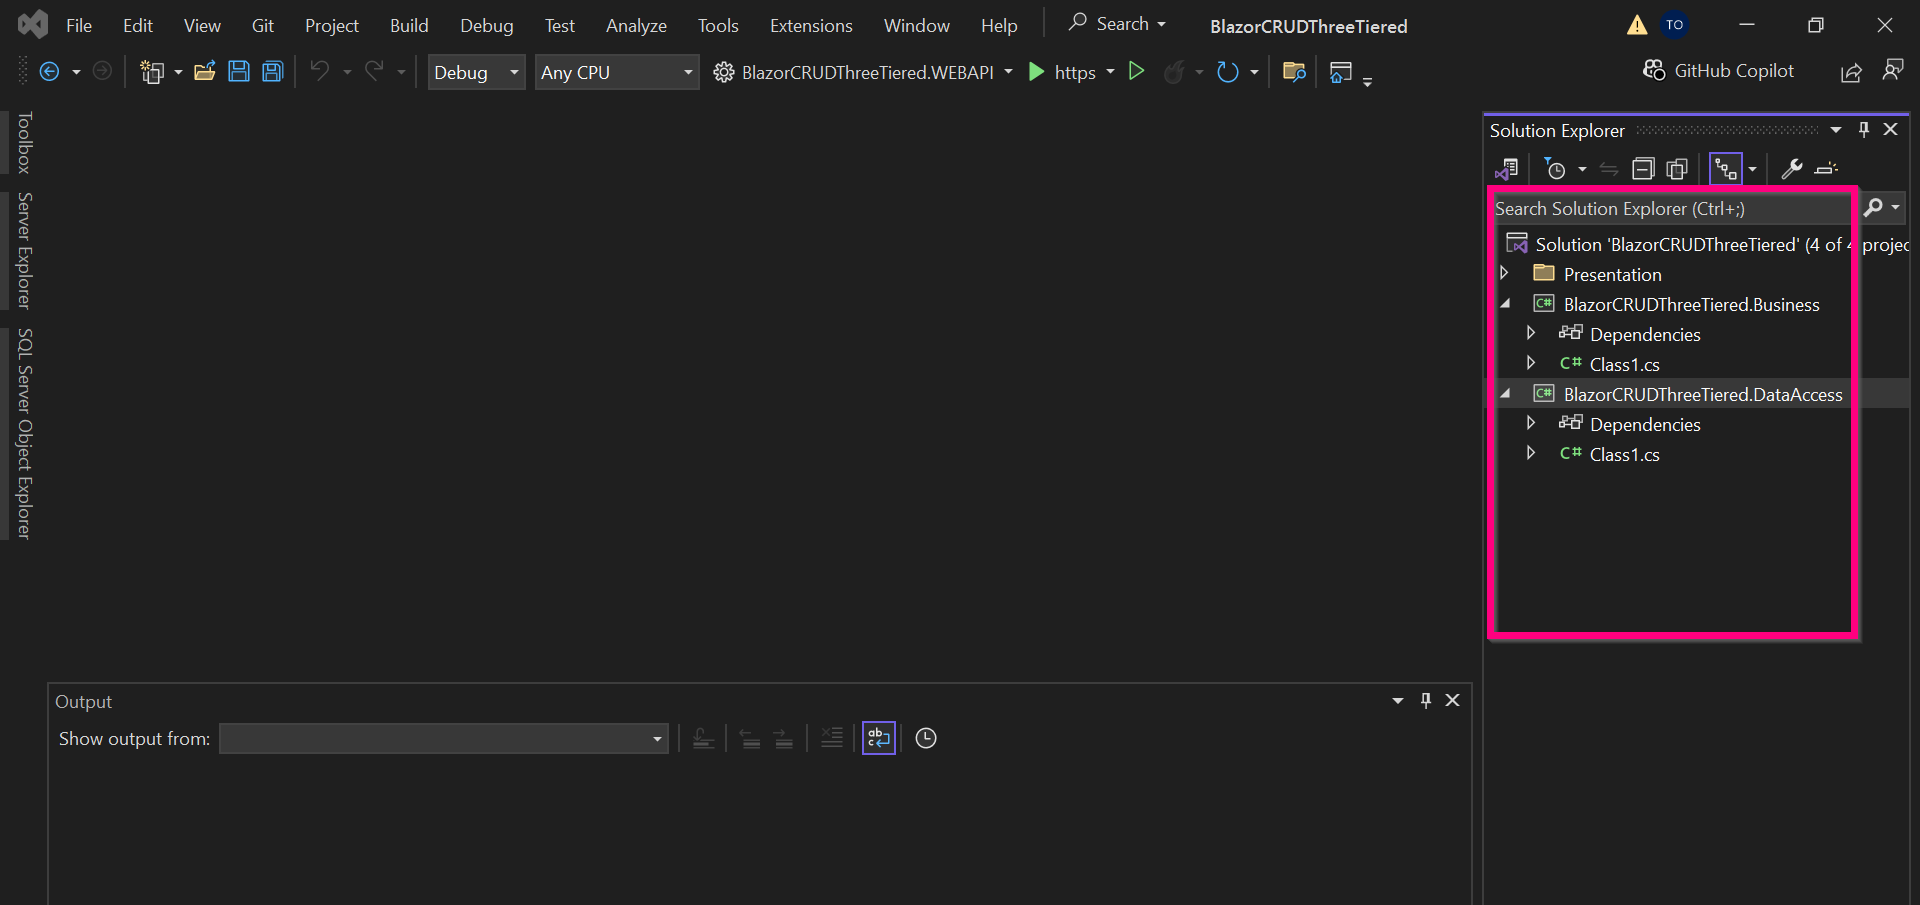
Add Class Library for Data Access Layer and Business Access Layer as above and provide the respective names
Final project structure should appear as below:
We will begin with the implementation of the Business Layer where we will add out Entities and DTOs (Data Transfer Objects)
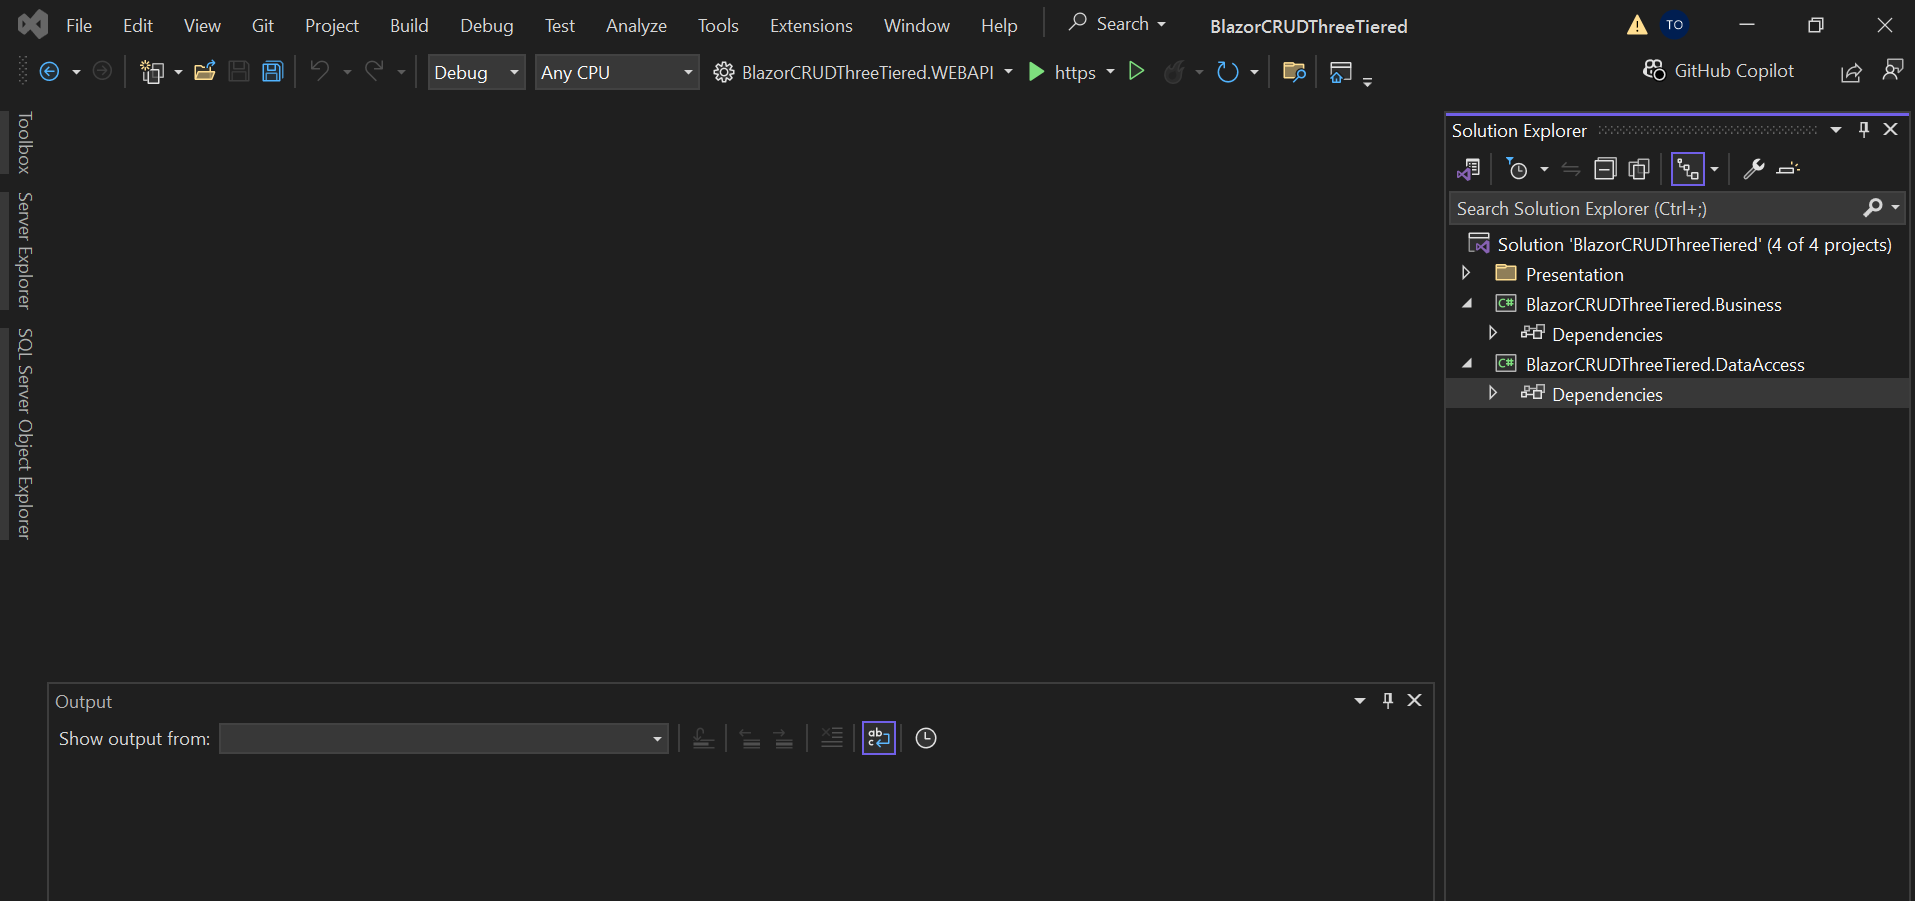
First clean up the project by deleting the default class(Class1.cs) created as we will not be using it both for the Business Layer and Data Access Layer. The final document should appear as below:
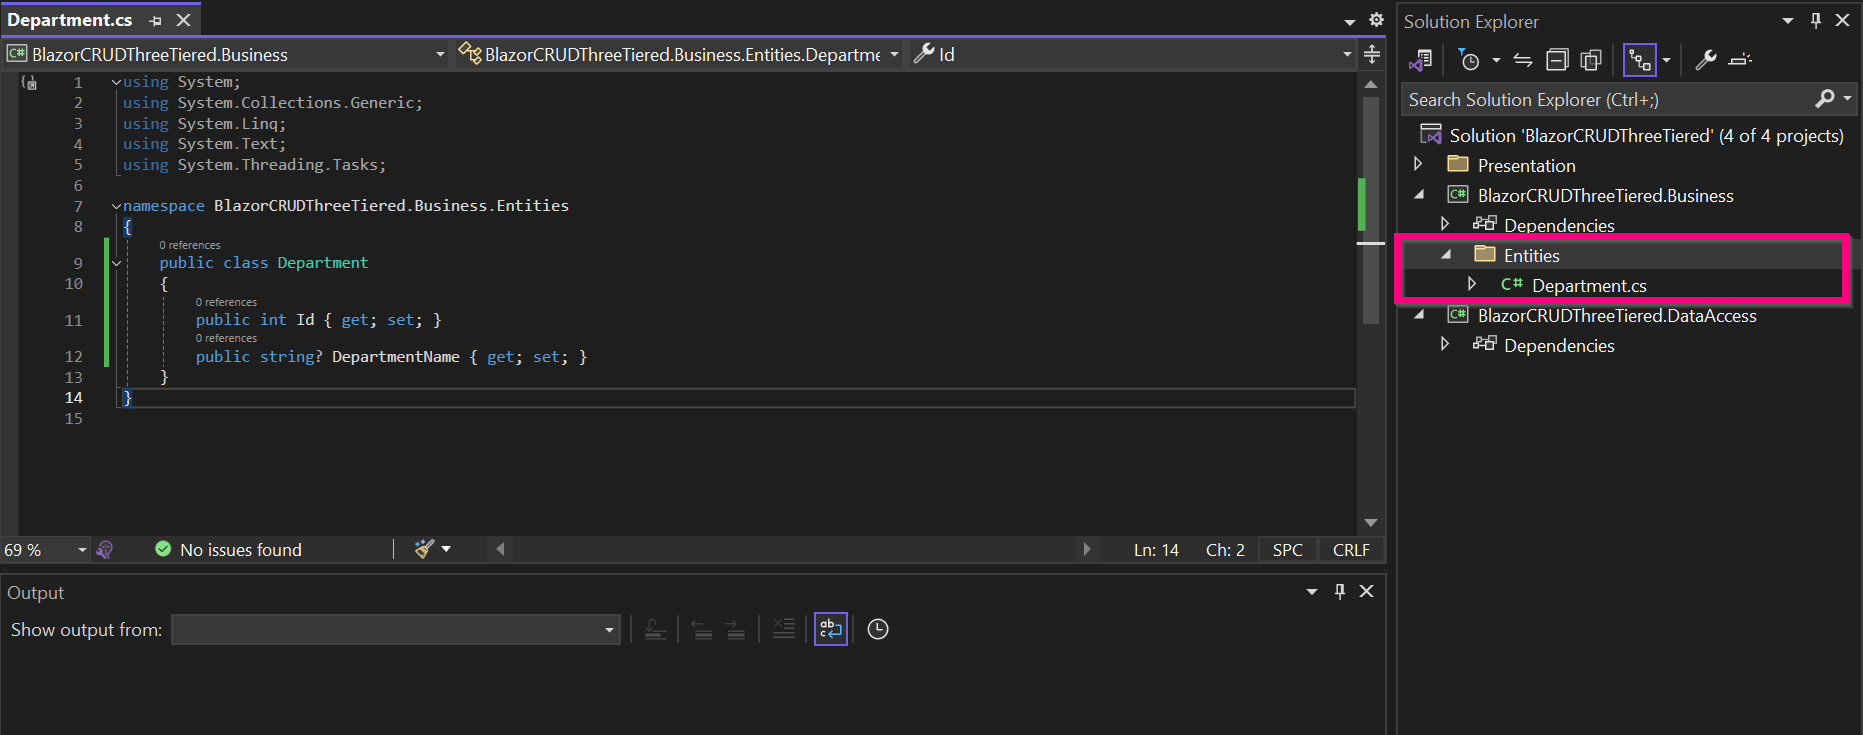
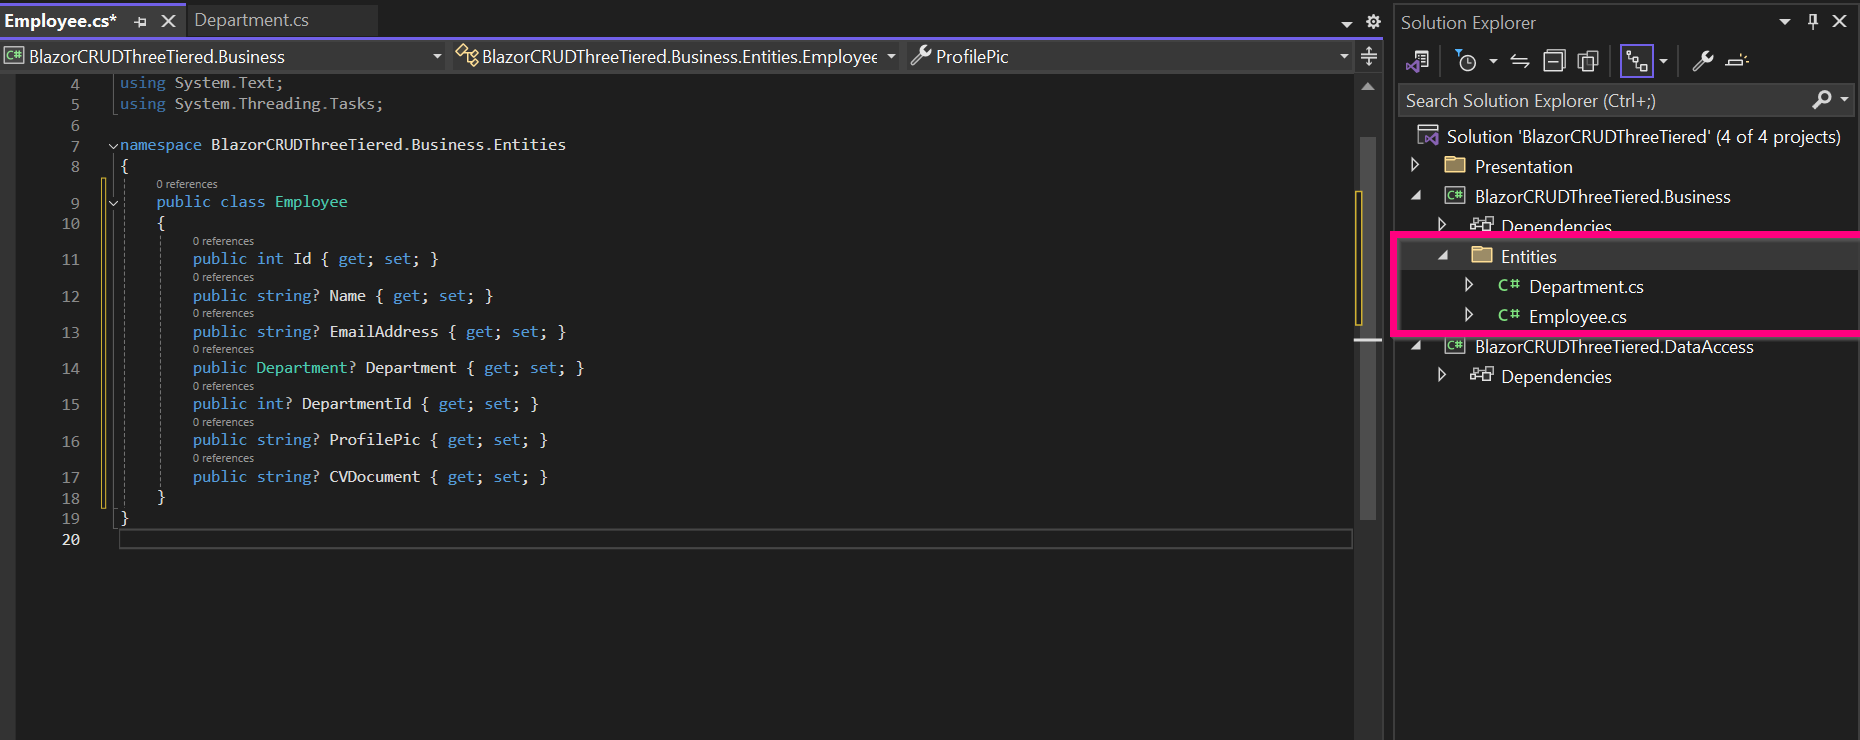
Create a folder called entities and add two class for Employee and Department. The class details should look as below together with the folder structure.
As noted there is a relation existing between the two that will help when implementing it on the interface
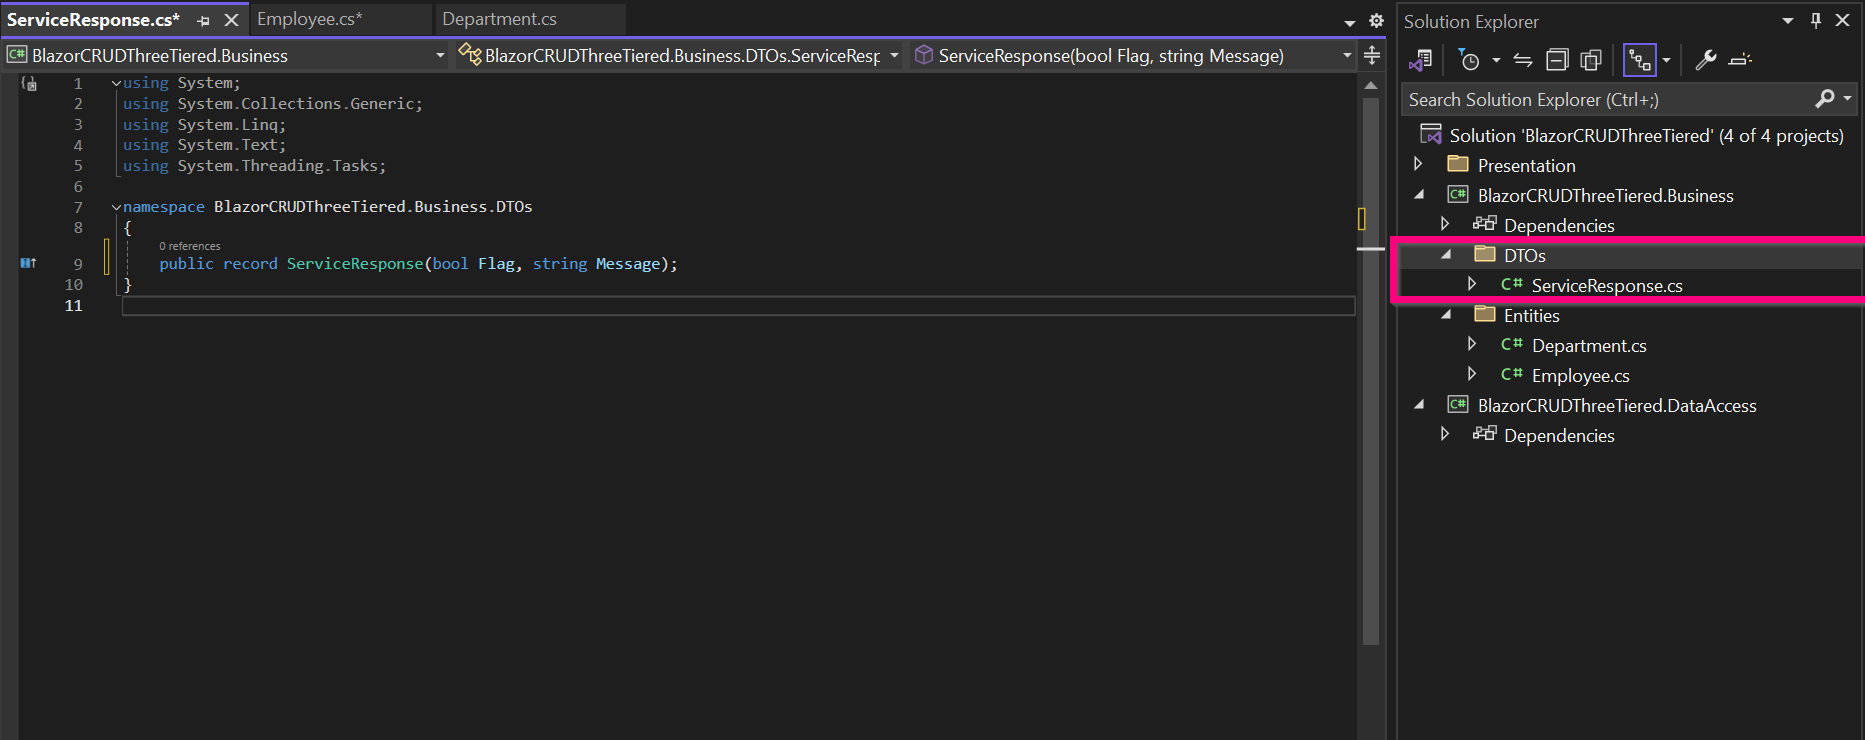
Create another folder in the business Layer called DTOs and add ServiceResponse class as below:
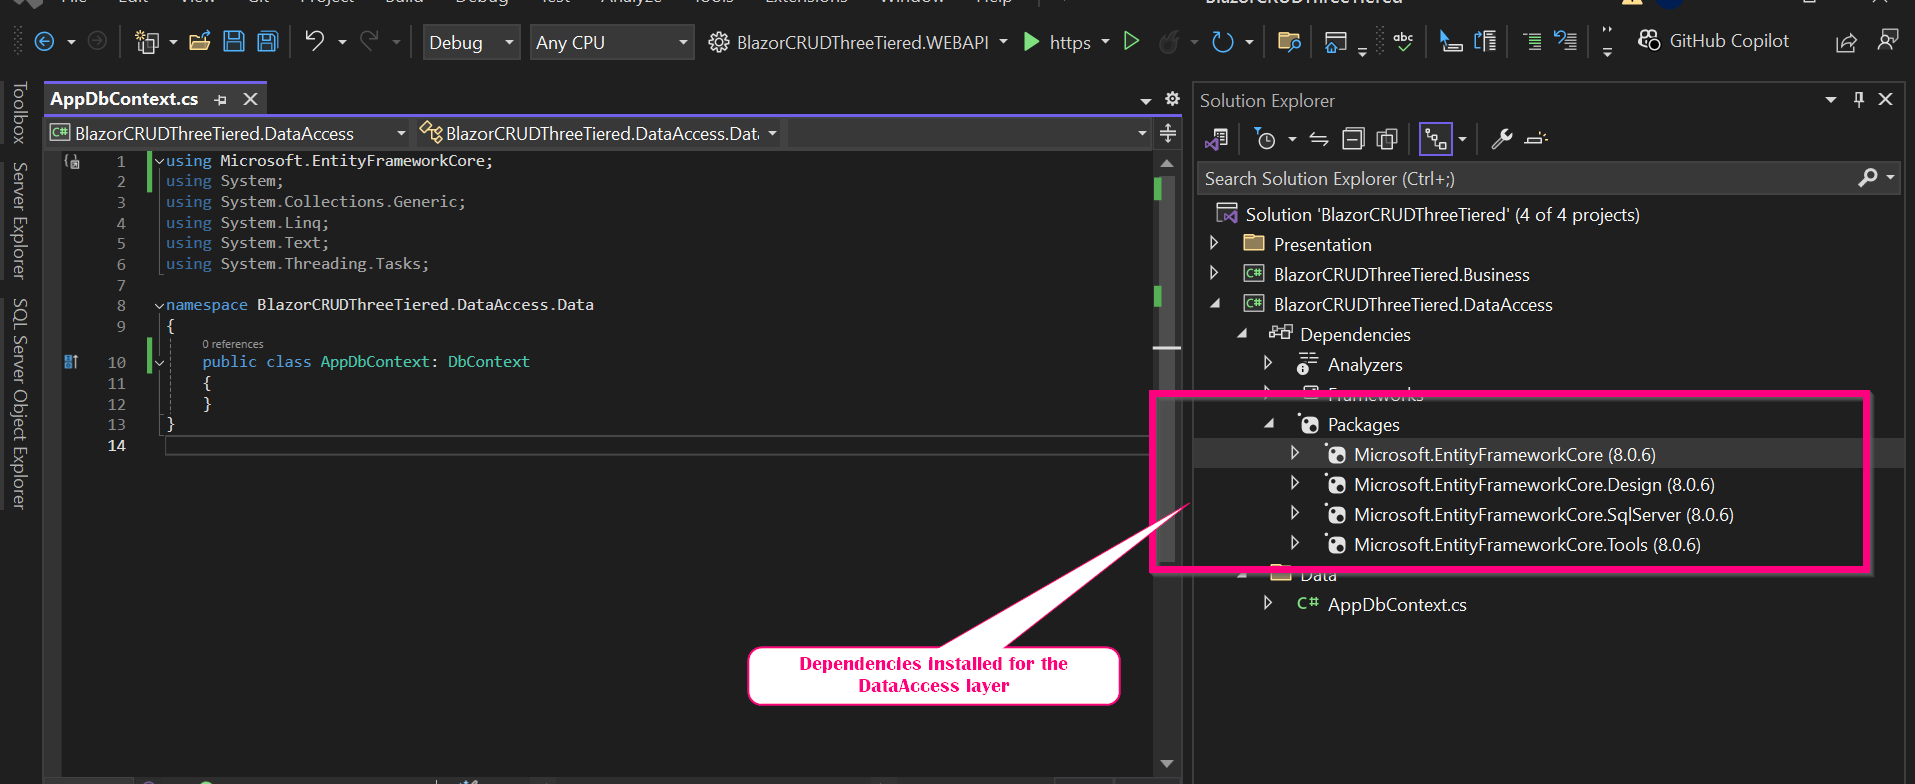
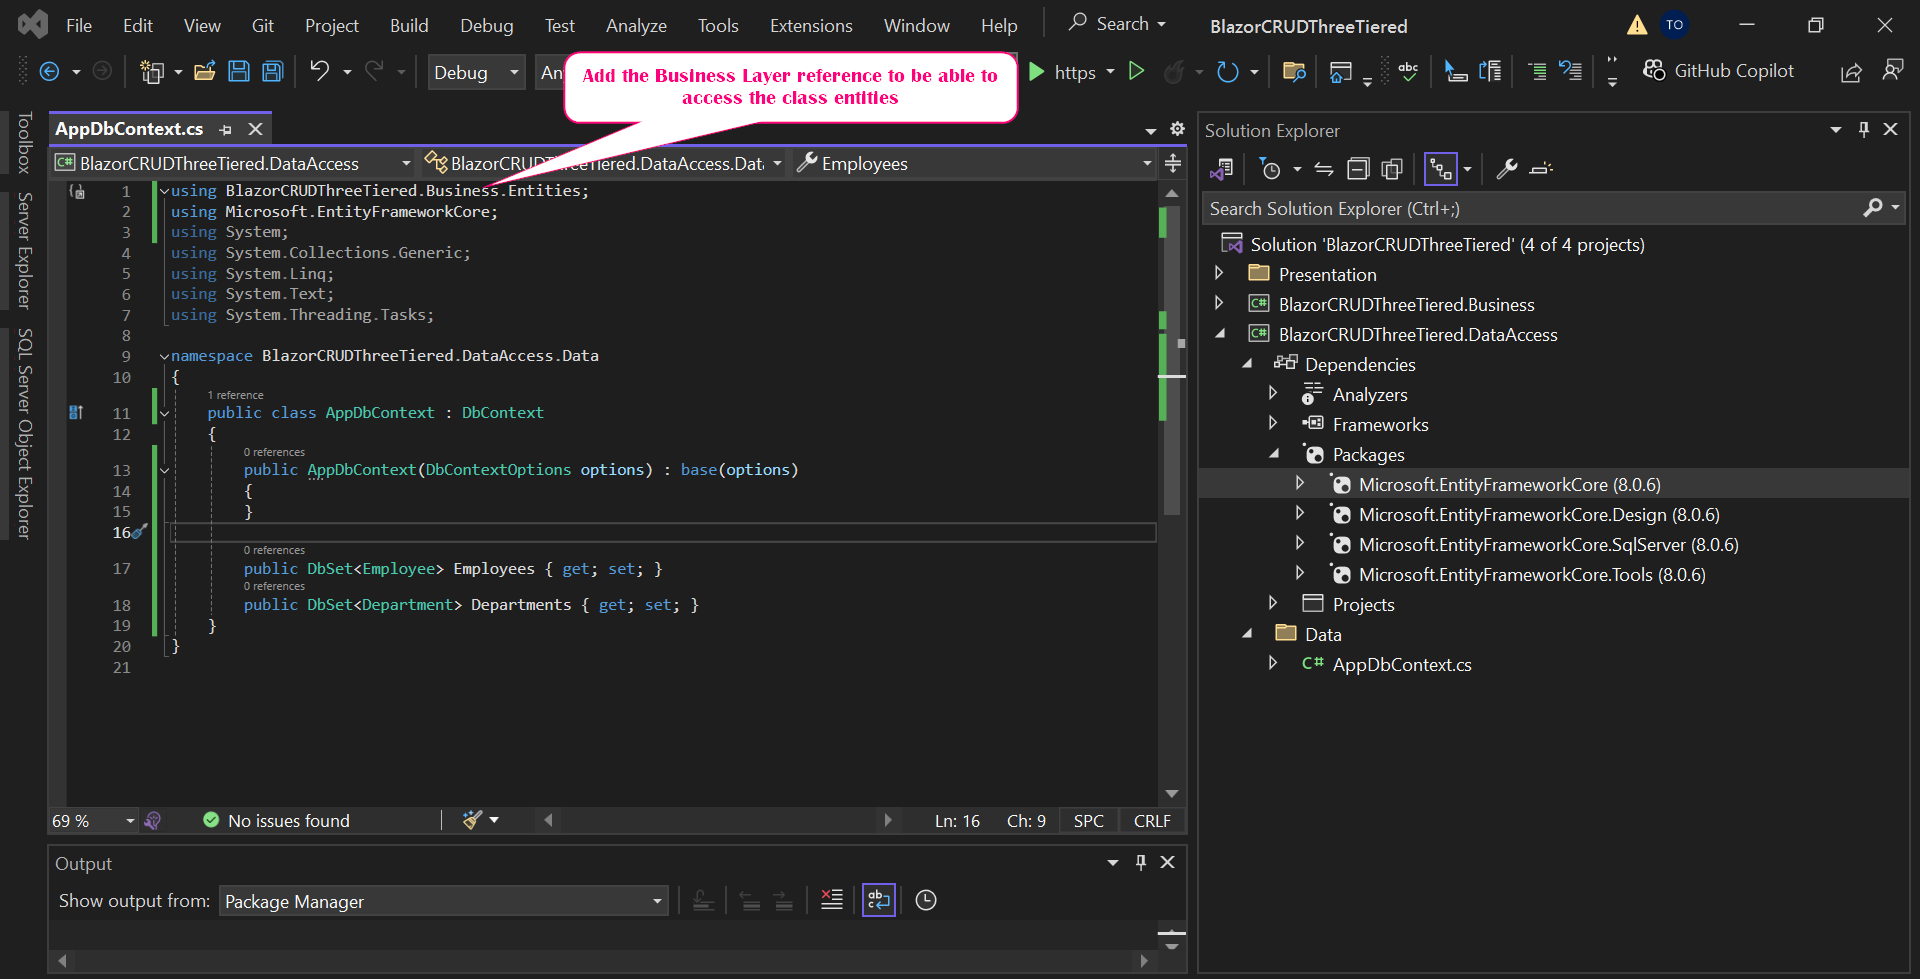
Next we move to the Data Access Layer where we first add data folder where we first add AppDbContext to help with connection to the database.
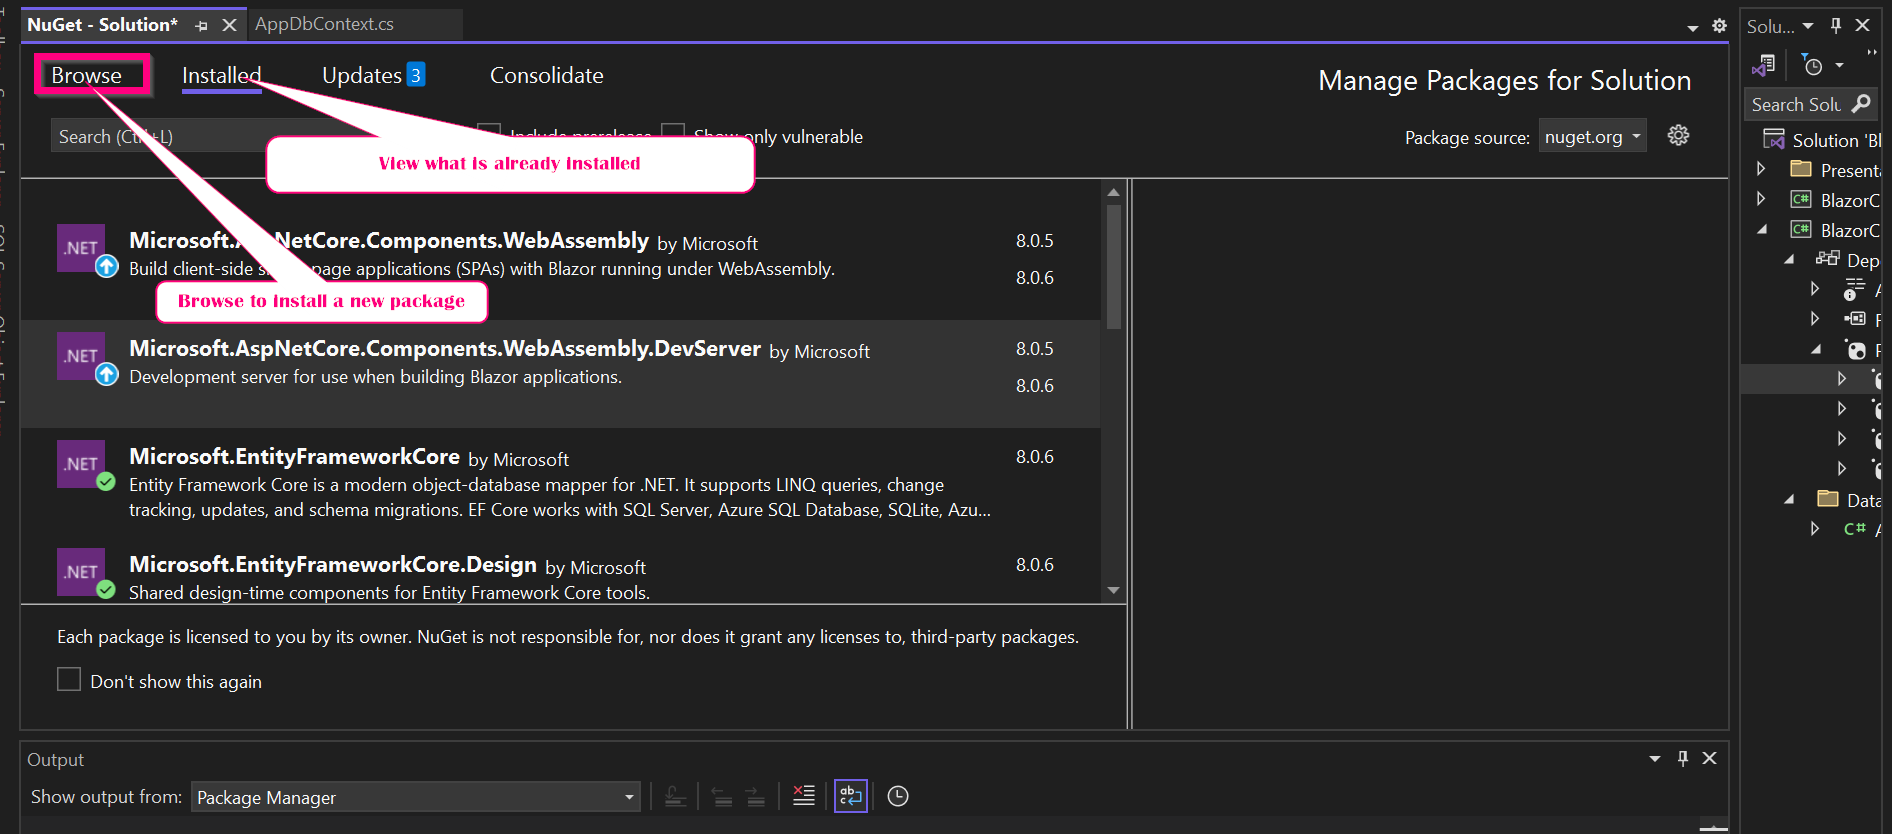
To help save time we can install the dependencies below from NuGet Gallery so as not to worry on their use when adding the dependent components. You can use the version of choice. As when writing this blog, I utilized the versions as indicated
Go to Tool>Nuget Package Manager> Manage Nuget package for Solution
- Microsoft.EntityFrameworkCore – Version 8.0.6
- Microsoft.EntityFrameworkCore.Design– Version 8.0.6
- Microsoft.EntityFrameworkCore.SqlServer– Version 8.0.6
- Microsoft.EntityFrameworkCore.Tools– Version 8.0.6
- Add also the dependency below on the BlazorCRUDThreeTiered.WEBAPI project
-
- Microsoft.EntityFrameworkCore.Design– Version 8.0.6
-
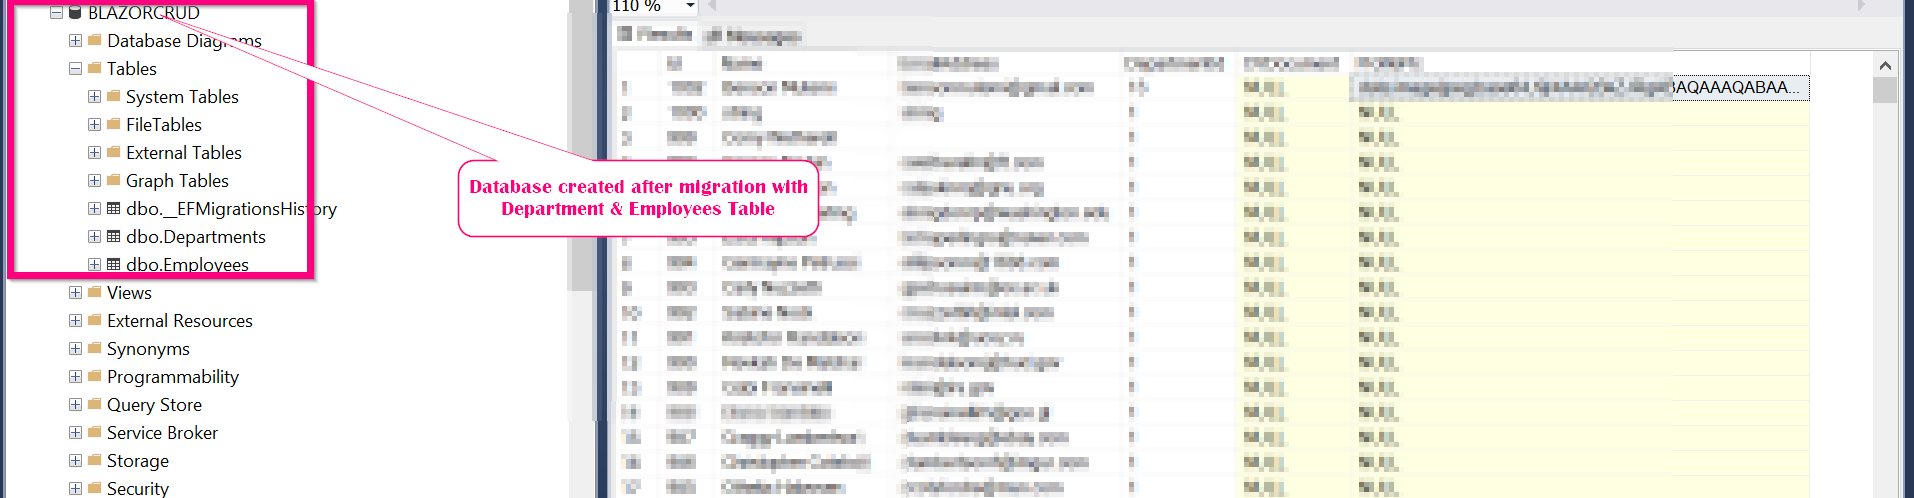
As for the next step we need to perform migrations to be able to create out database for the two entities we created Employee and Department.
For this to be possible we need to have the below procedure:
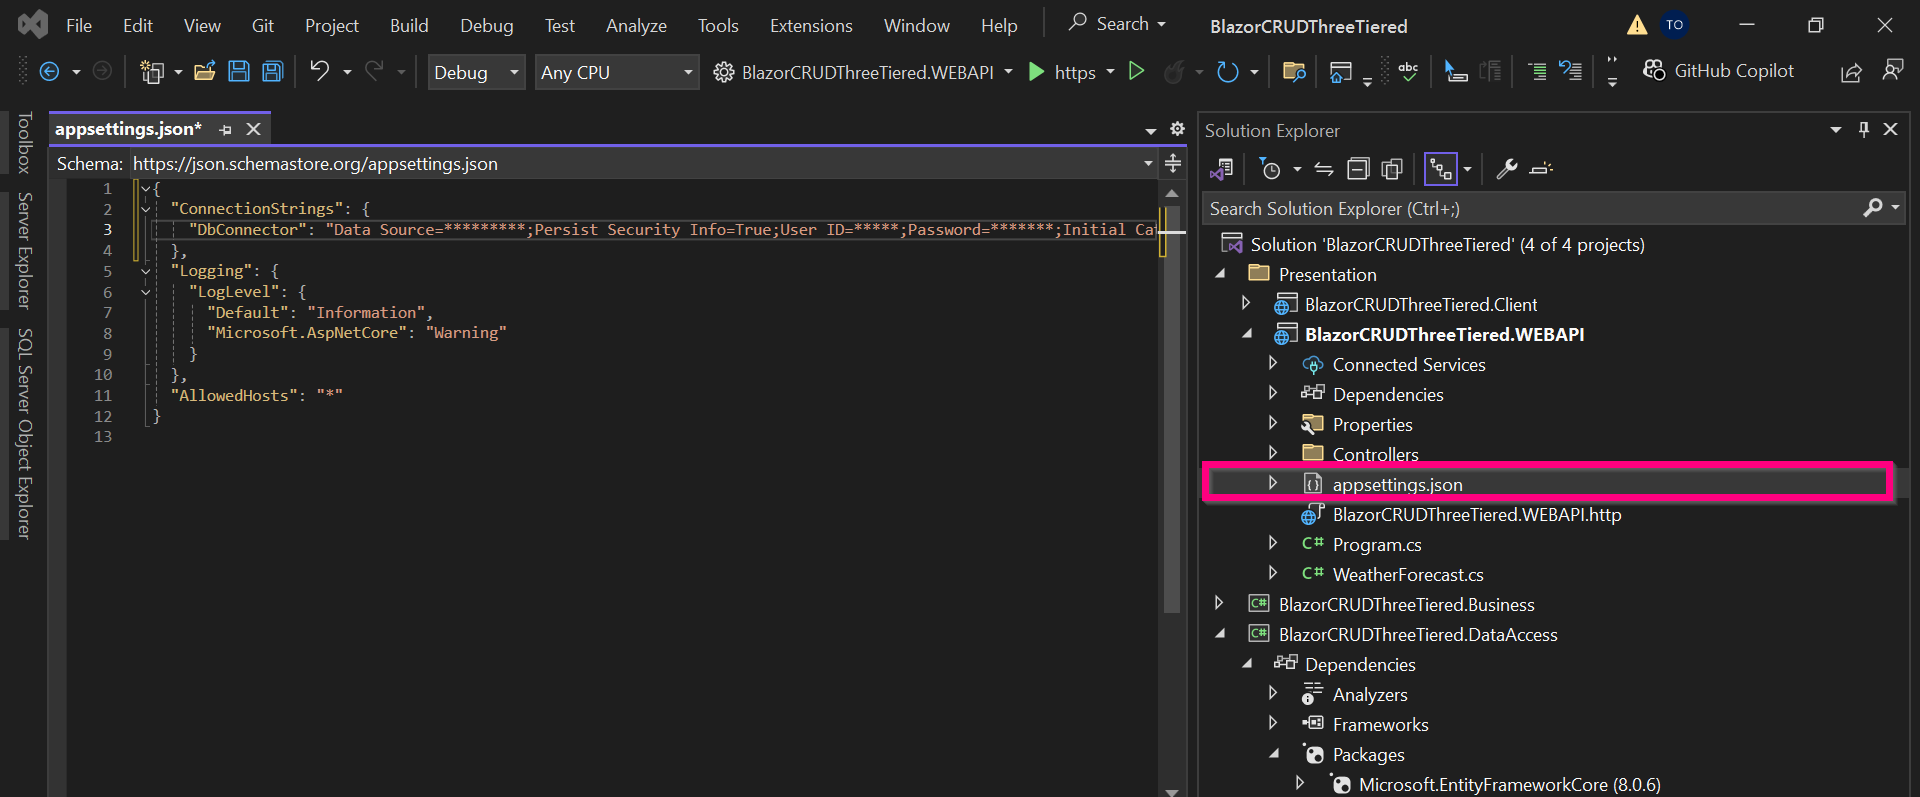
Add a connection string to the WEBAPI of the location the database will be created. This should be added to the appsettings.json file as below:
/* Your code... */"ConnectionStrings": { "DbConnector": "Data Source=XXXXXXXXXXXX;Persist Security Info=True;User ID=XXXXX;Password=XXXXXXXXXXXX;Initial Catalog=XXXXXXXX; TrustServerCertificate=True;Encrypt=false" },
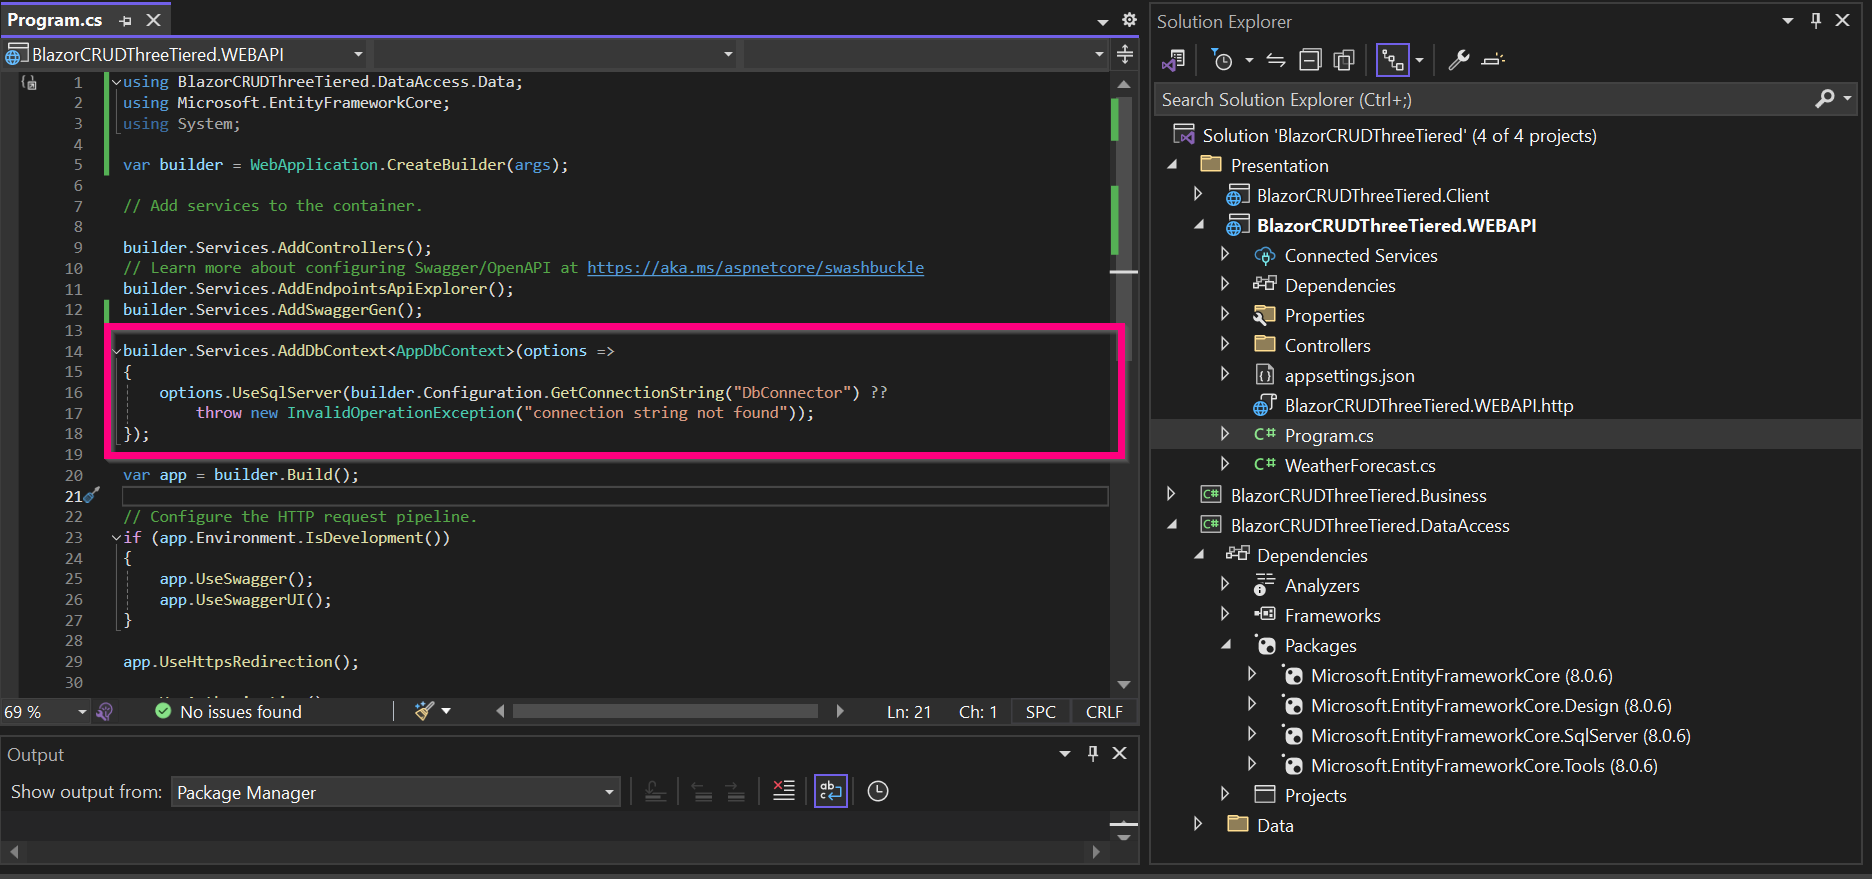
Add the AppDBContext to the Program.cs class as indicated to be accessible in the application – as below:
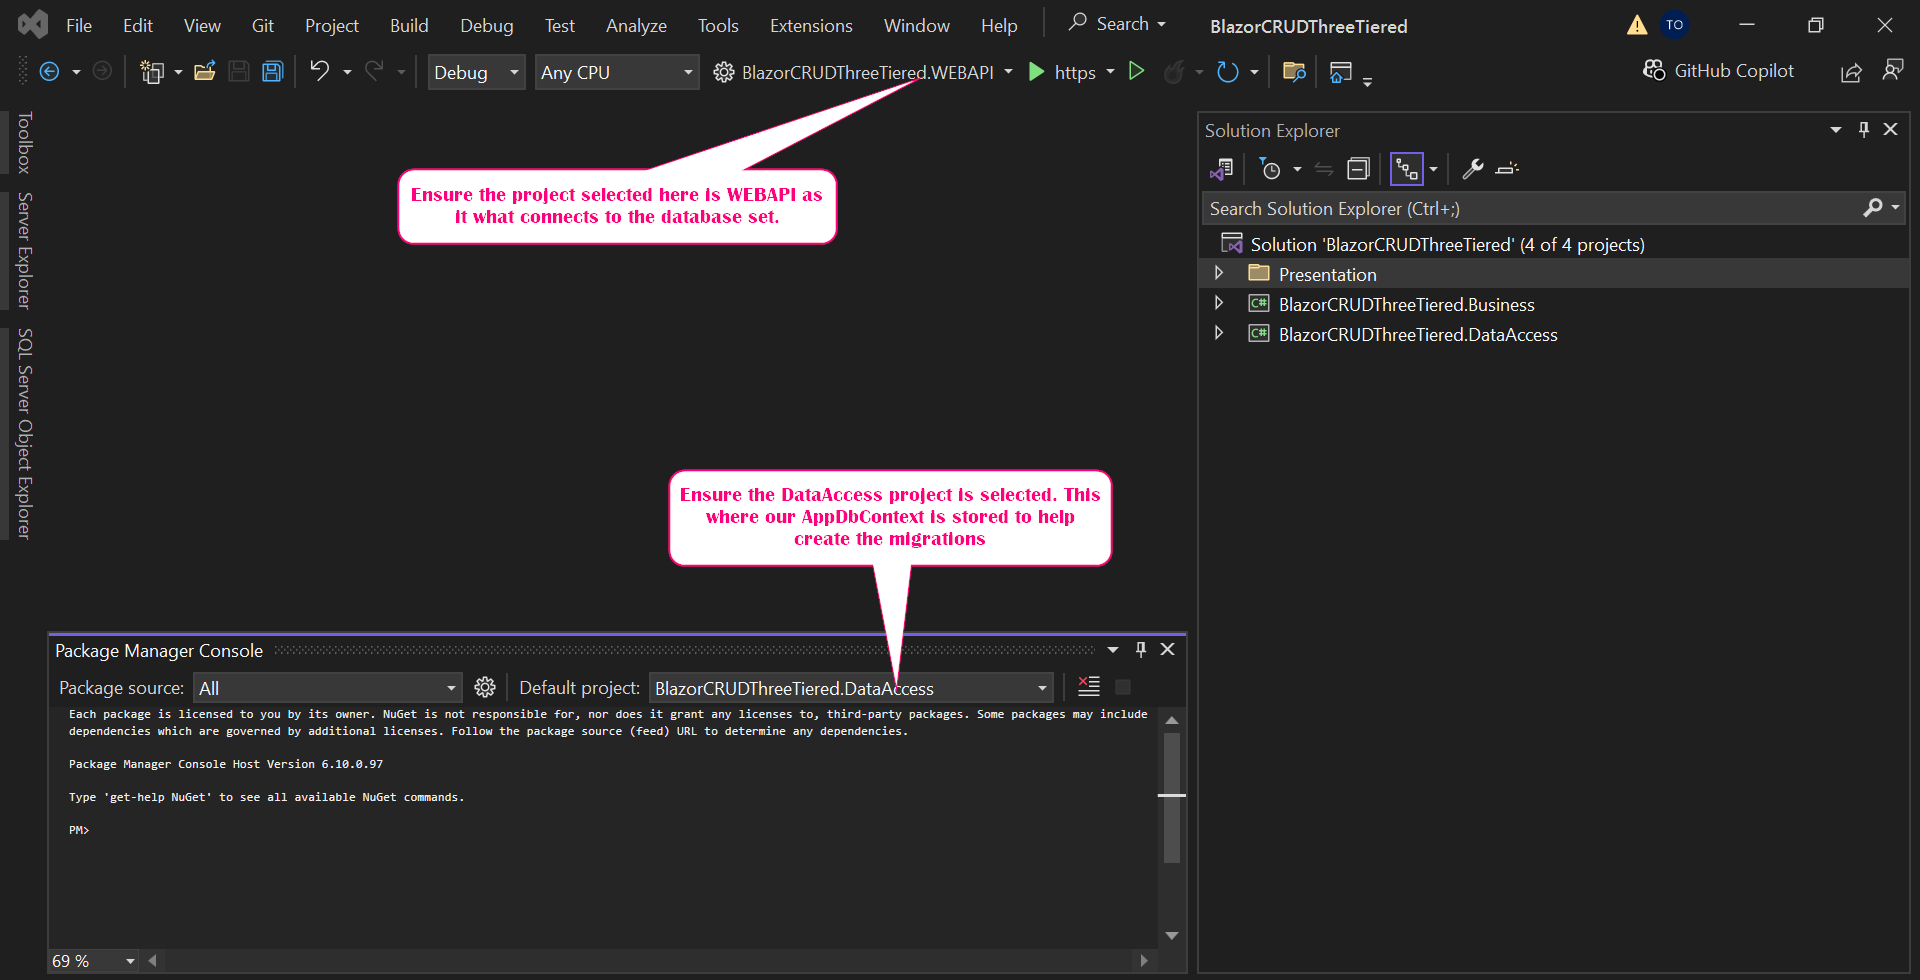
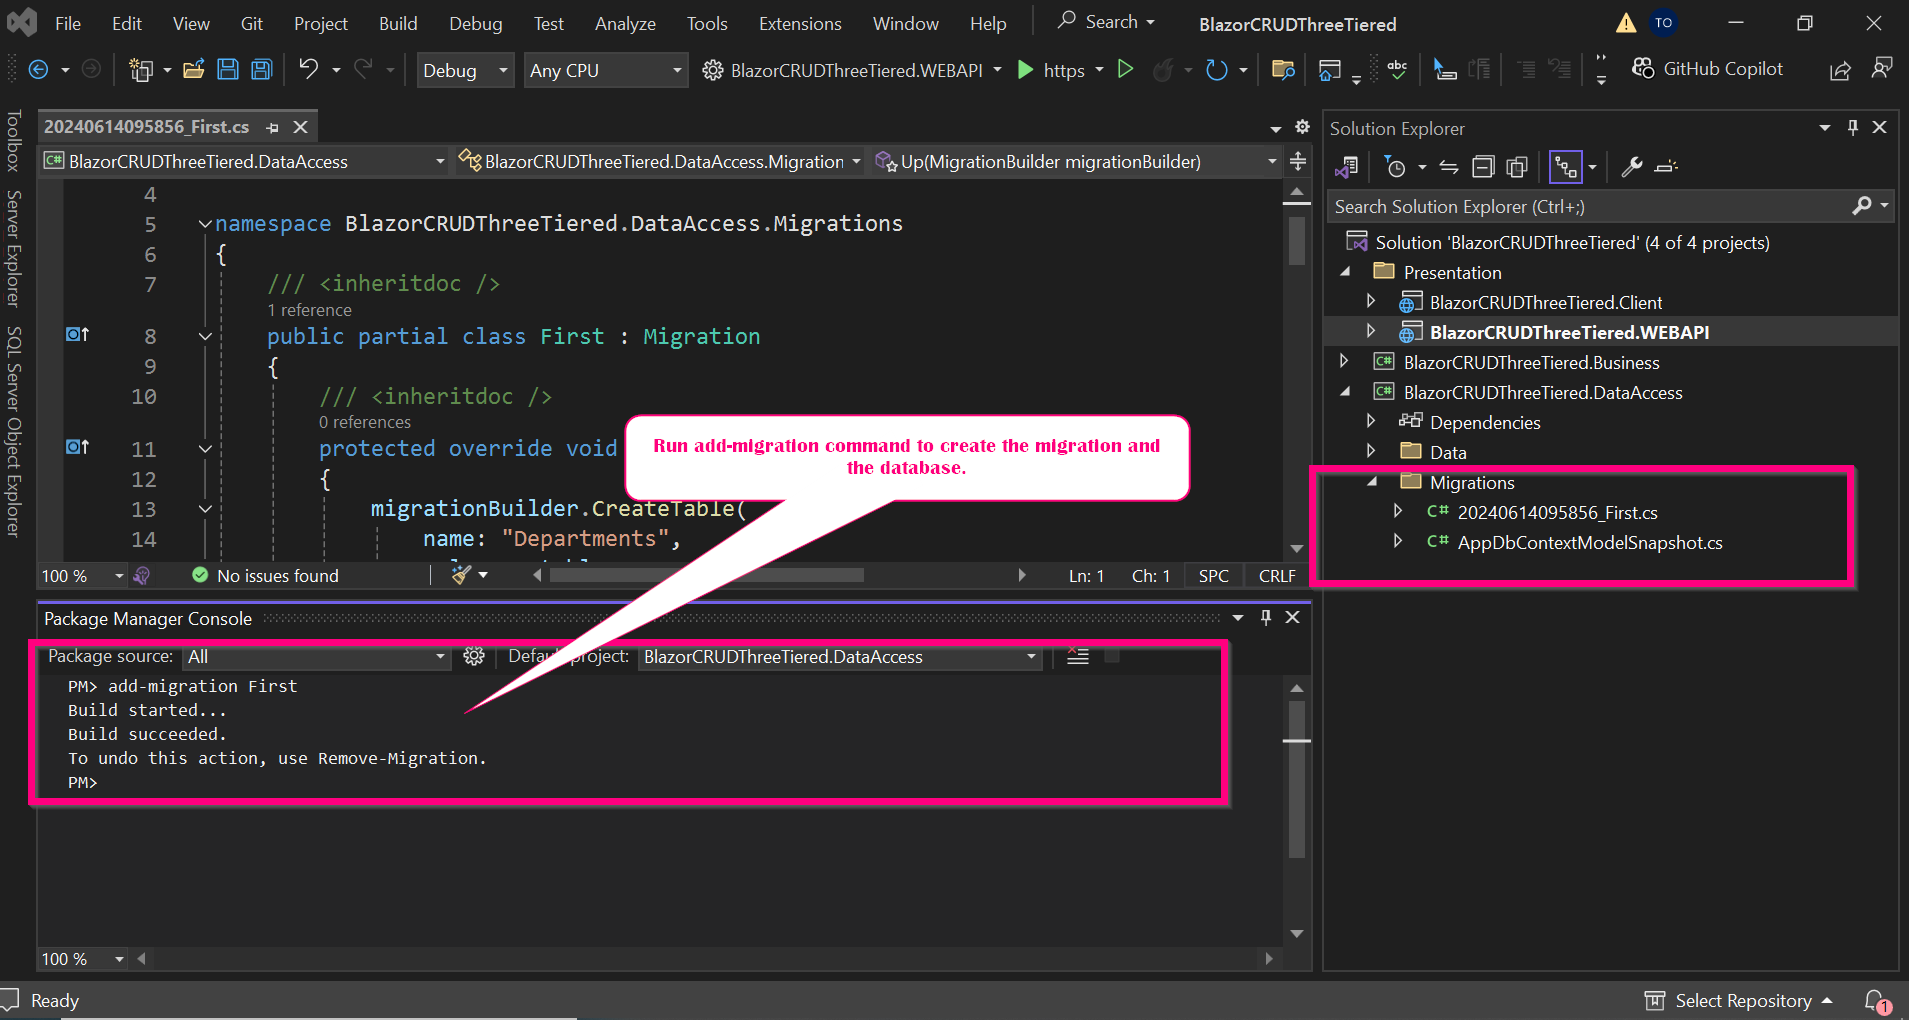
With this step up we can run our migrations to get the database created as below.
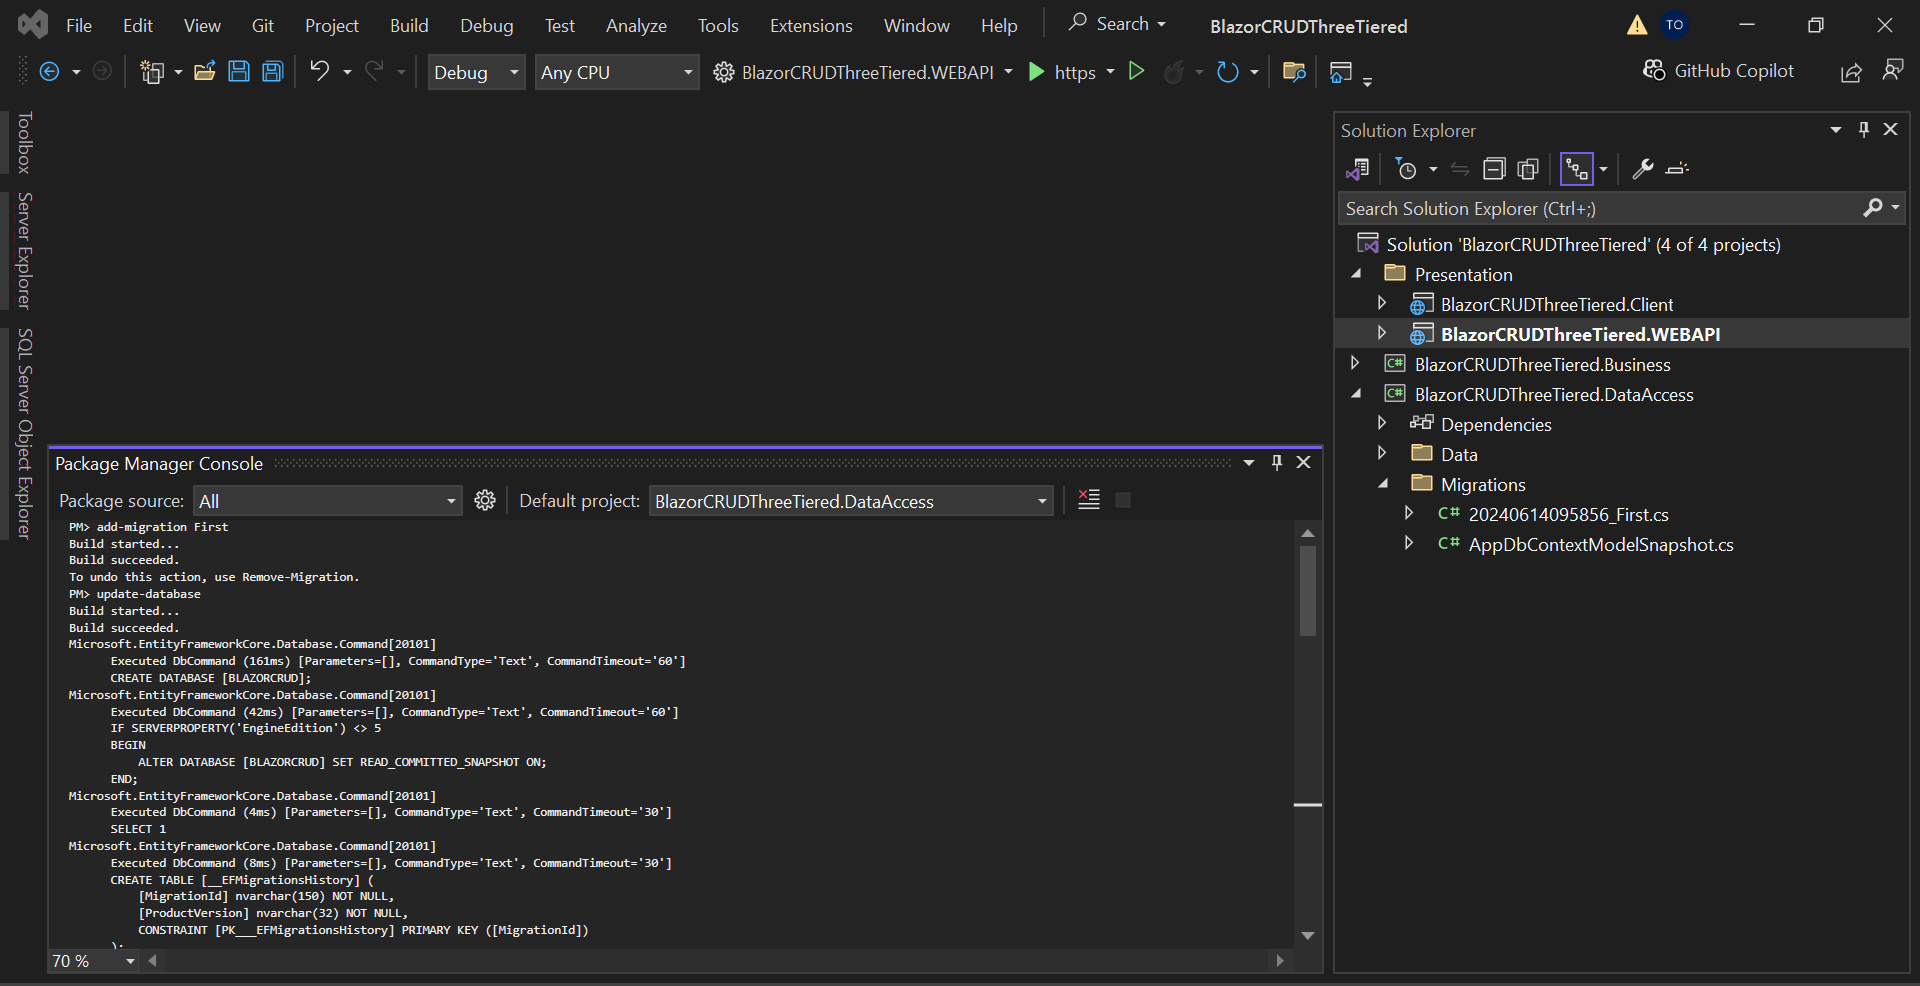
Open the package manager console from Tools> Nuget Package Manager>Package Manager Console
-
- Ensure the projects are selected as indicated to avoid getting errors:
Run the below commands to create migrations for the project
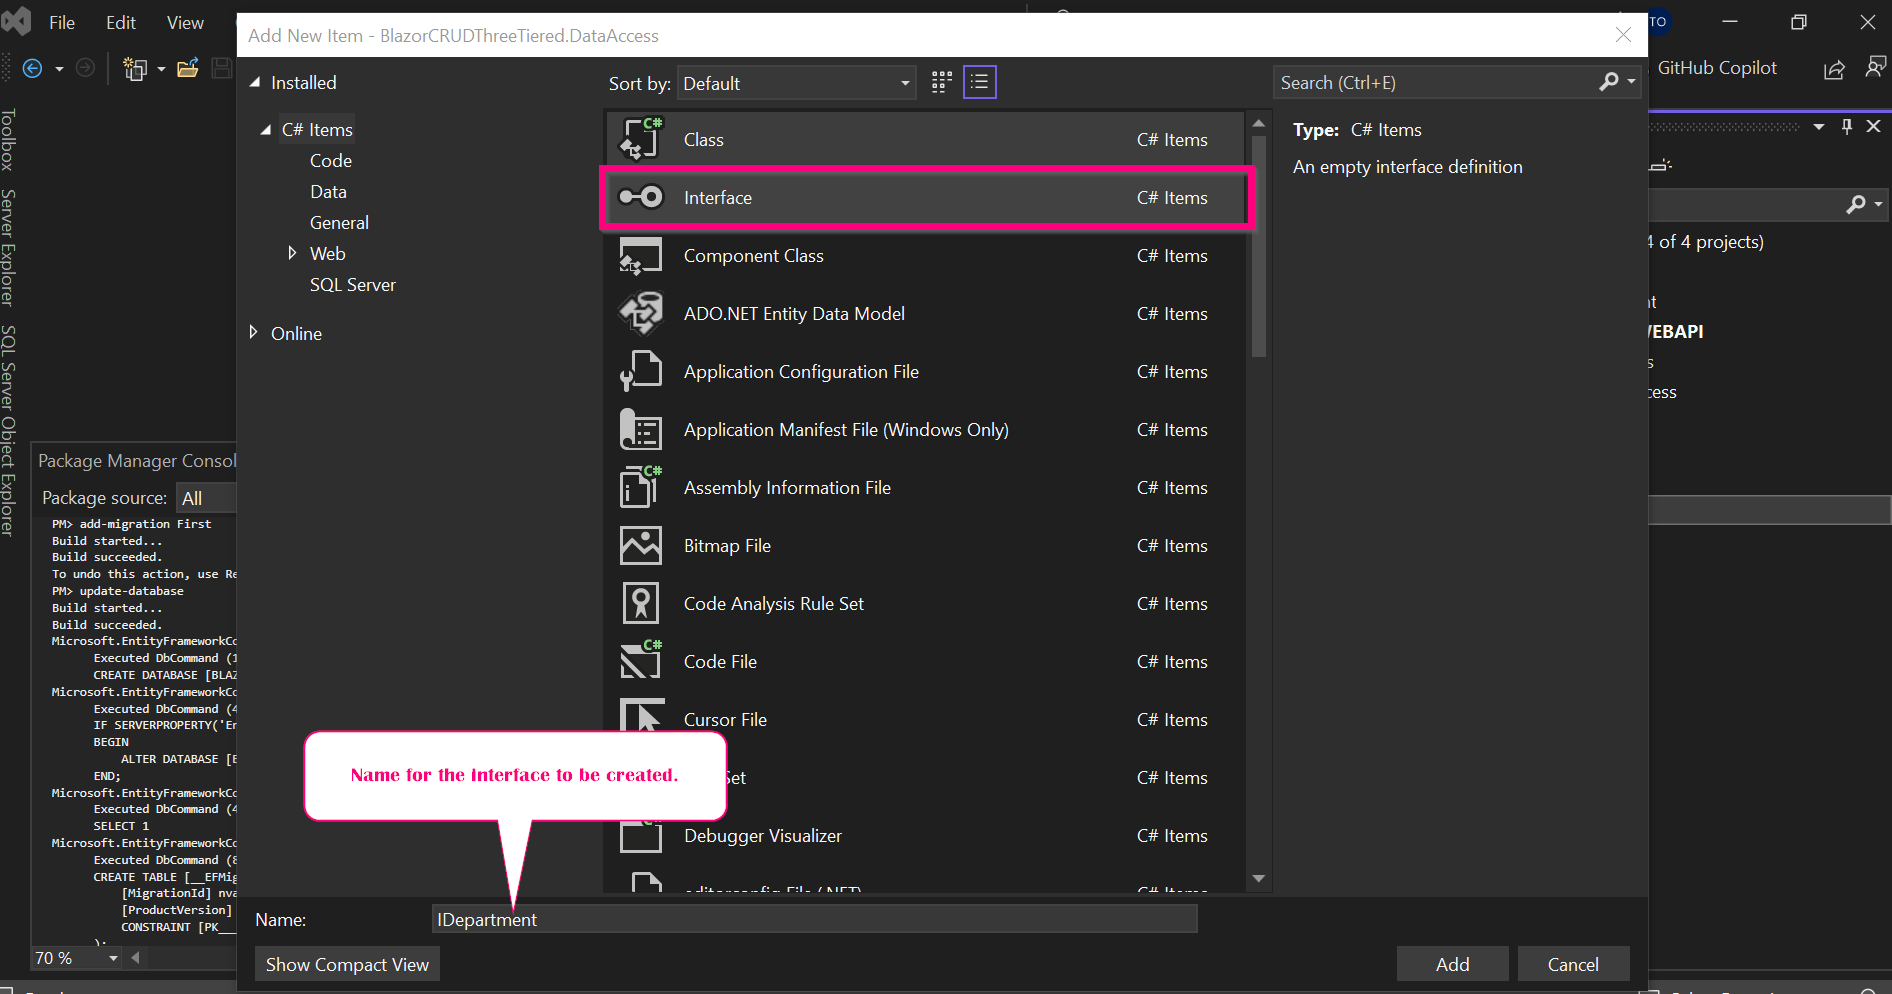
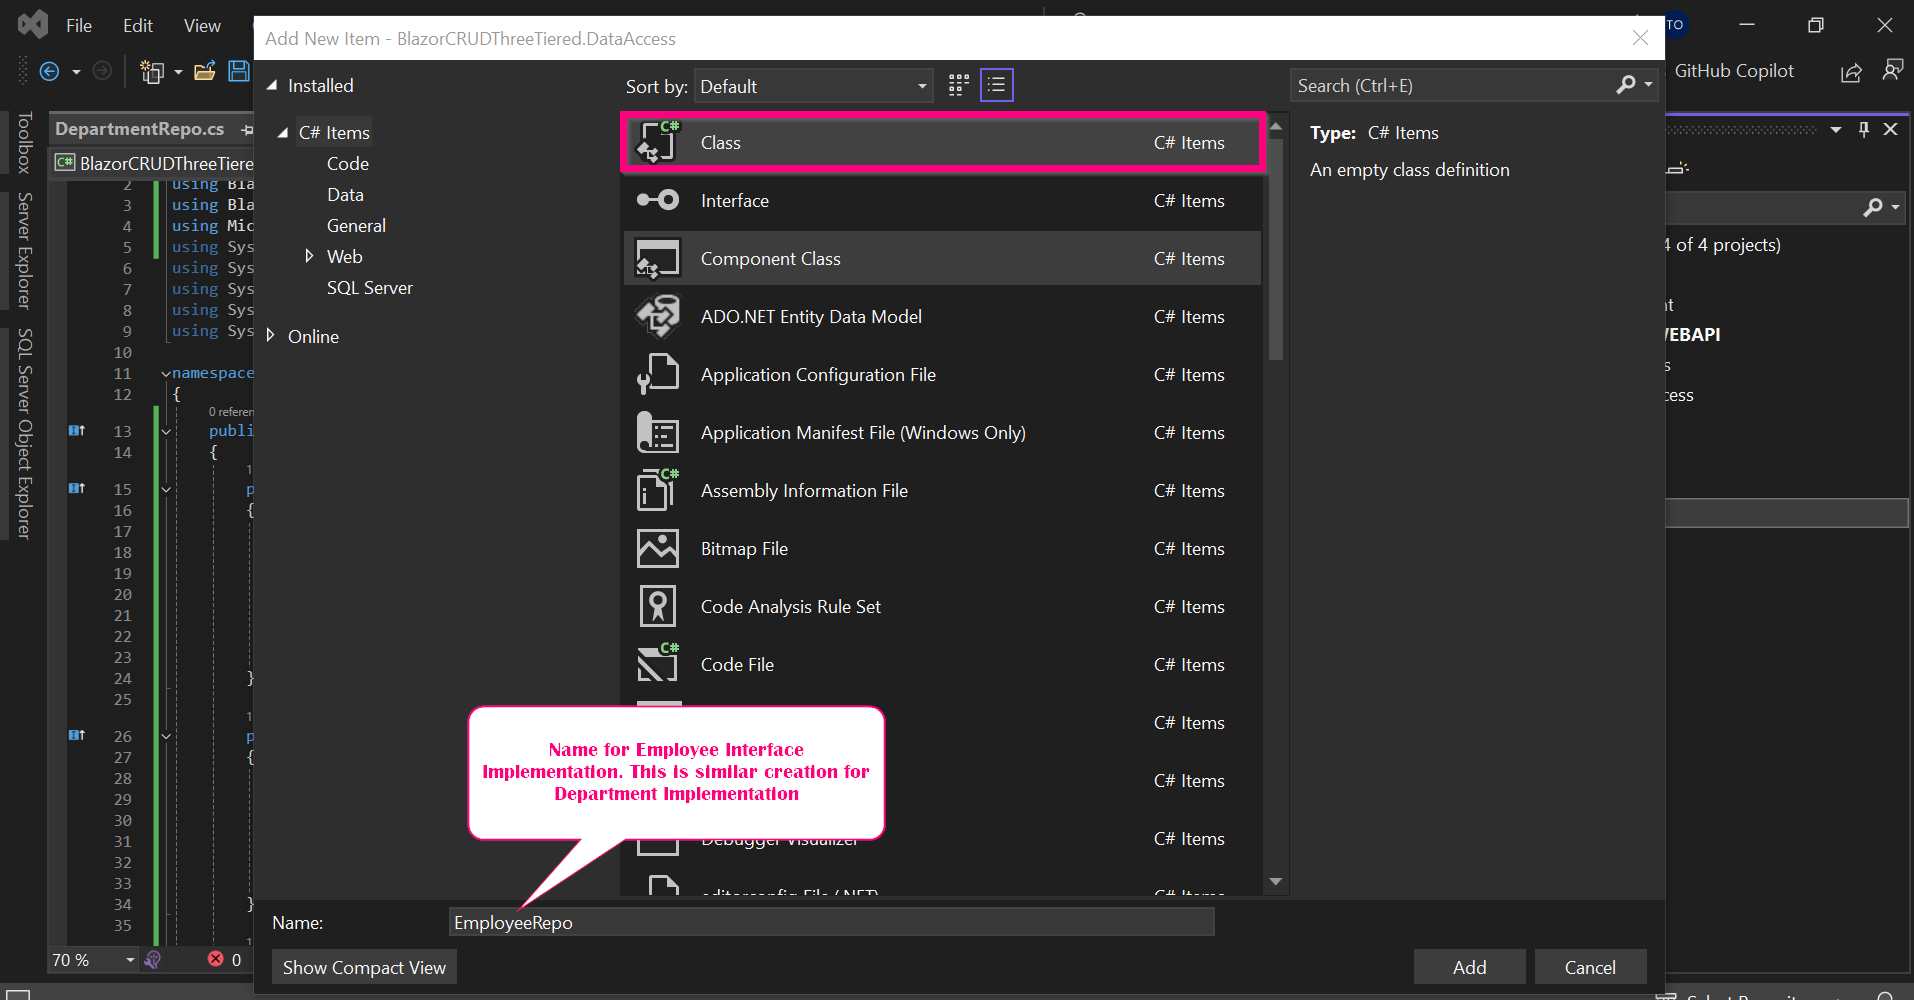
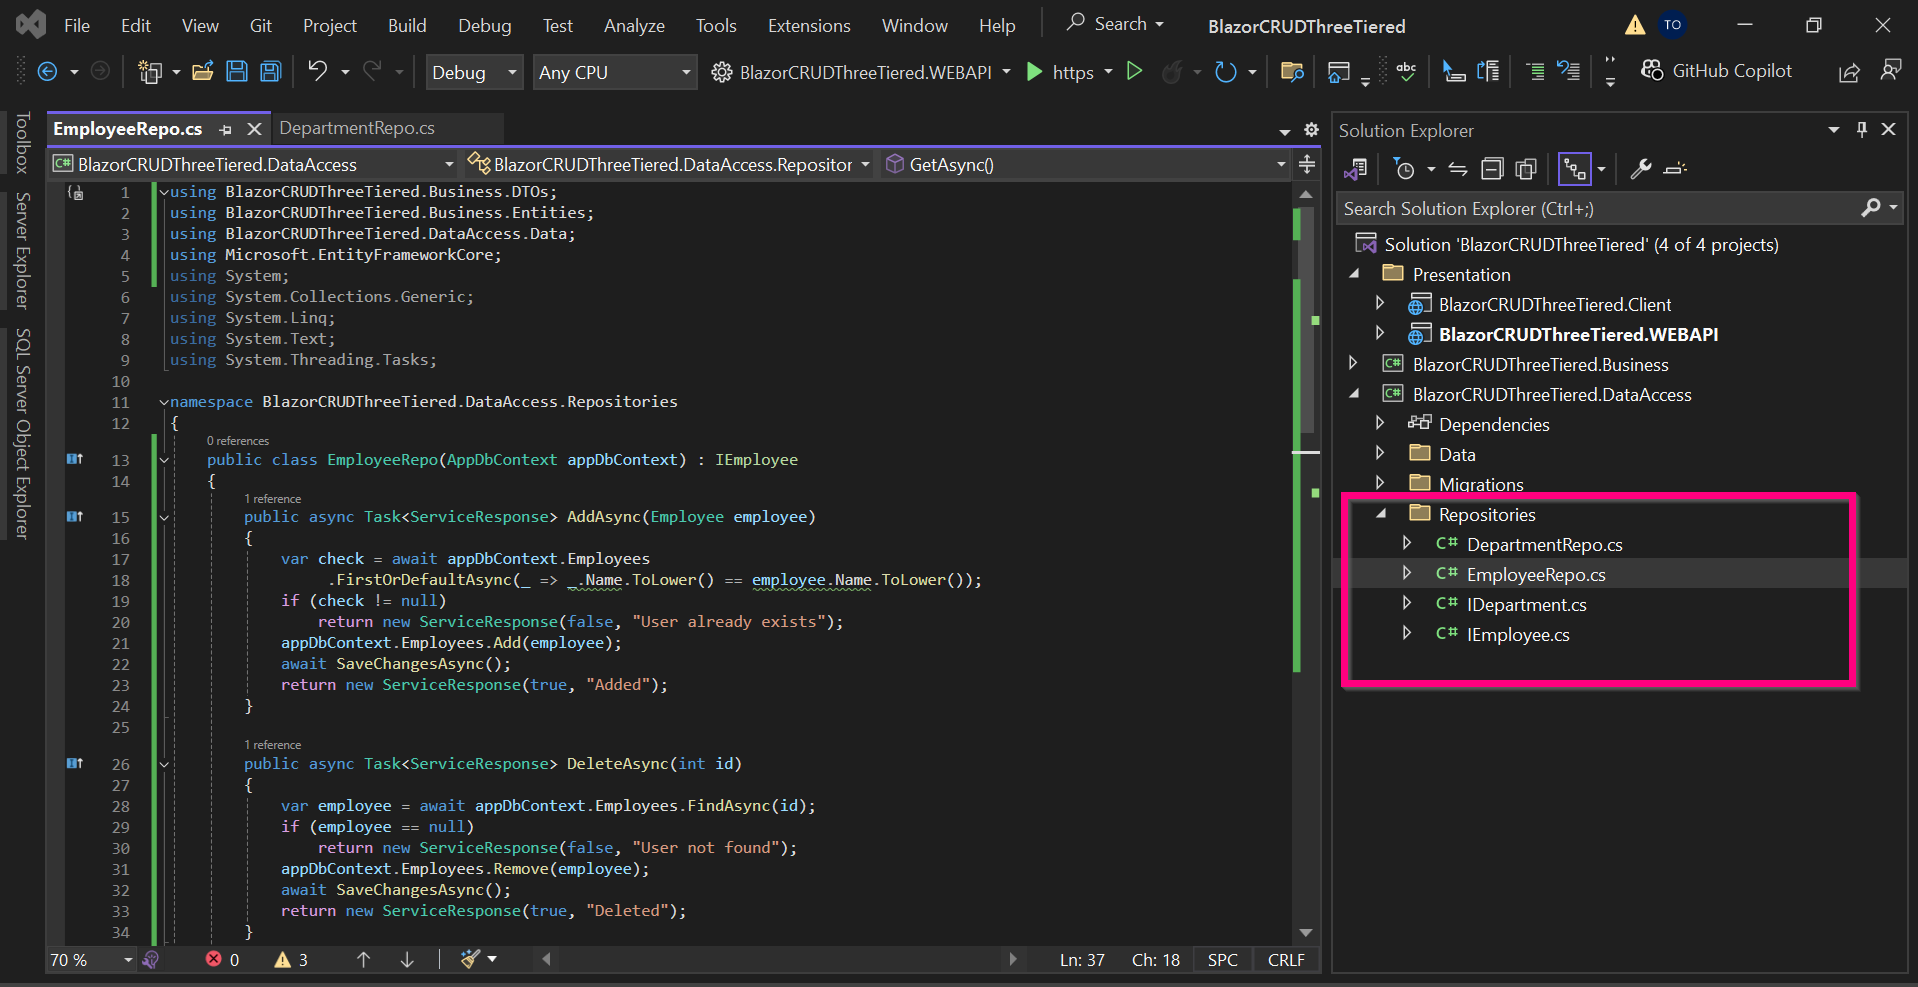
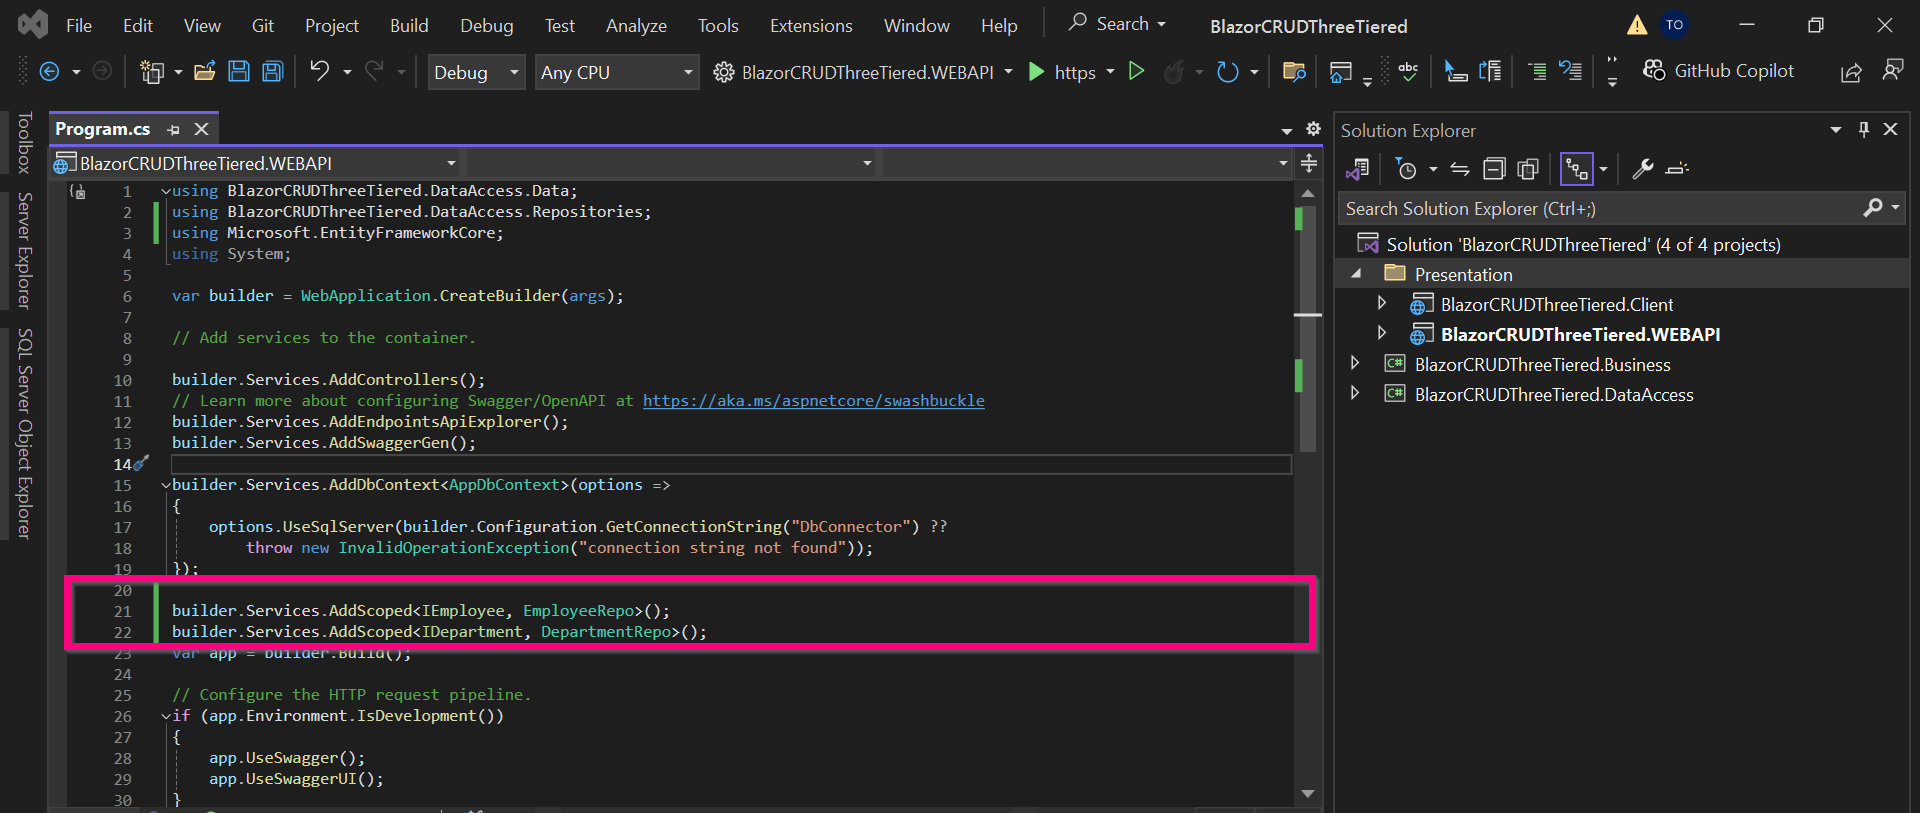
Create a new folder in the Data Access Layer called Repositories and add Interface and implementation and Department and Employee respectively.
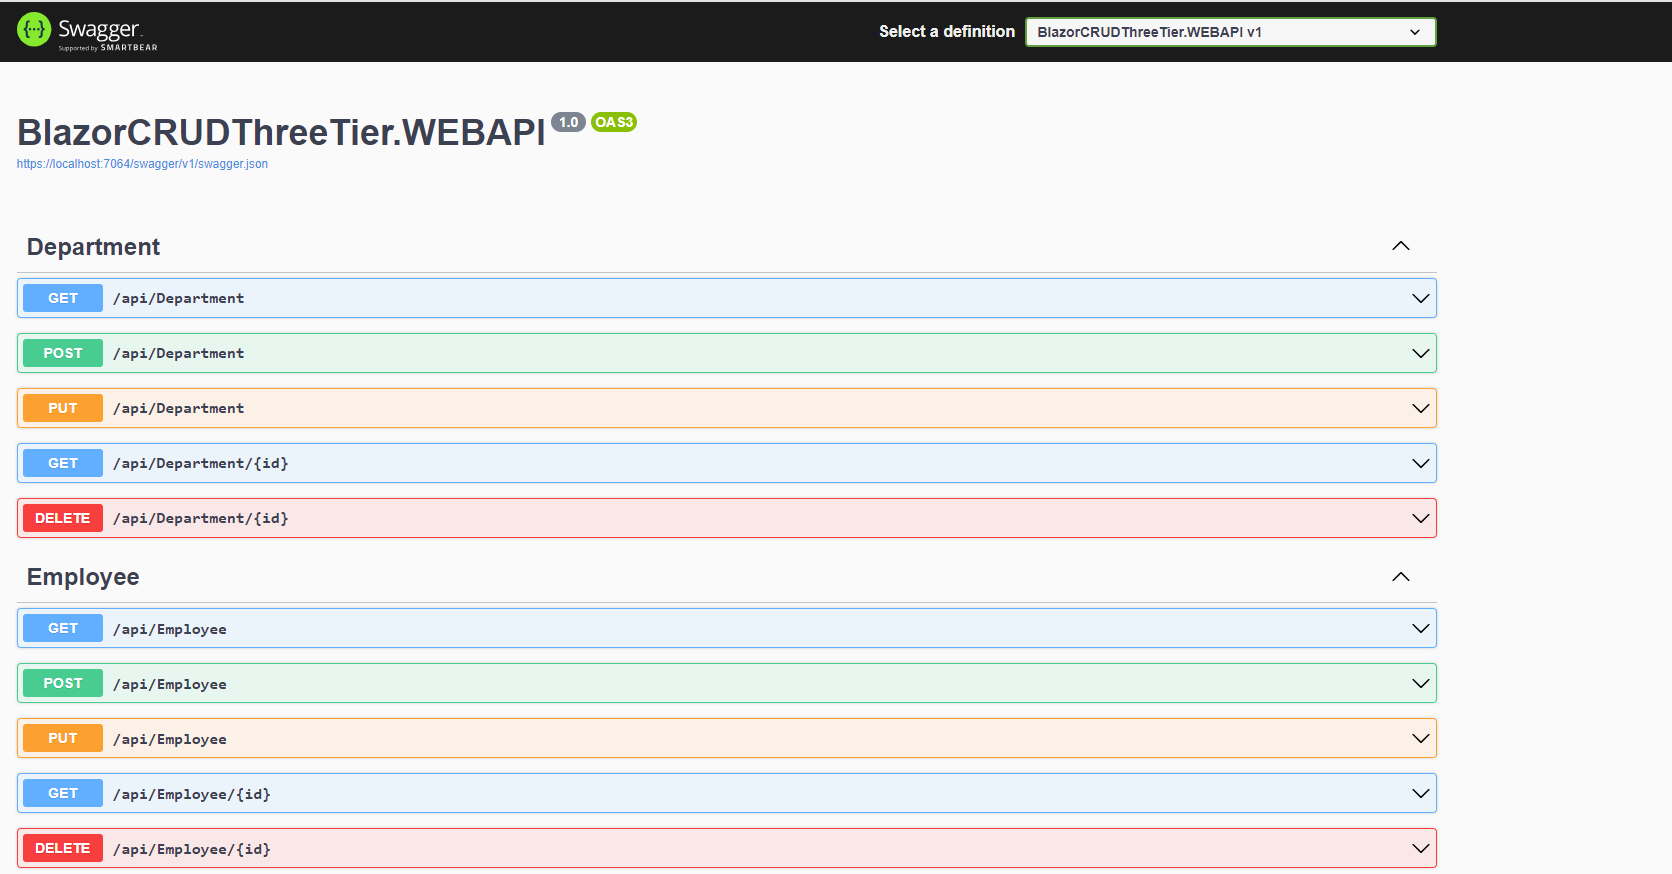
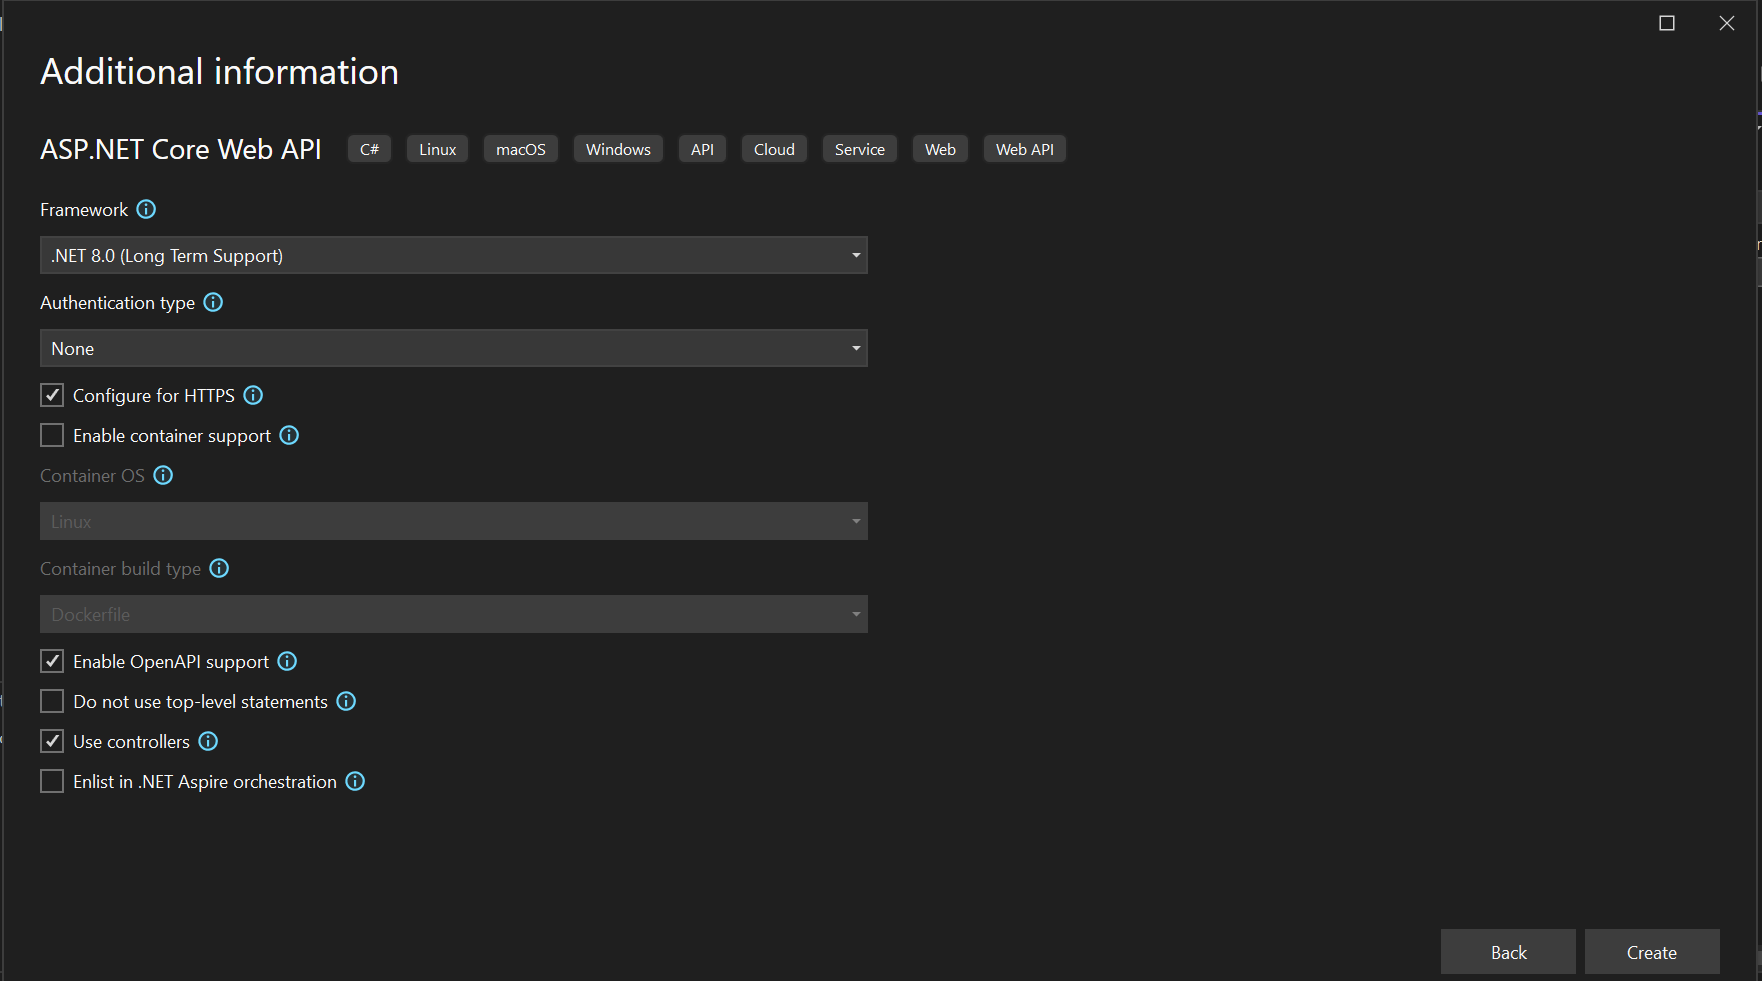
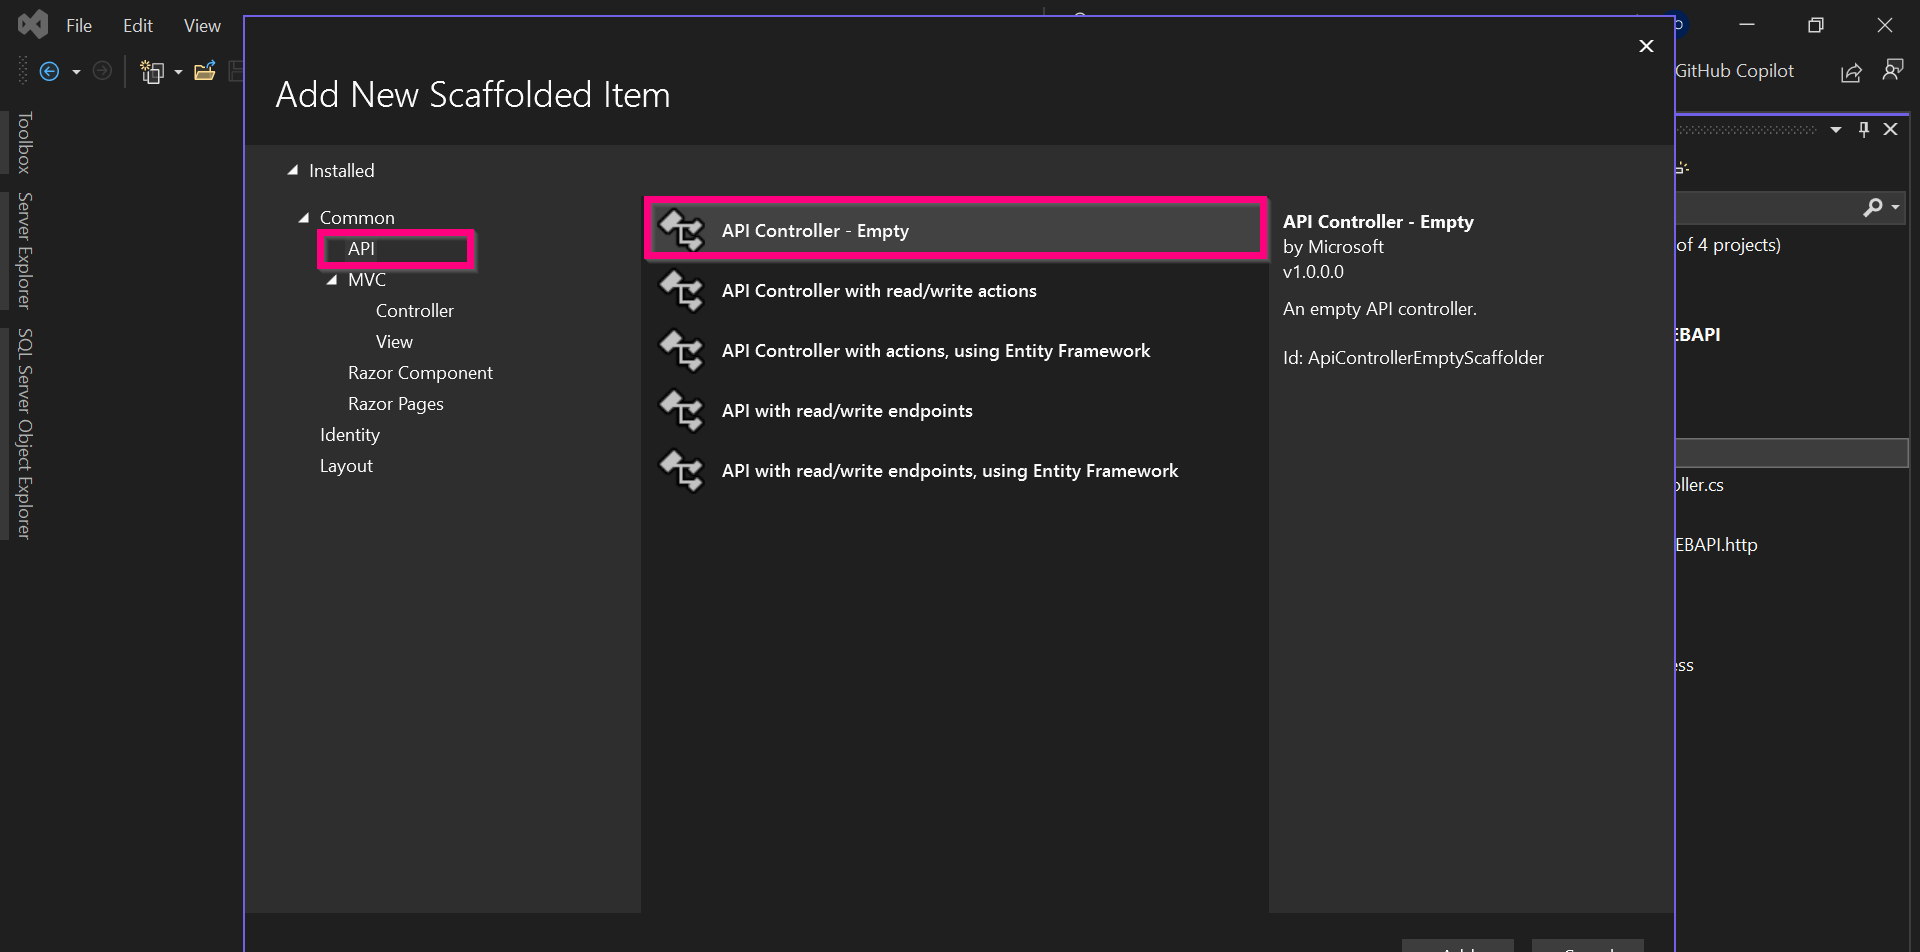
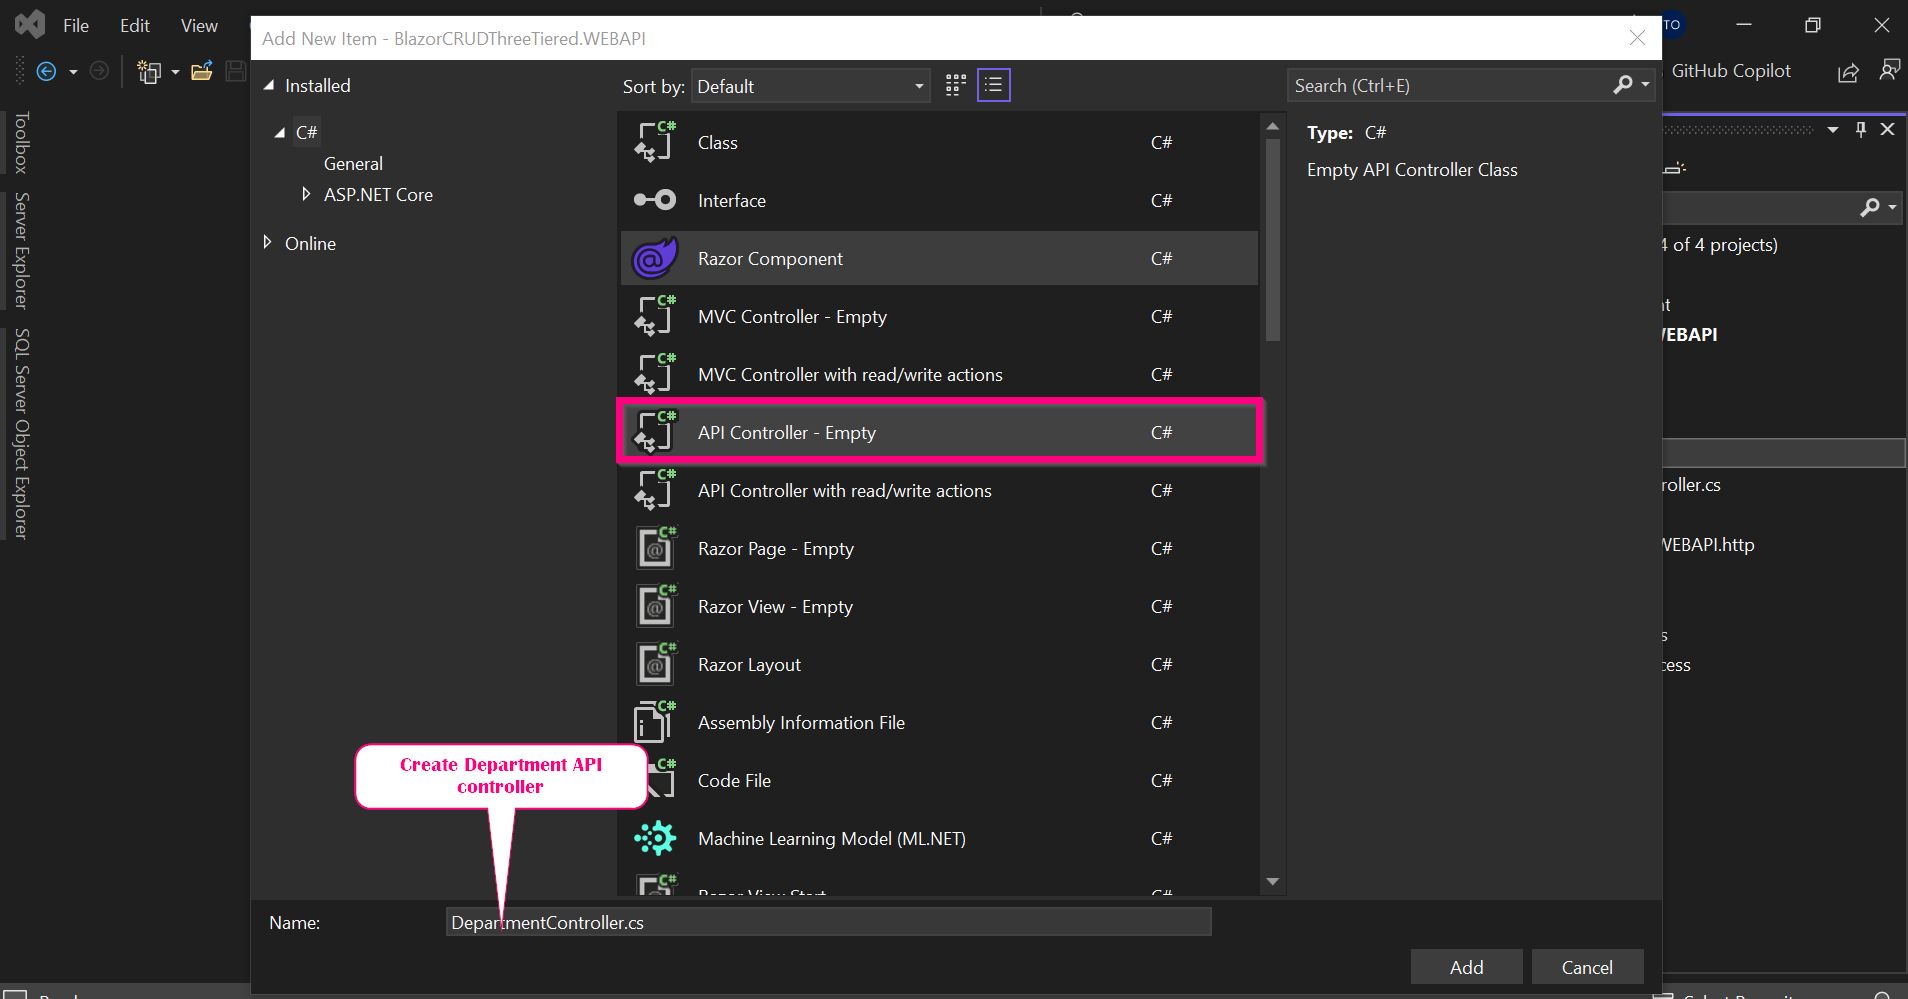
The next step is to create controller API for both Department and Employee in the WEBAPI project as below:
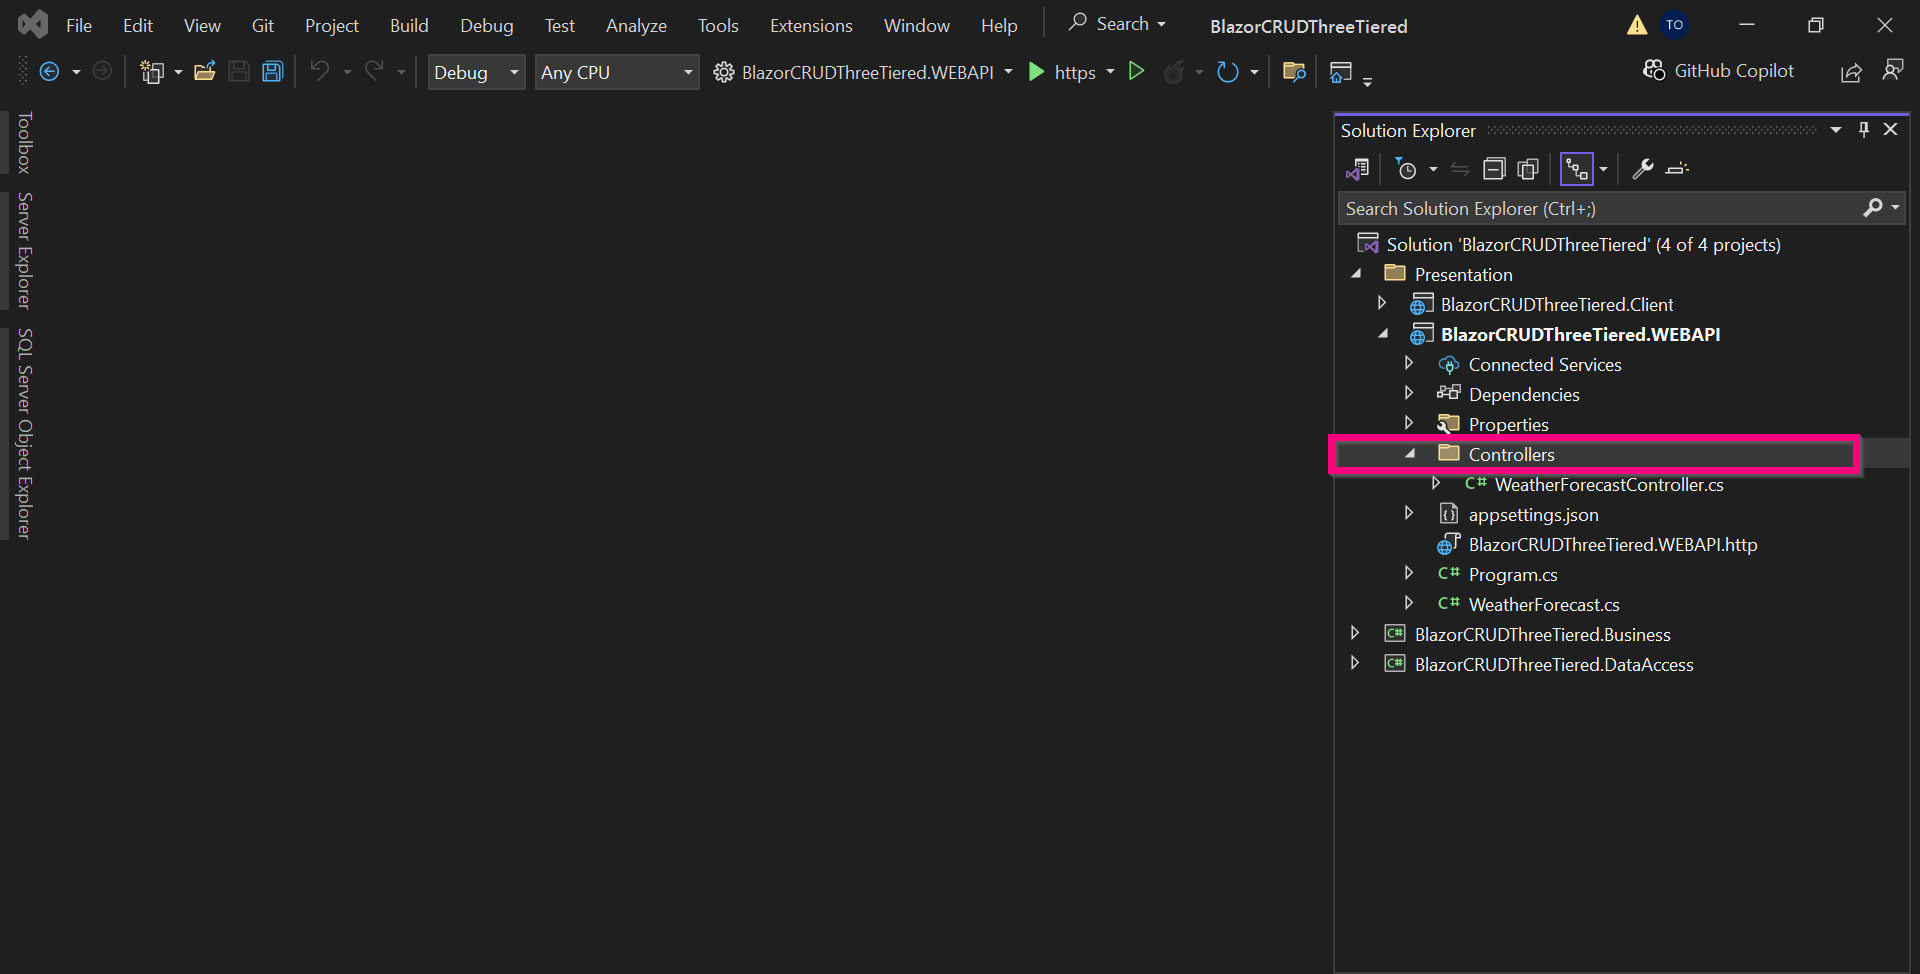
The final folder of the controller should in the project BlazorCRUDThreeTiered.WEBAPI should be as
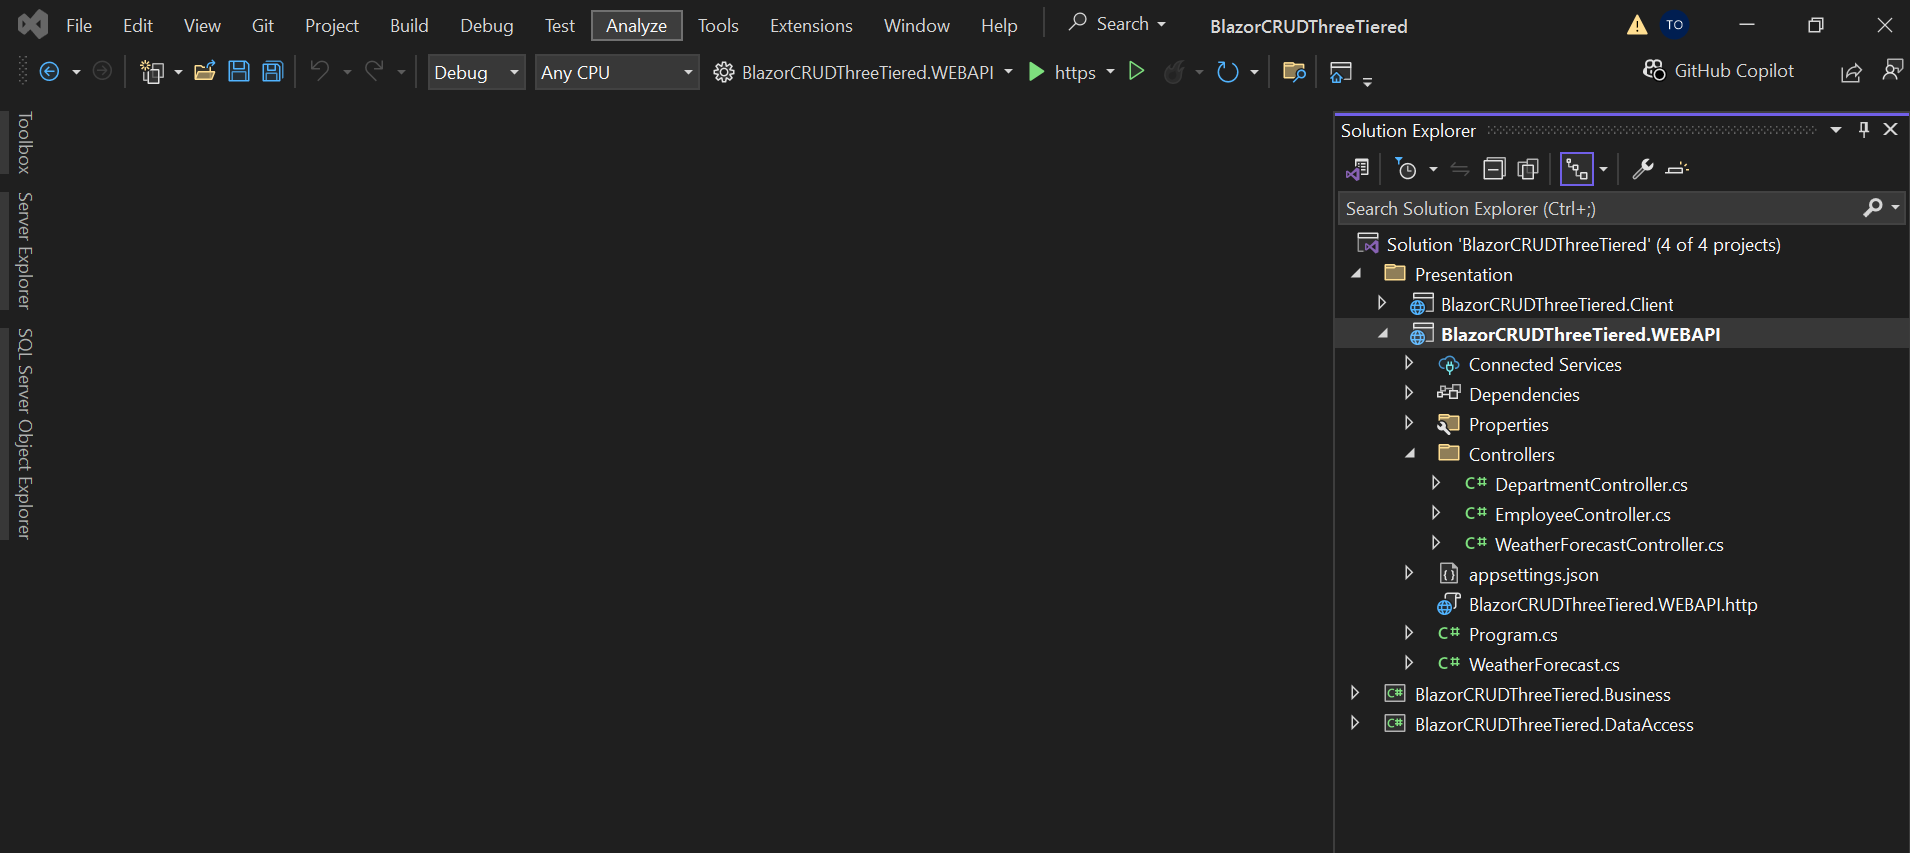
Next we need to test the WEBAPI created. Before running we have to register the interfaces created in the Data Access layer within our API as below.
We have been able to Complete the Business Logic
Have configured the Data Access Layer
Have adjusted the First part of the Presentation Layer – That is the WEBAPI
The Final part we will now deal with how to consume the API on the Blazor web Application: BlazorCRUDThreeTiered.Client
For the Blazor user interface, will utilize the below UI component dependencies
-
- Blazor Bootstrap – This will help especially for Toast Notifications
- Radzen Blazor Components – This will help with a great part of the UI including Data Grid, Modal Dialog ,Buttons etc.
- The Nuget installation is as below:
- Blazored.Toast – Version 4.2.1
- Blazor.Bootstrap– Version 2.2.0
- Radzen.Blazor– Version 4.32.3
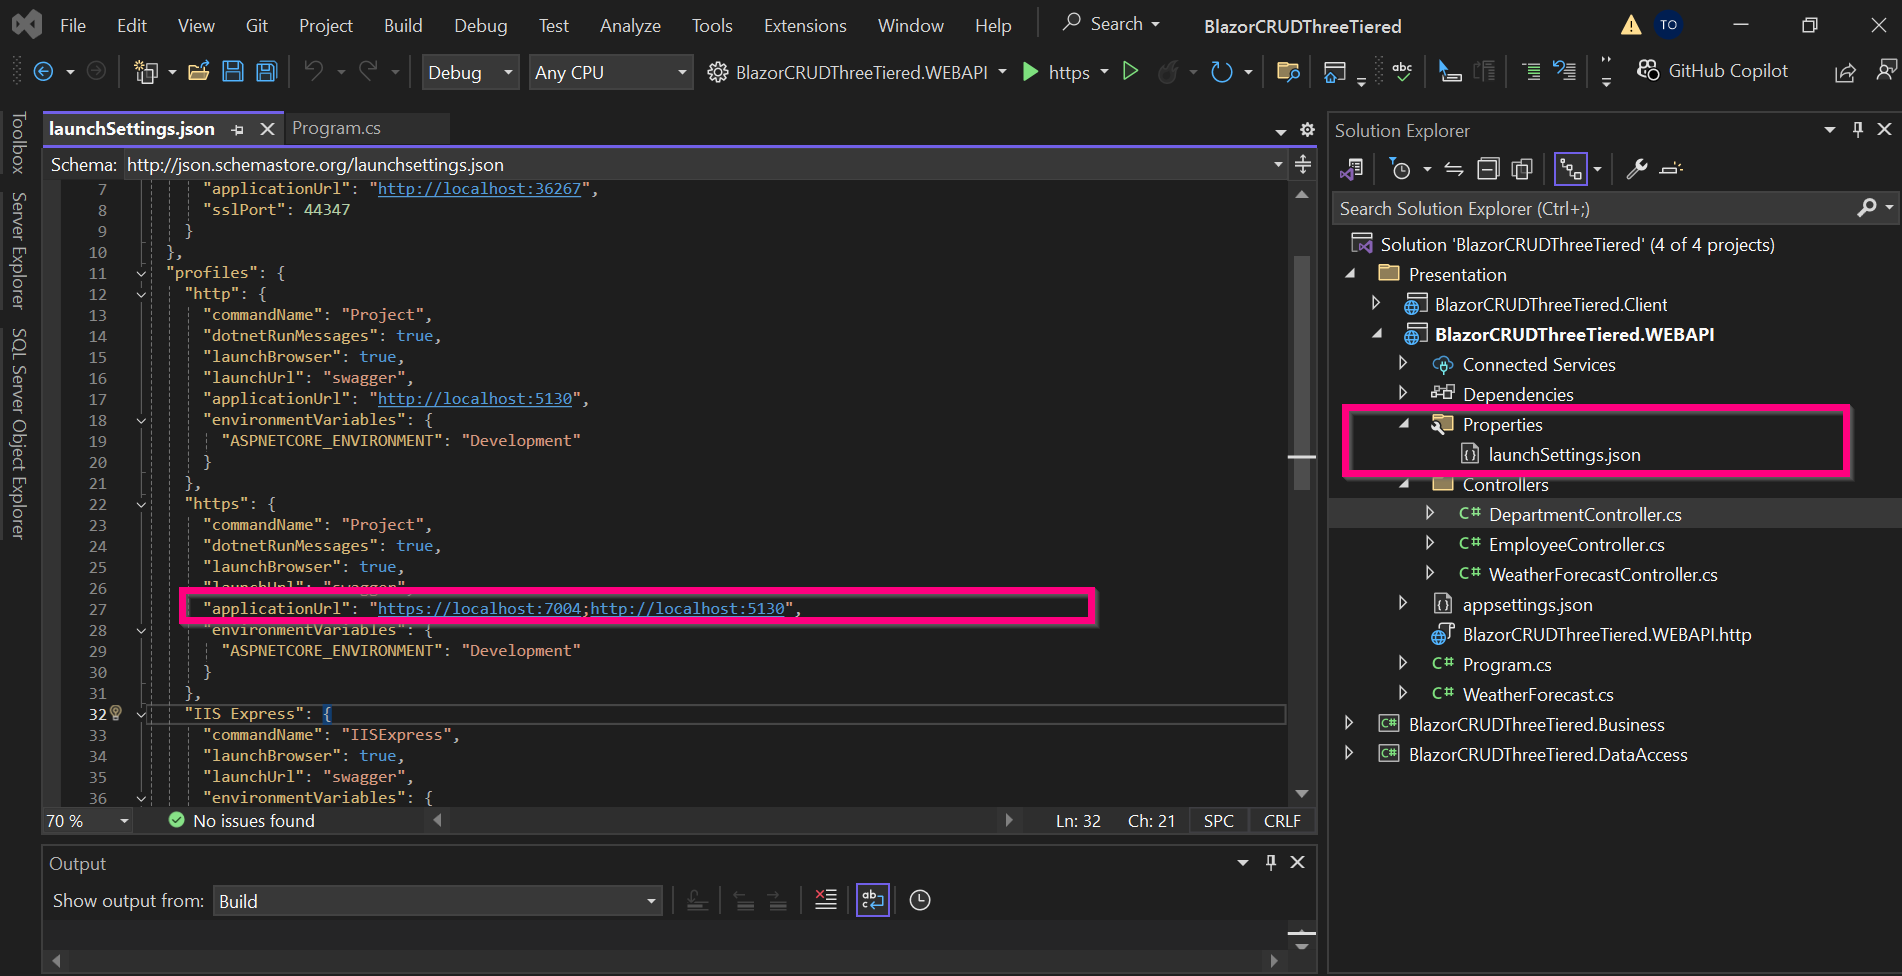
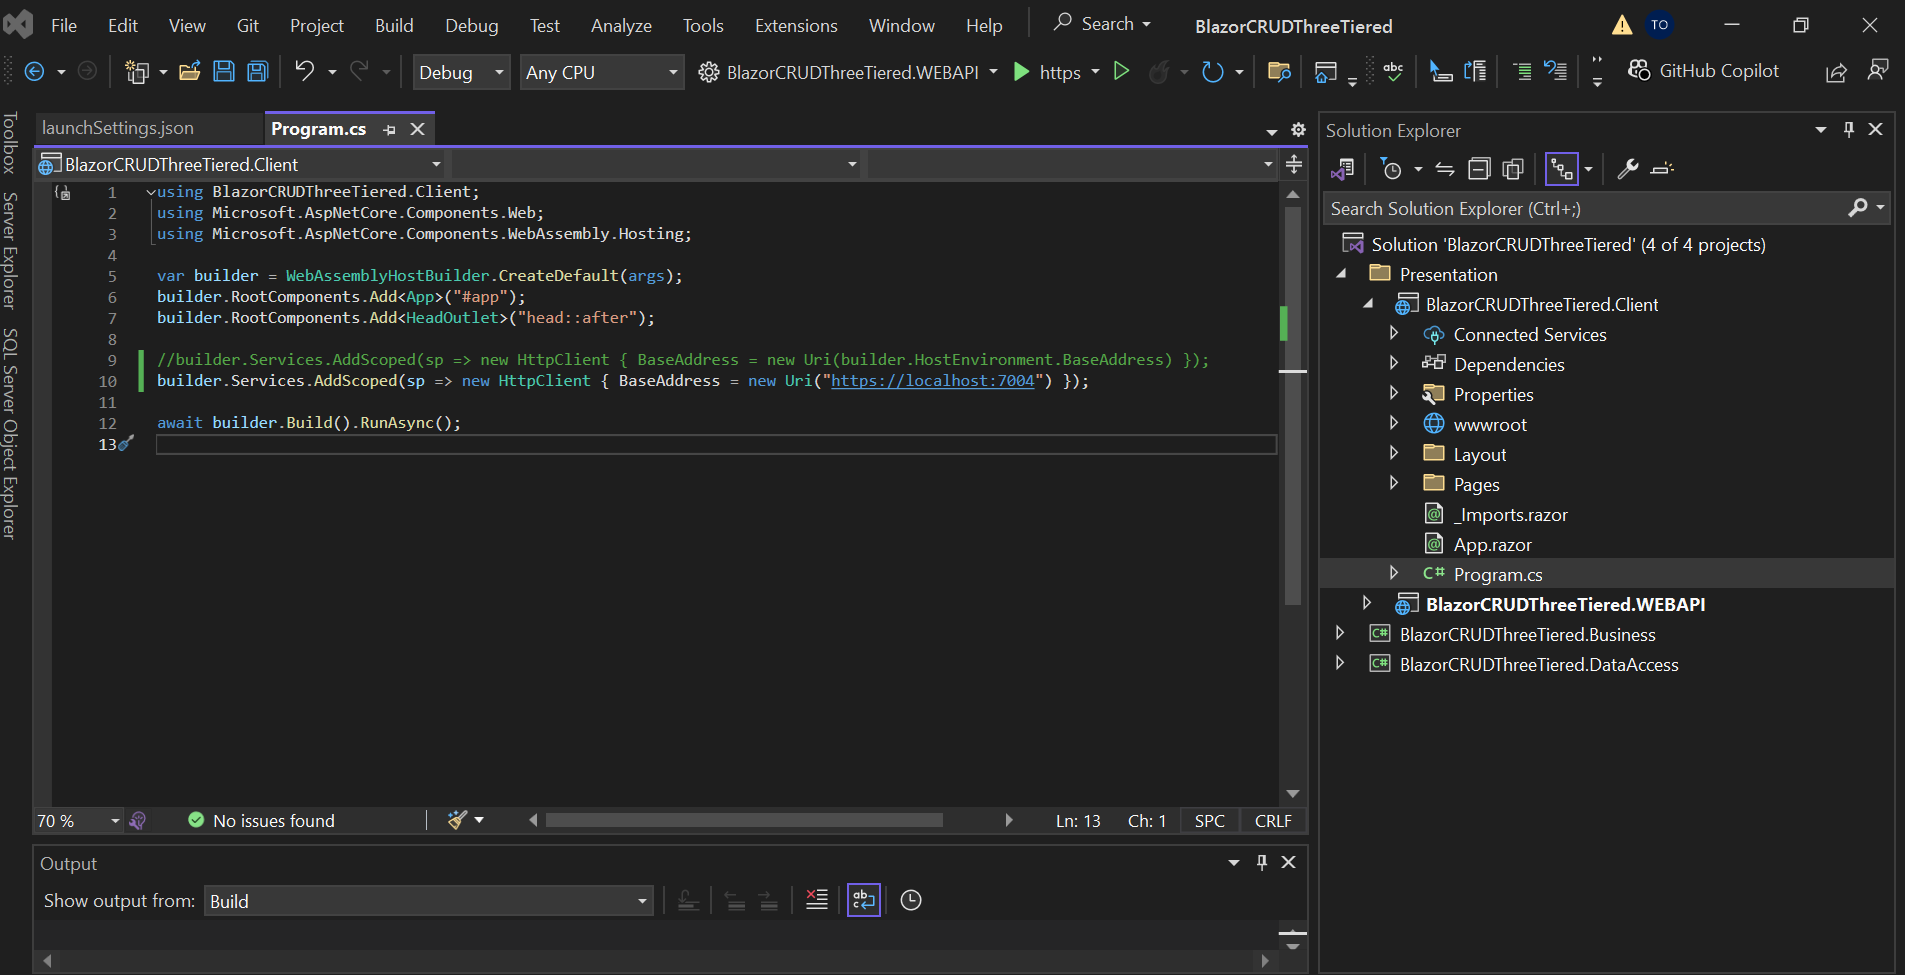
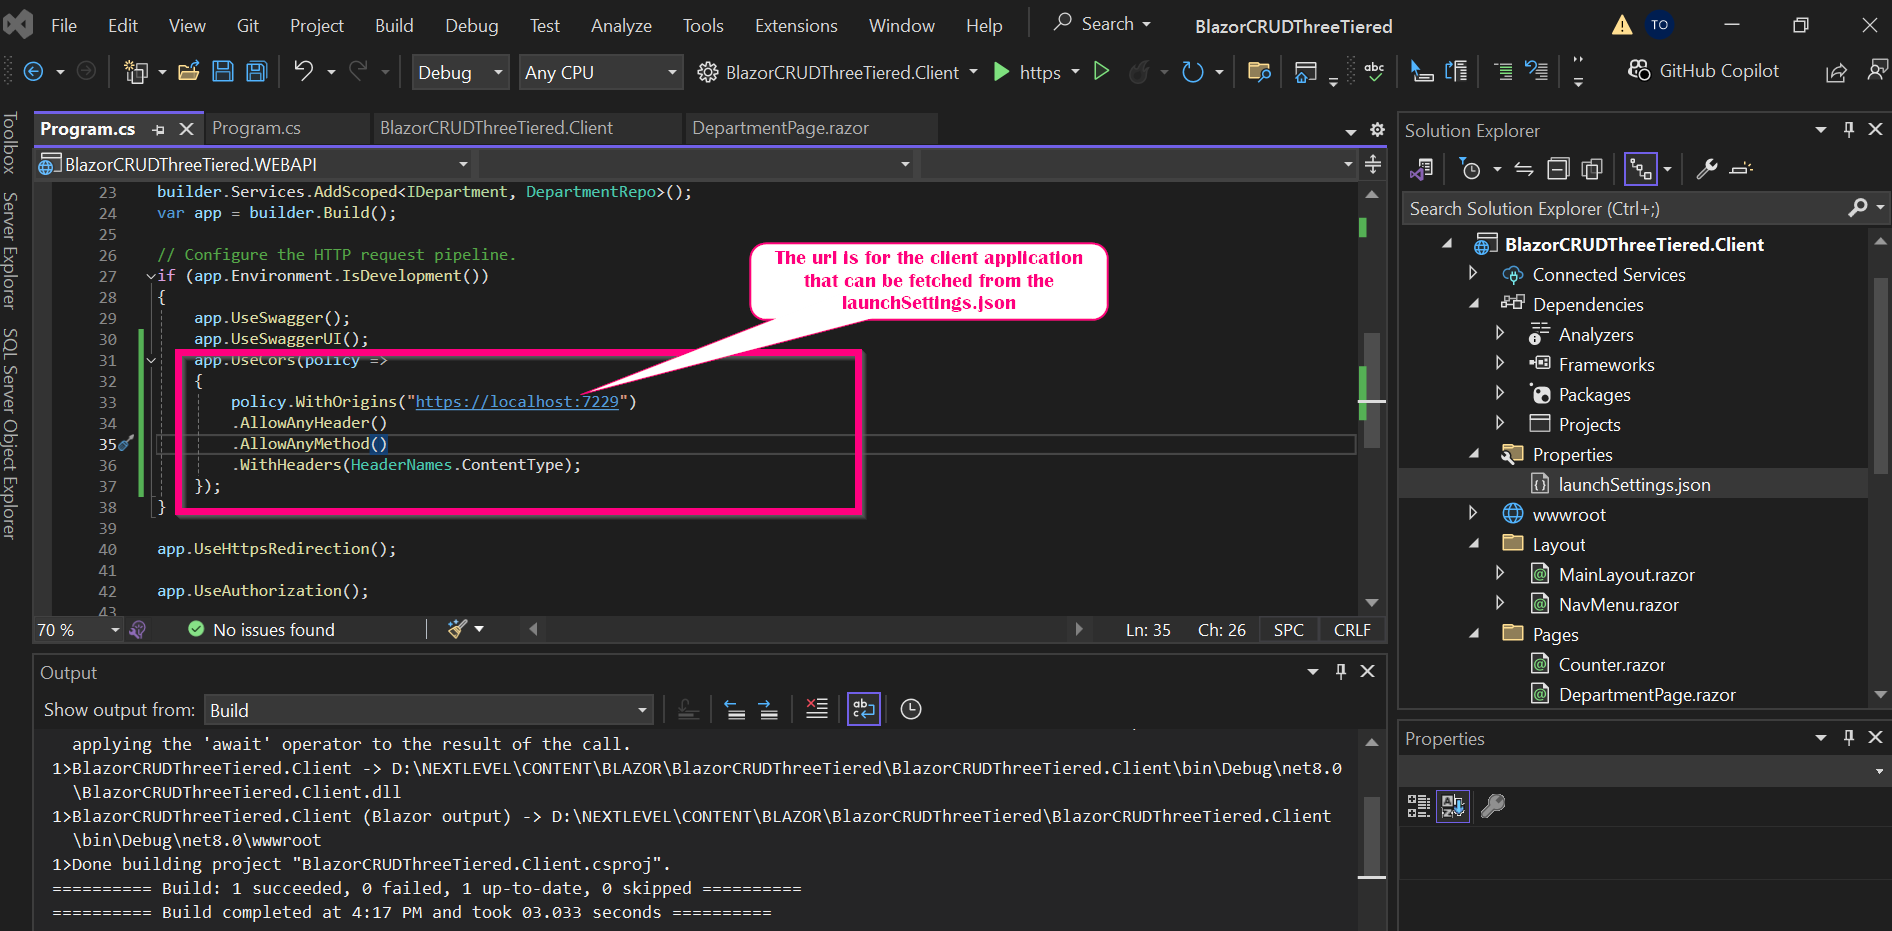
First we call the API into our Client application by getting the associated URL and pasting it into the Program.cs file of the client application: BlazorCRUDThreeTiered.Client.
The URL can be found in the launchSettings.json file of the WEBAPI project.
We begin by creating departments section as illustrated in the diagrams below:


Next we need to associate the API created to the specific endpoint created that are responsible for the CRUD. We therefore create API service in the interface to assist on this.
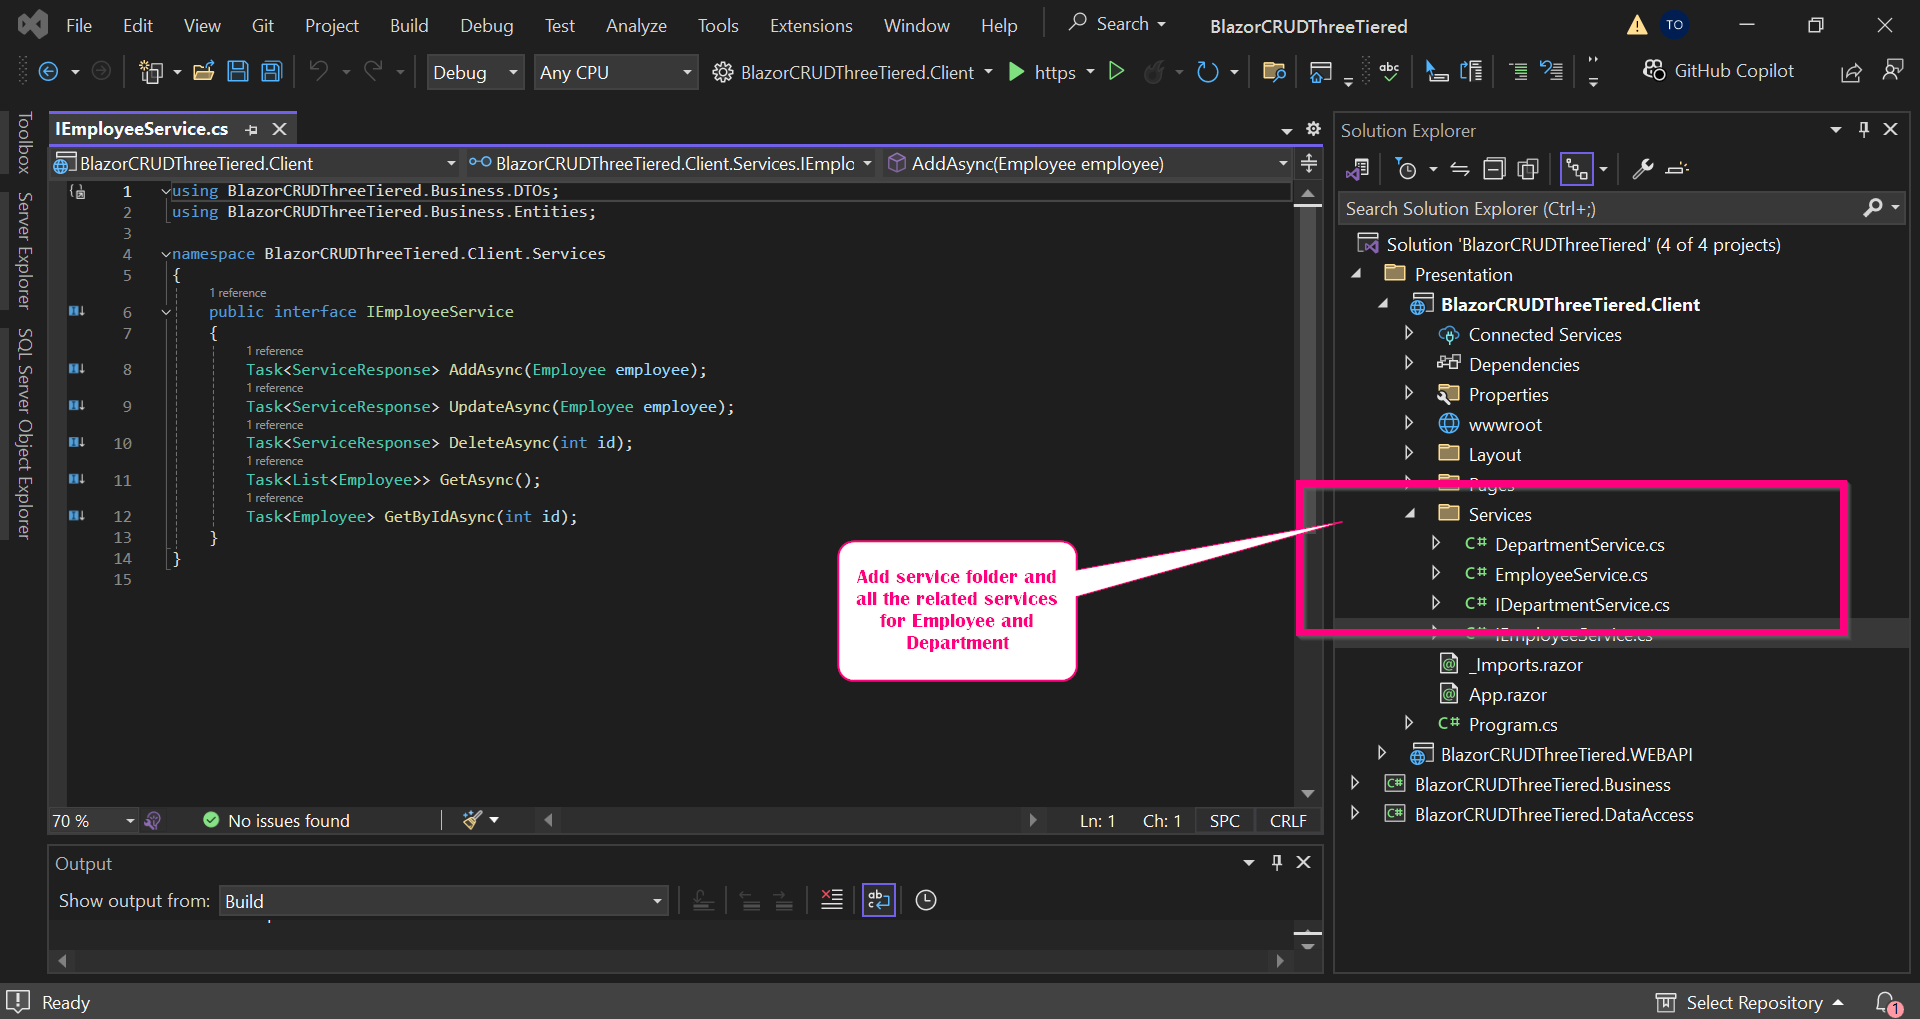
Create a Services folder in Client folder and add the API services for both department and employee as below:
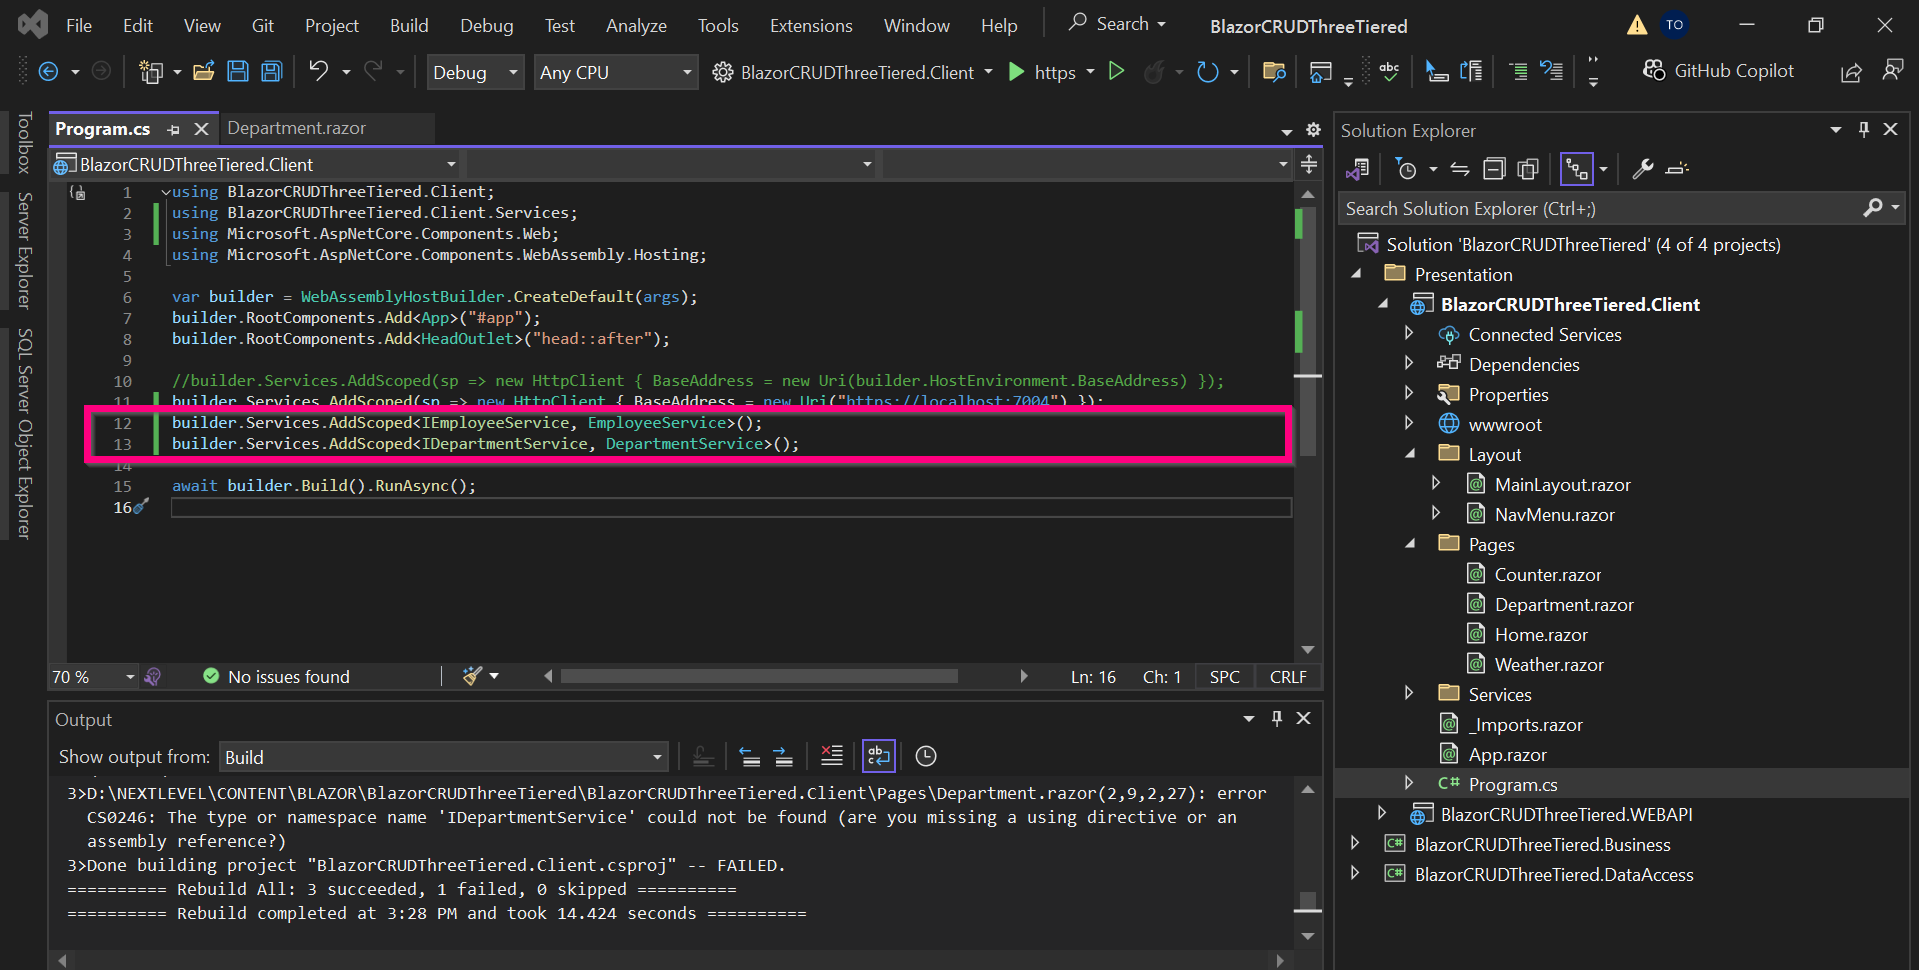
Then register the services in the client Program.cs file as shown below:
Next is to inject the department service in the department component as below:

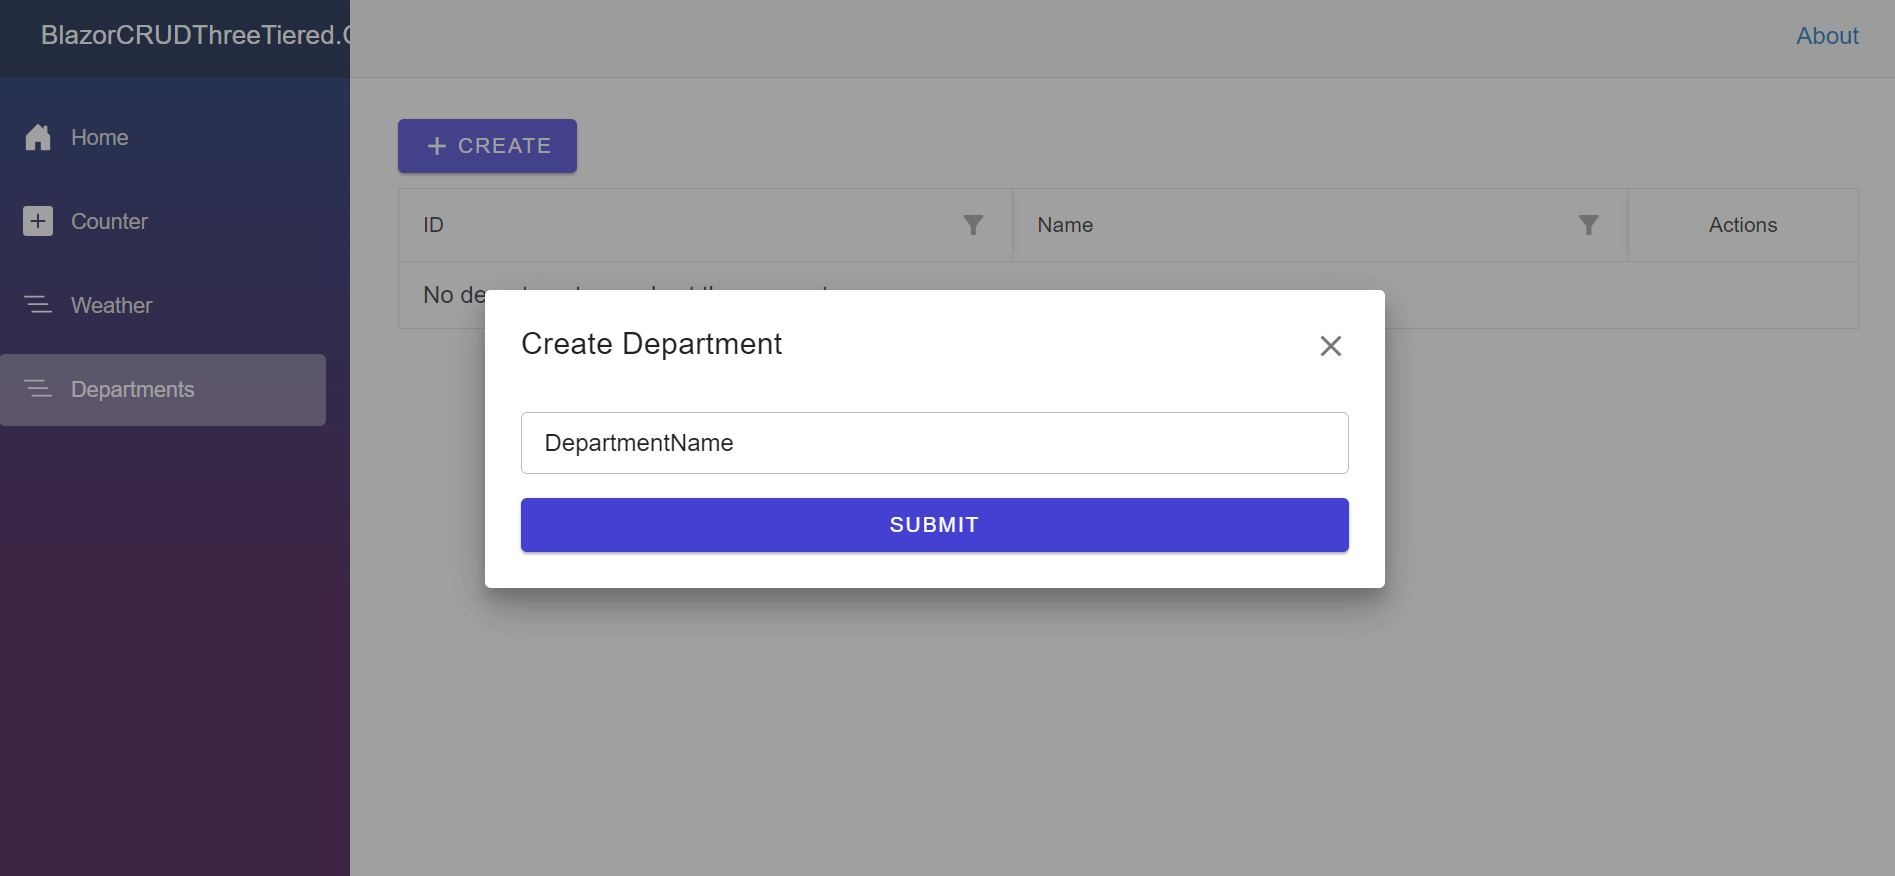
Add the associated crud for the department. For the add functionality, you have to add the dialog and toast services assisted by the Balzor BootStrap and Radzen Component dependencies we talked about before.
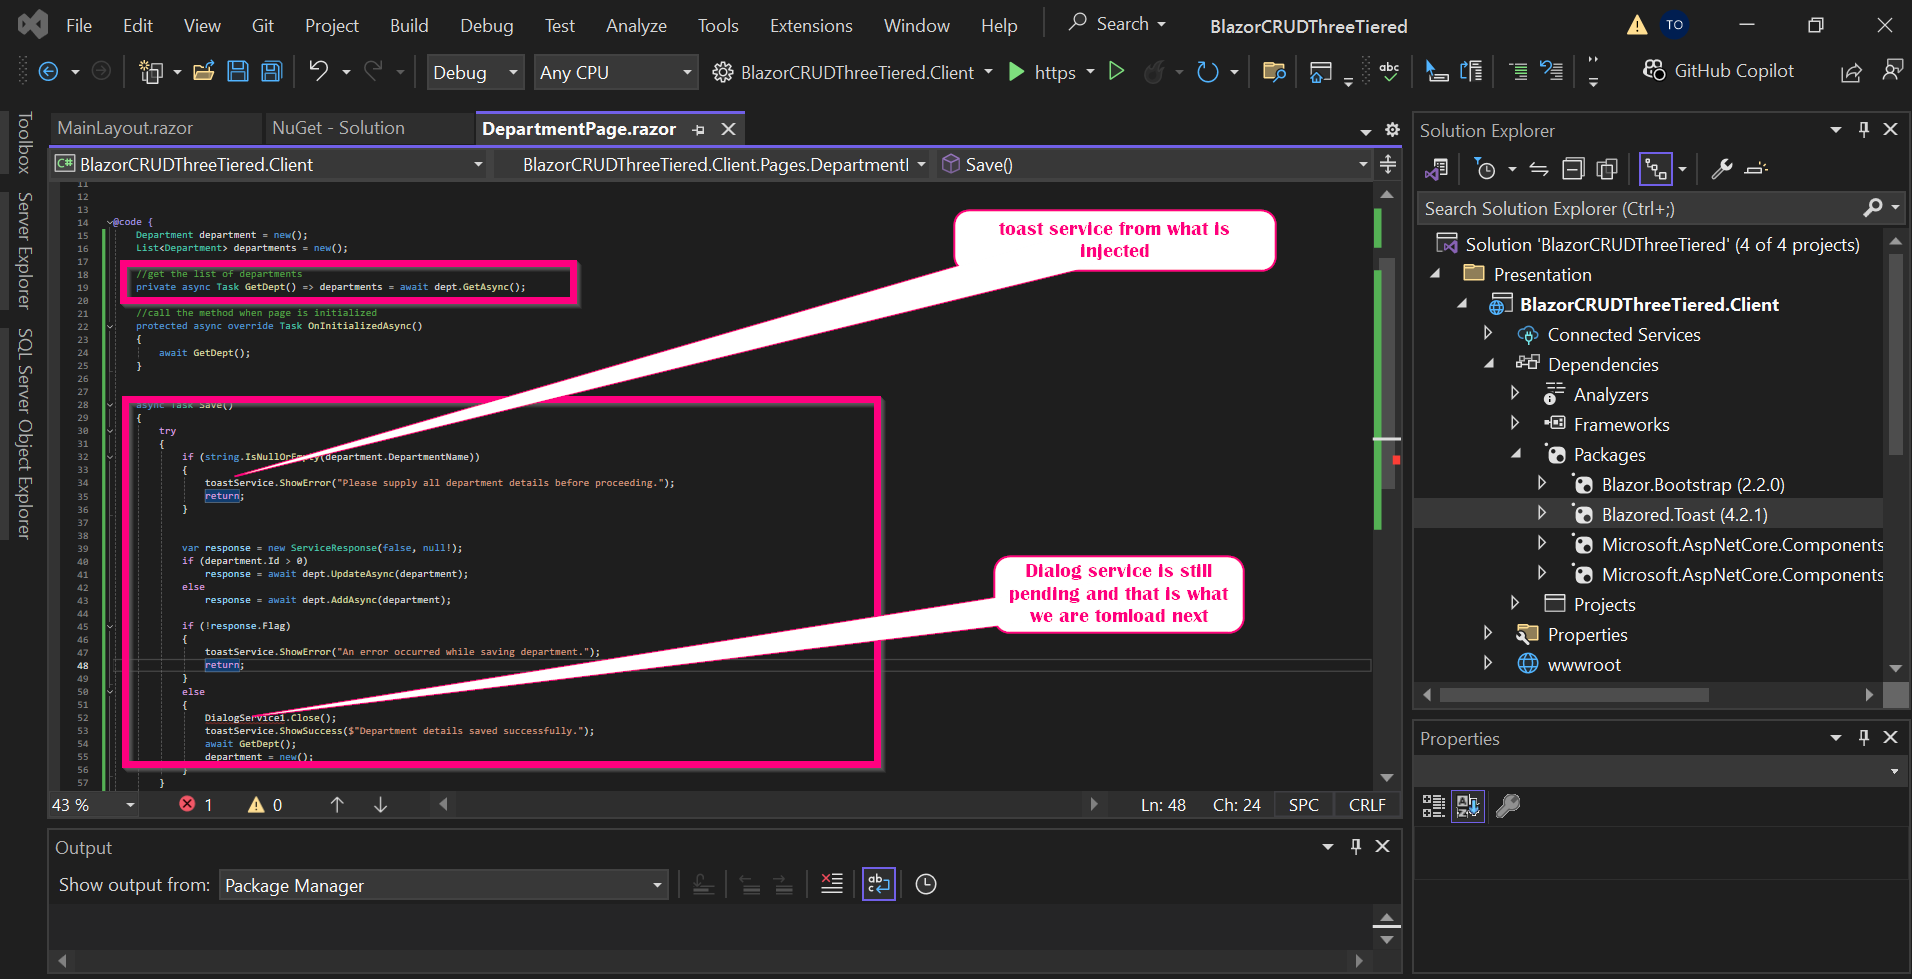
Then we add the dialog service from Radzen components that we will use when creating and editing Items.
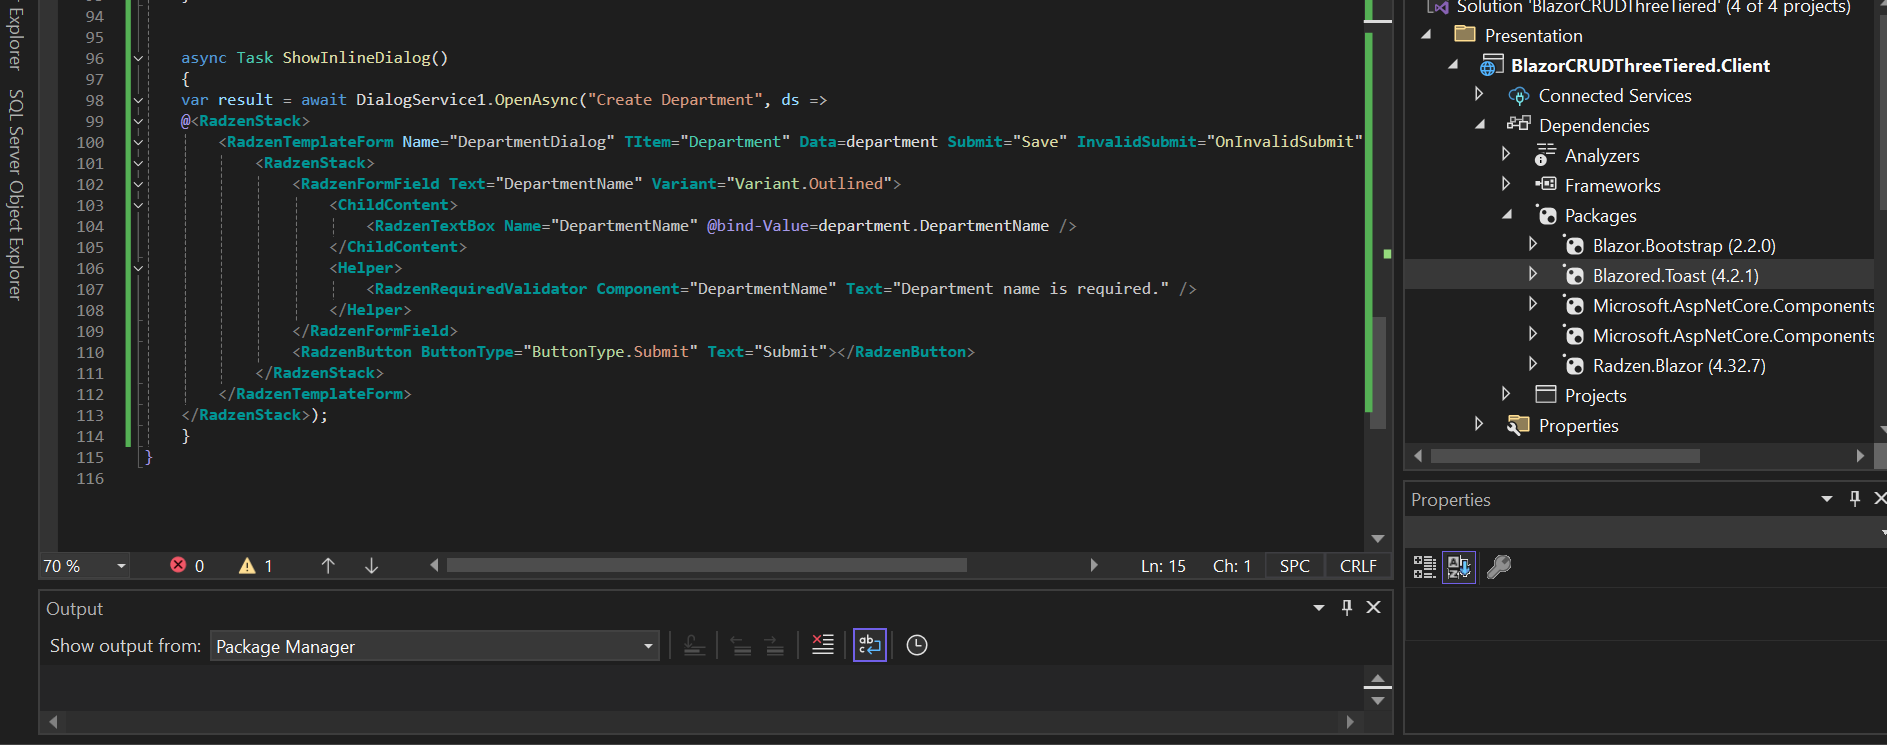
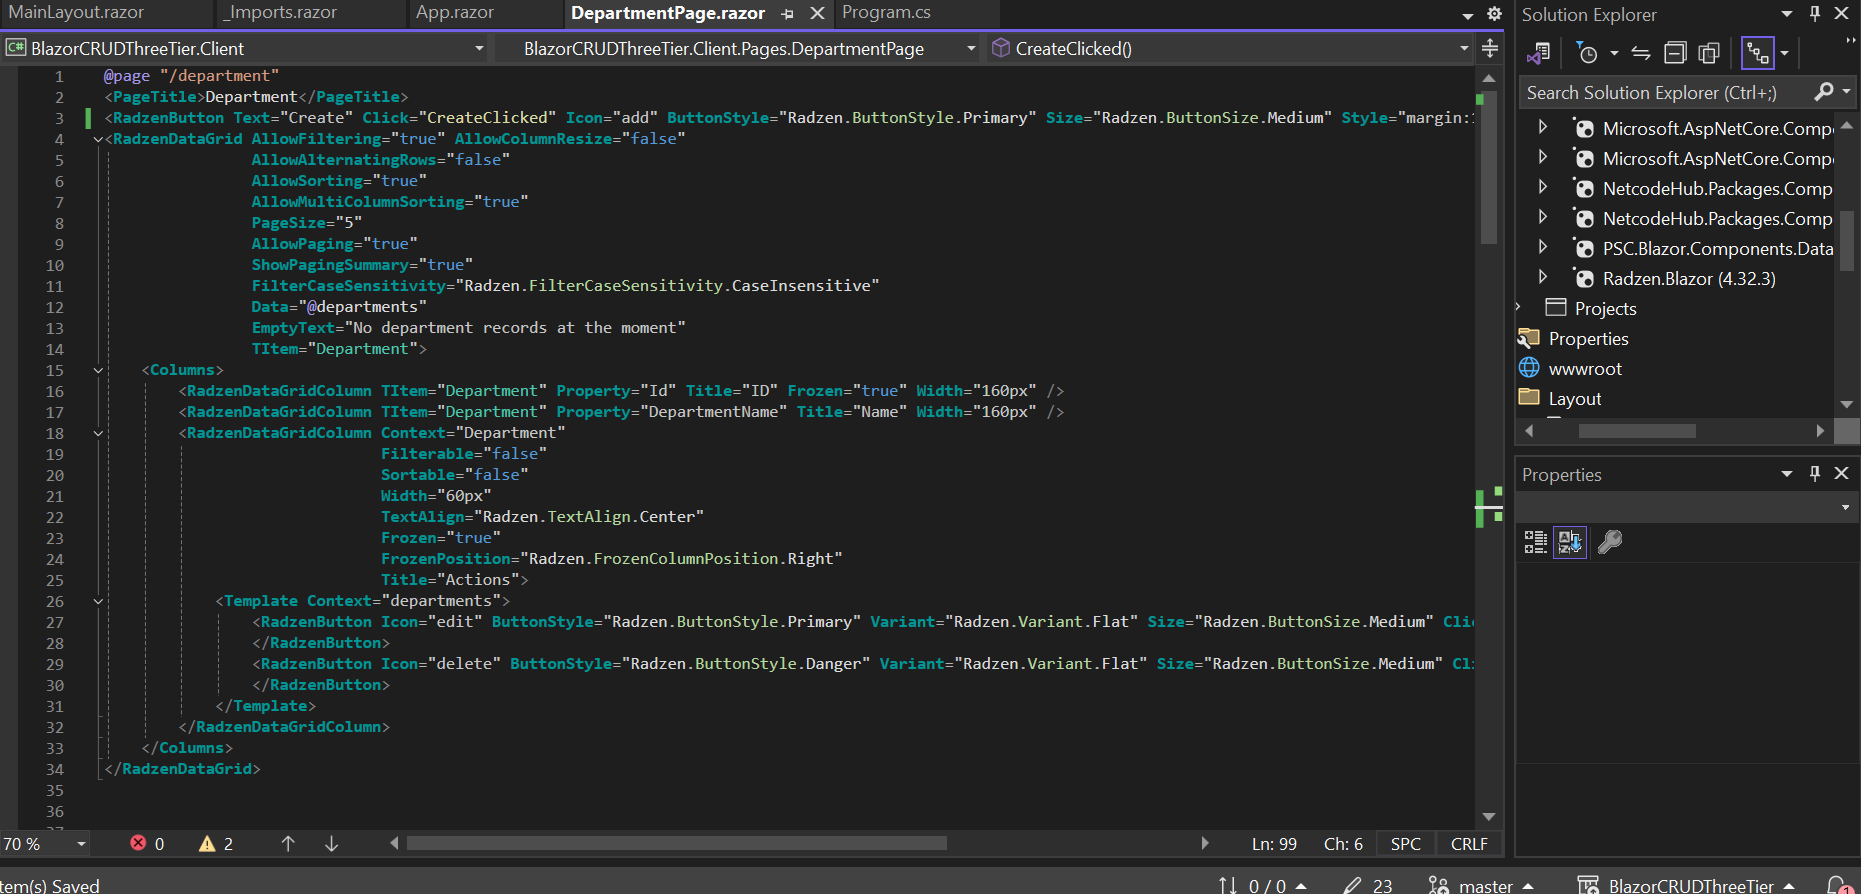
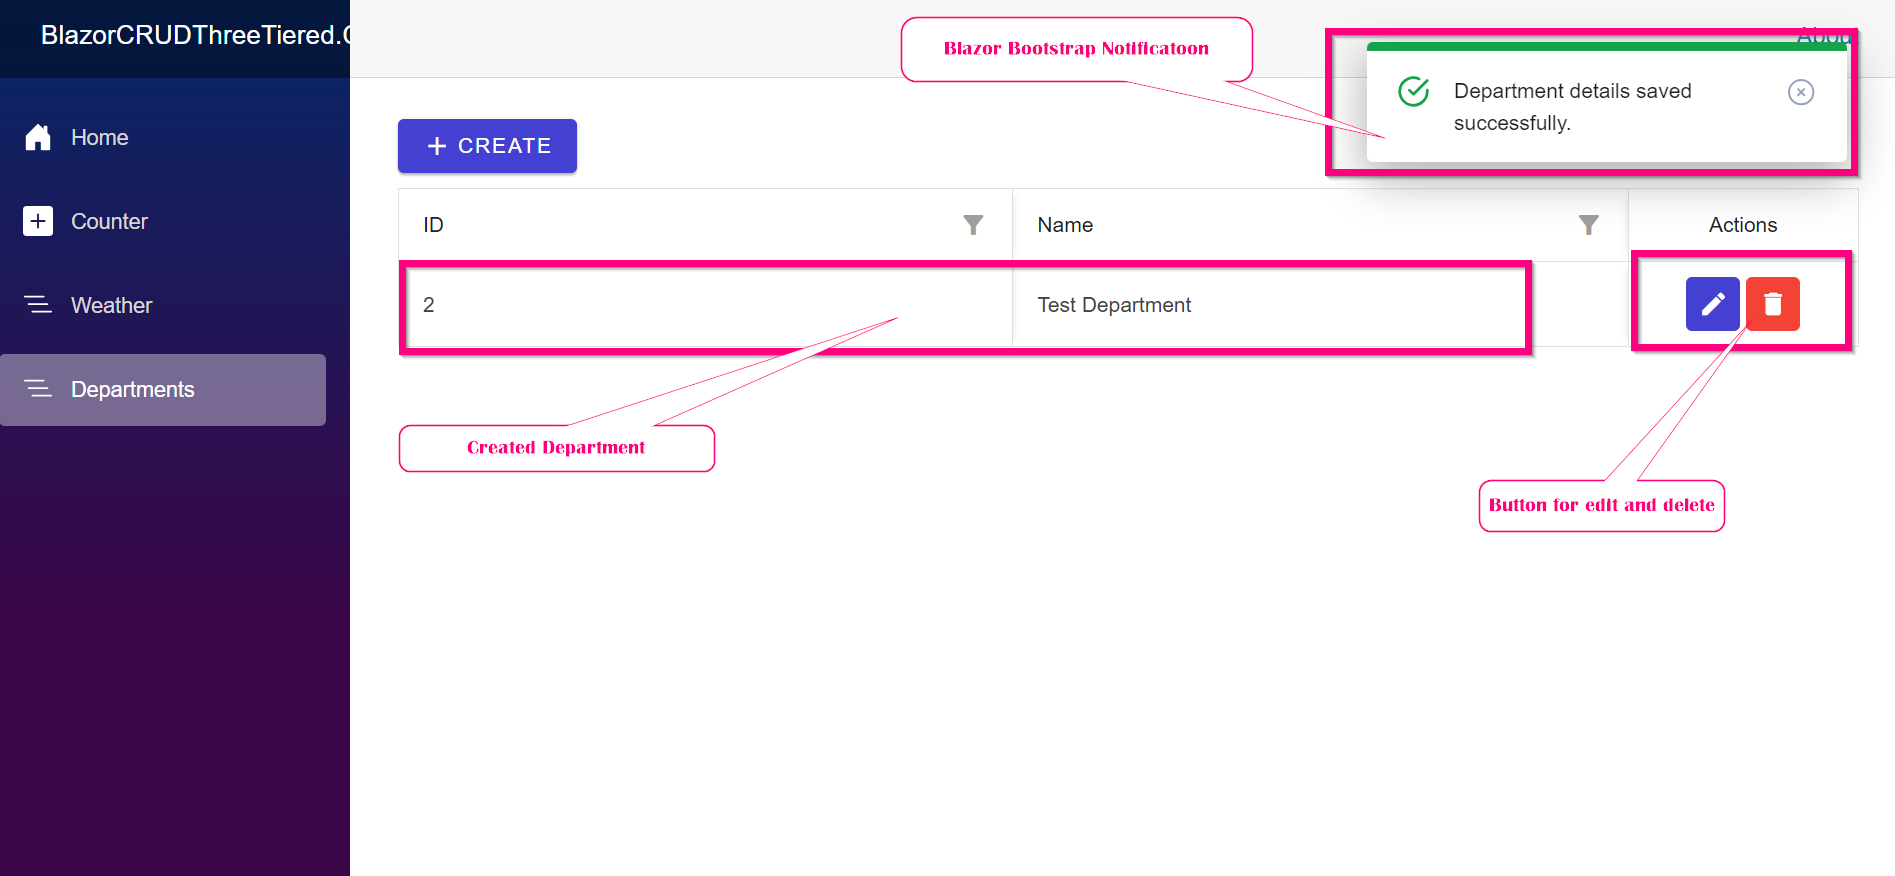
After this we add the major Radzen components which is the DataGrid. This will assist with functionalities like Search, Display and the entire application CRUD
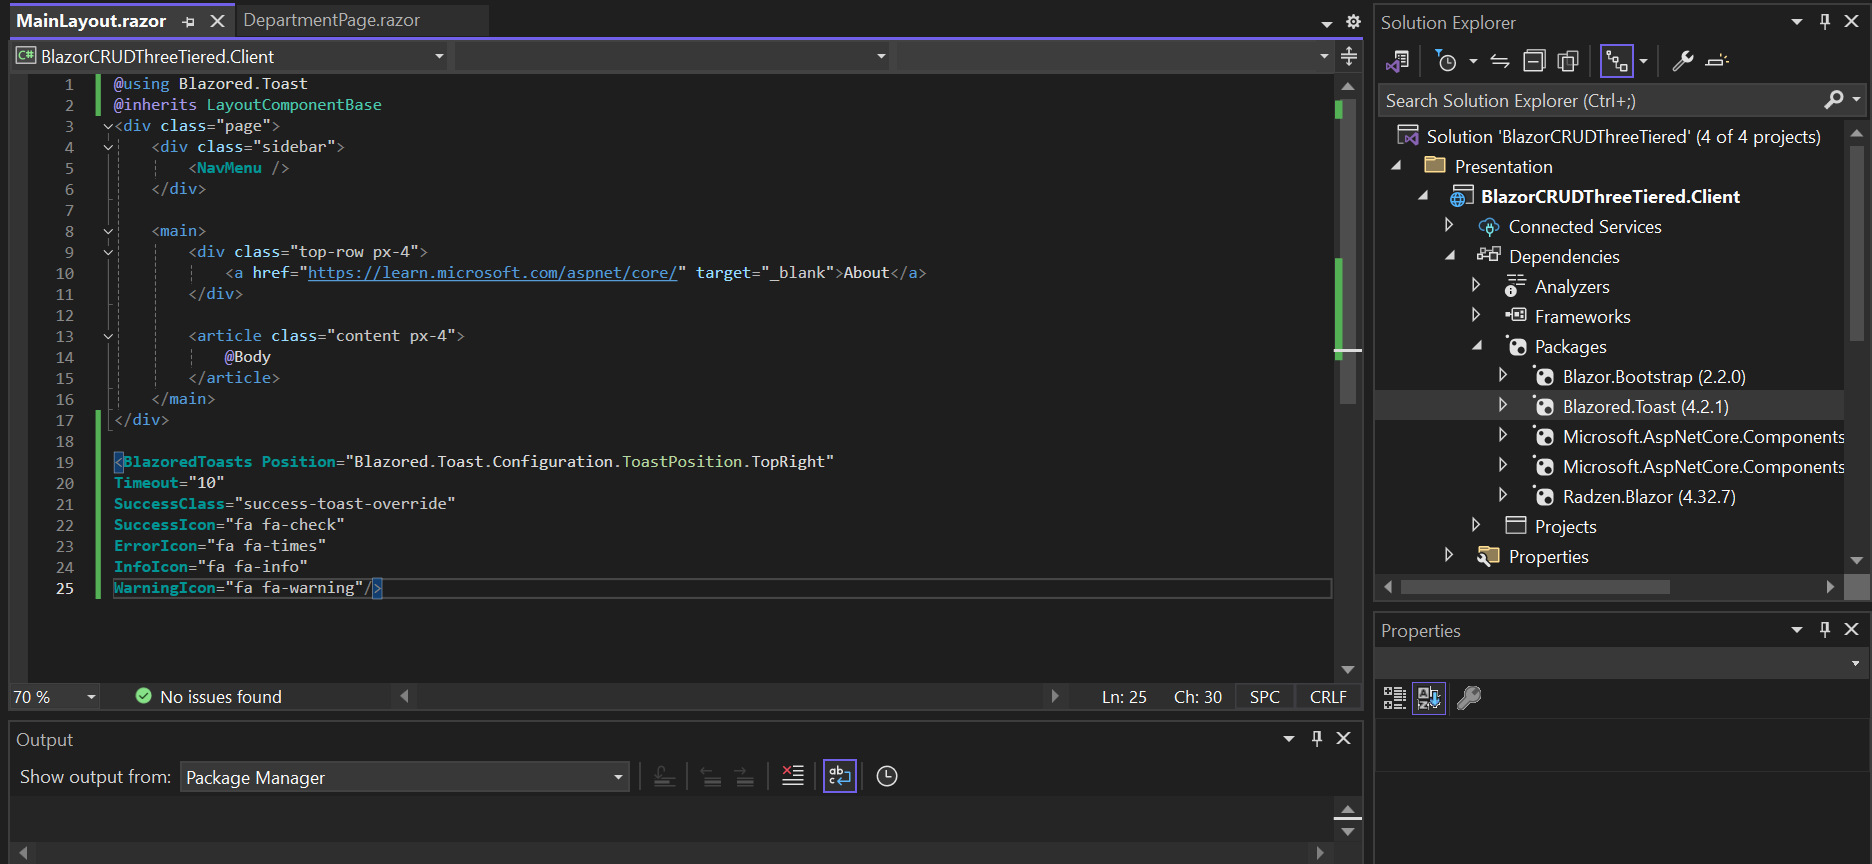
Finally add the Dialog and Toast notification component to the Main Layout as below and Register the below services to the Program.cs file of the client application.
builder.Services.AddScoped();
builder.Services.AddScoped<IToastService,ToastService>();
builder.Services.AddRadzenComponents();
Add CORS in the WEBAPI to restrict API access to just one domain and in this case will be the client application specified.
-
- Cross-Origin Resource Sharing (CORS) is a security feature that allows or restricts web applications running at one domain to make requests for resources from a different domain.
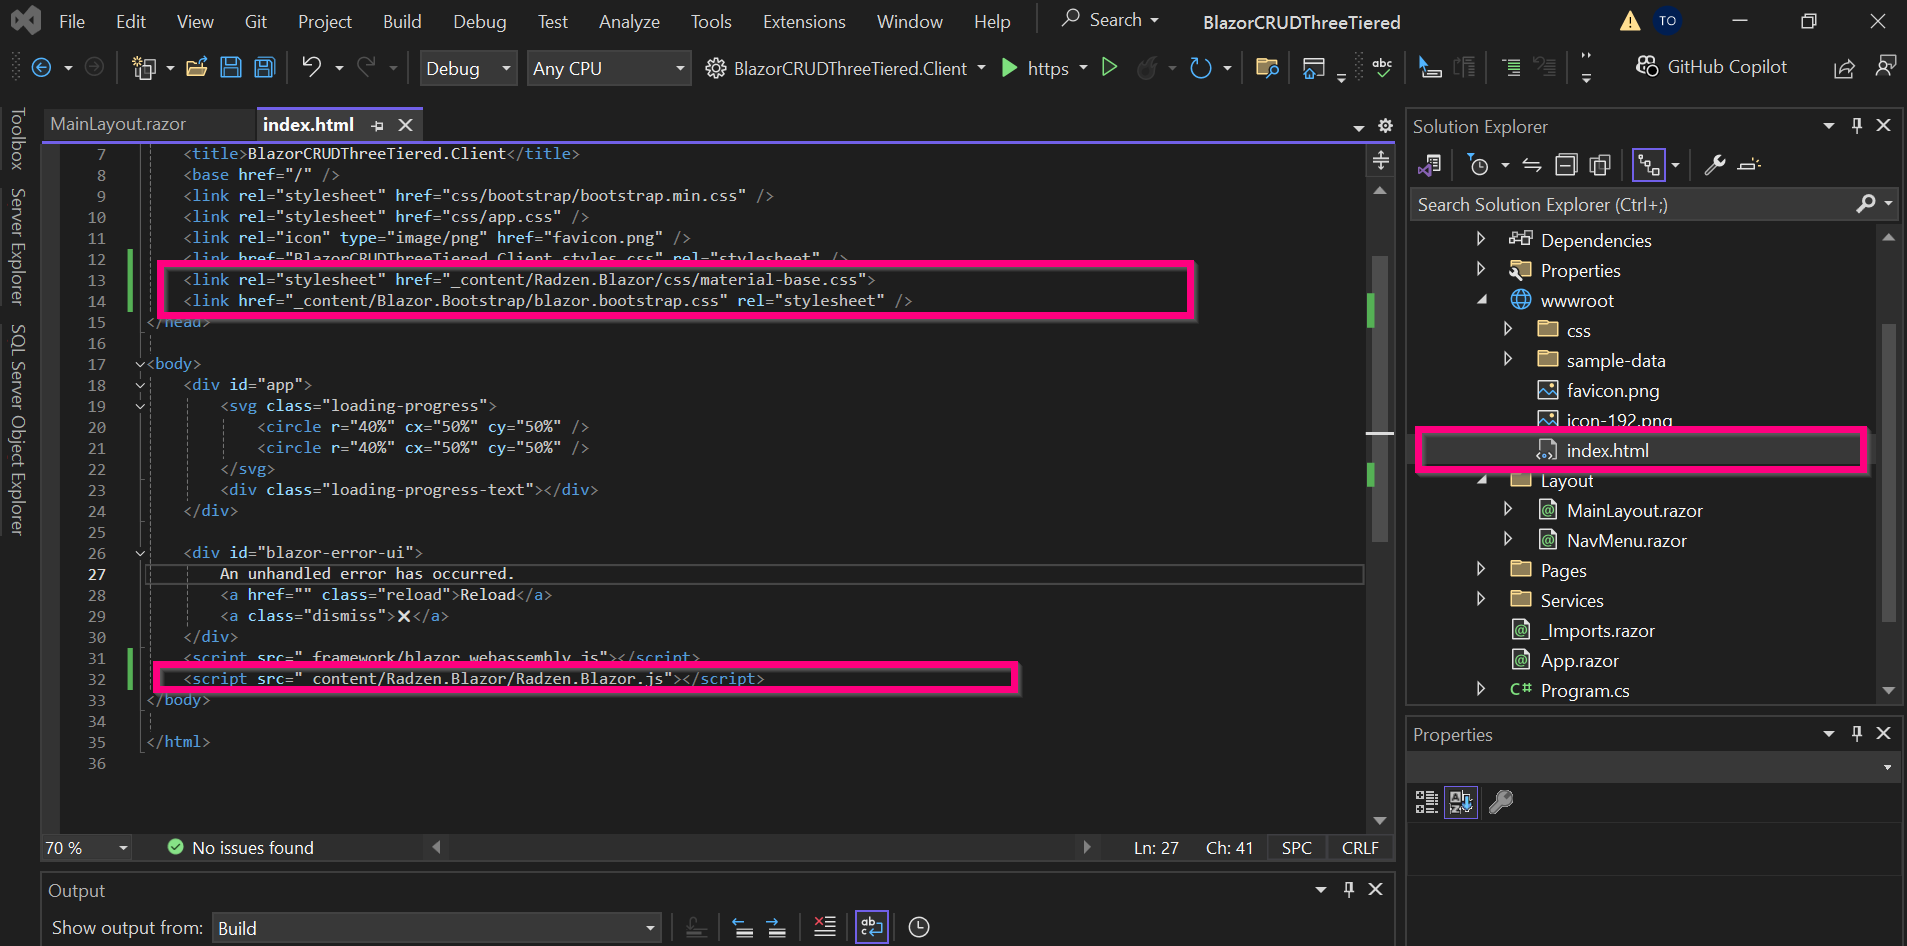
To resolve the rendering of JavaScript as directed by Radzen documentation adjust the index.html file to look as below
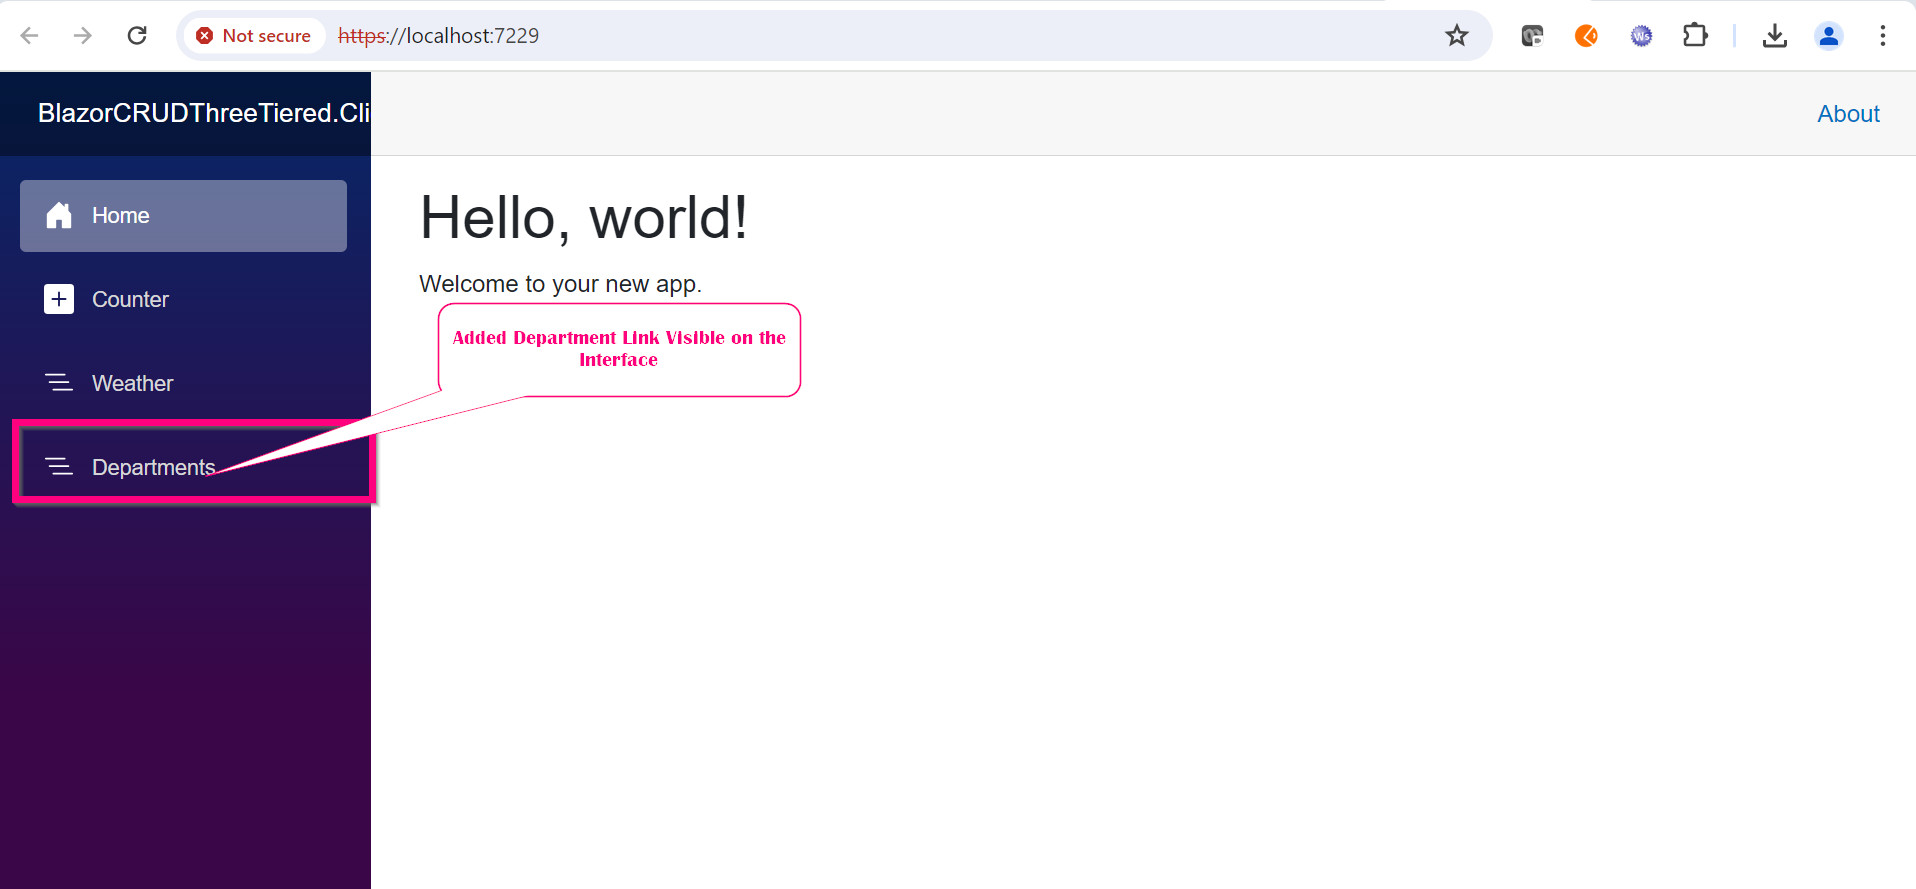
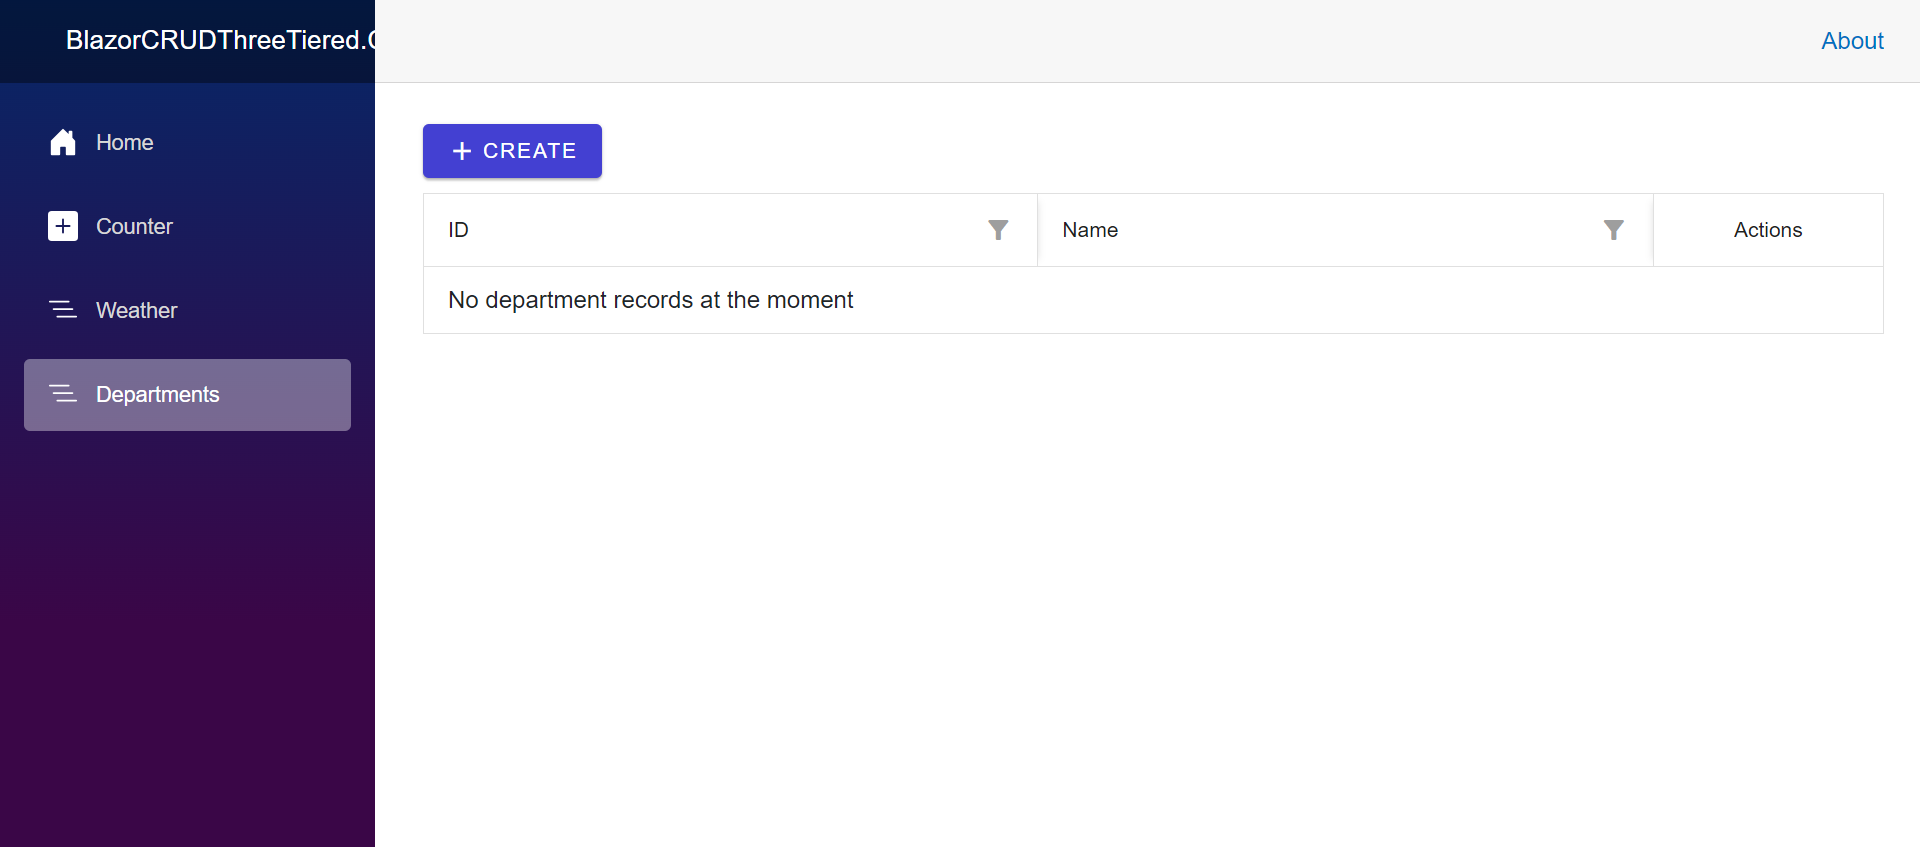
Finally launch both the WEBAPI and Client and Click on Department. The below should be the display:
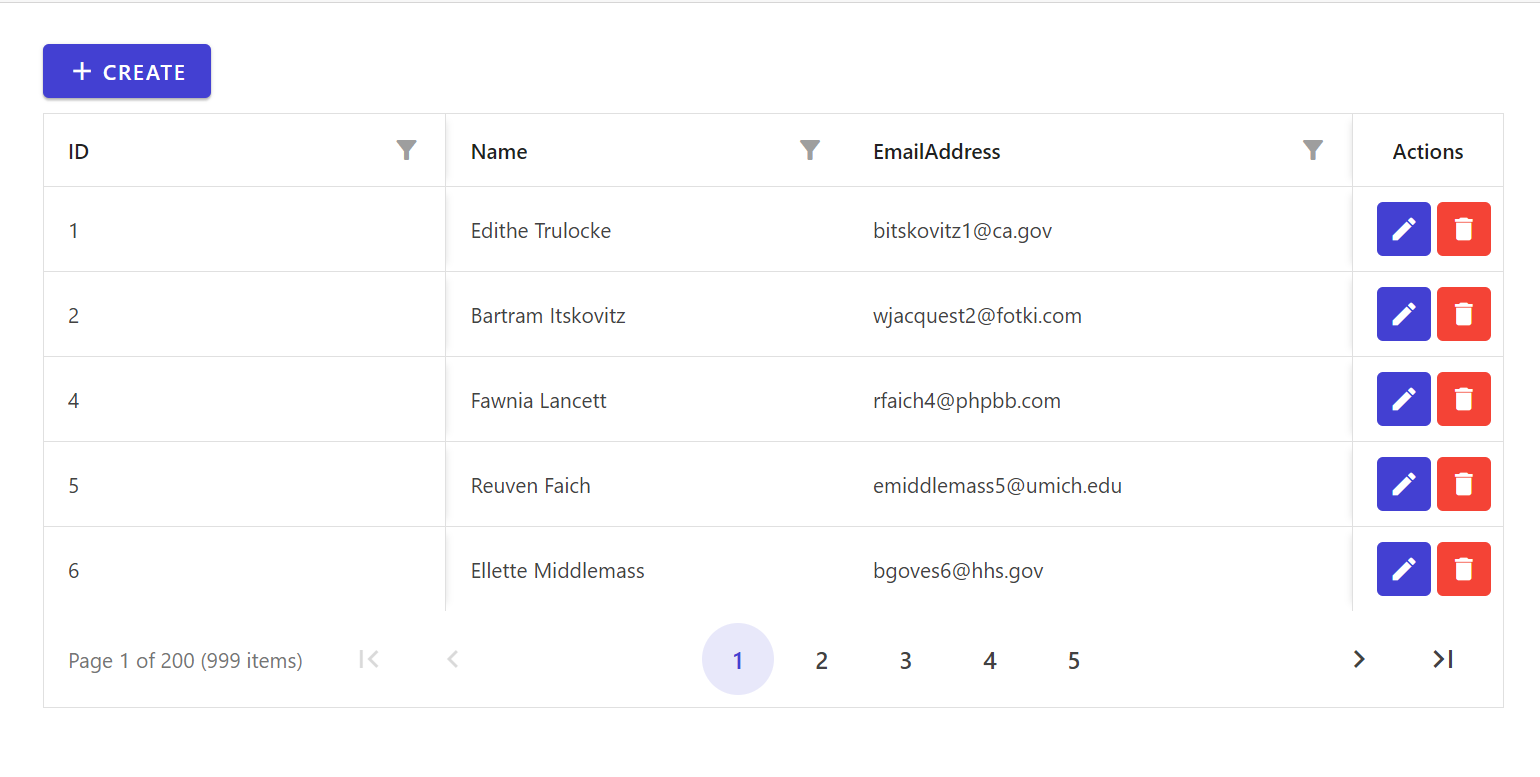
With our Department page now working, we need to do the same for the Employee page. The process will be the same except for a few adjustments. As like you know the employee page will have a dropdown that has details of a department.
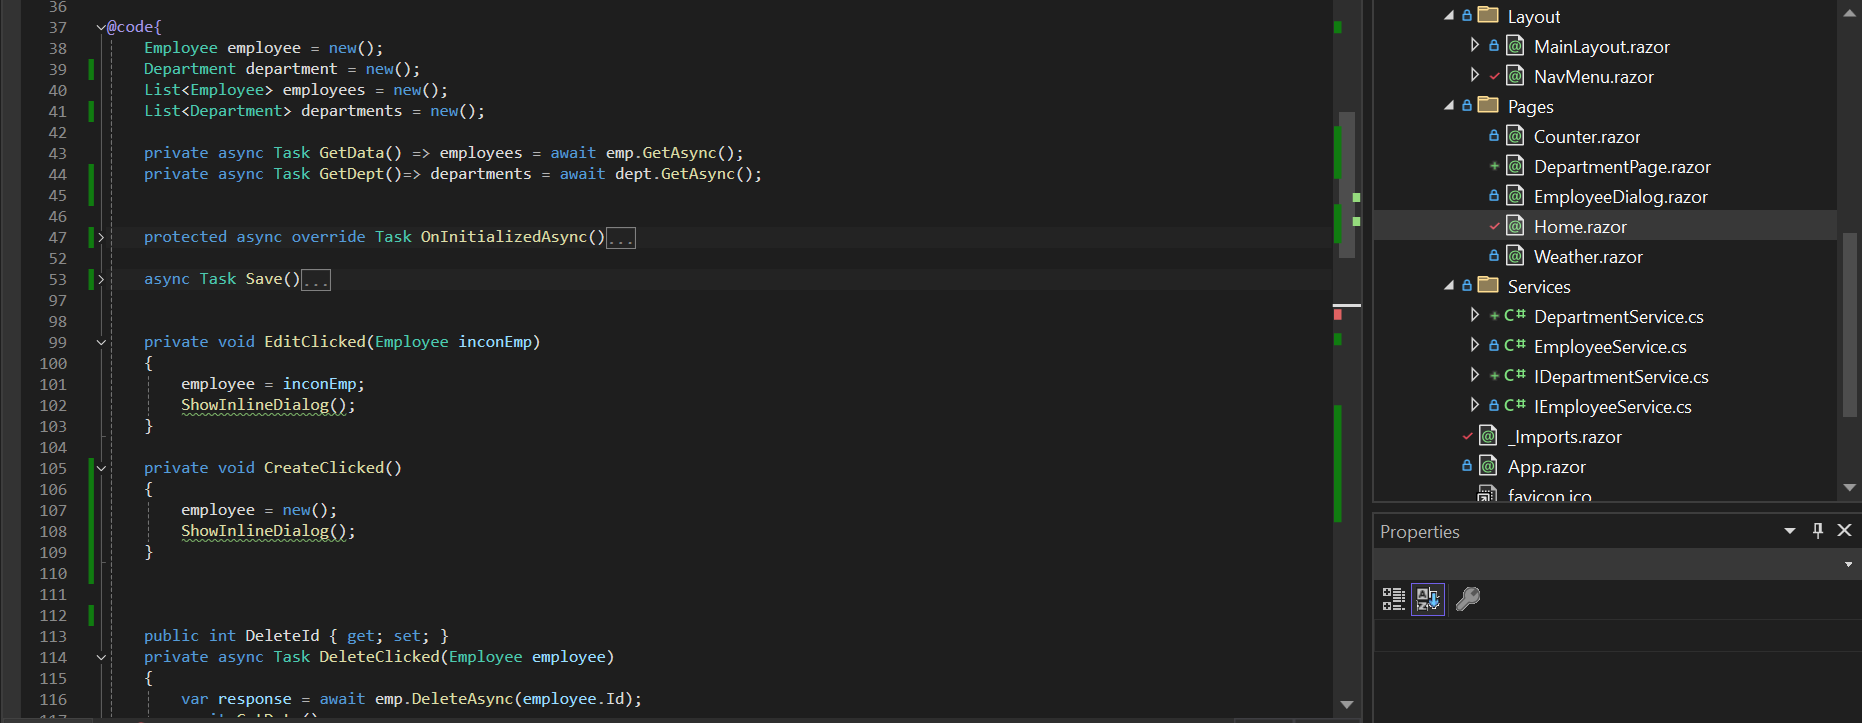
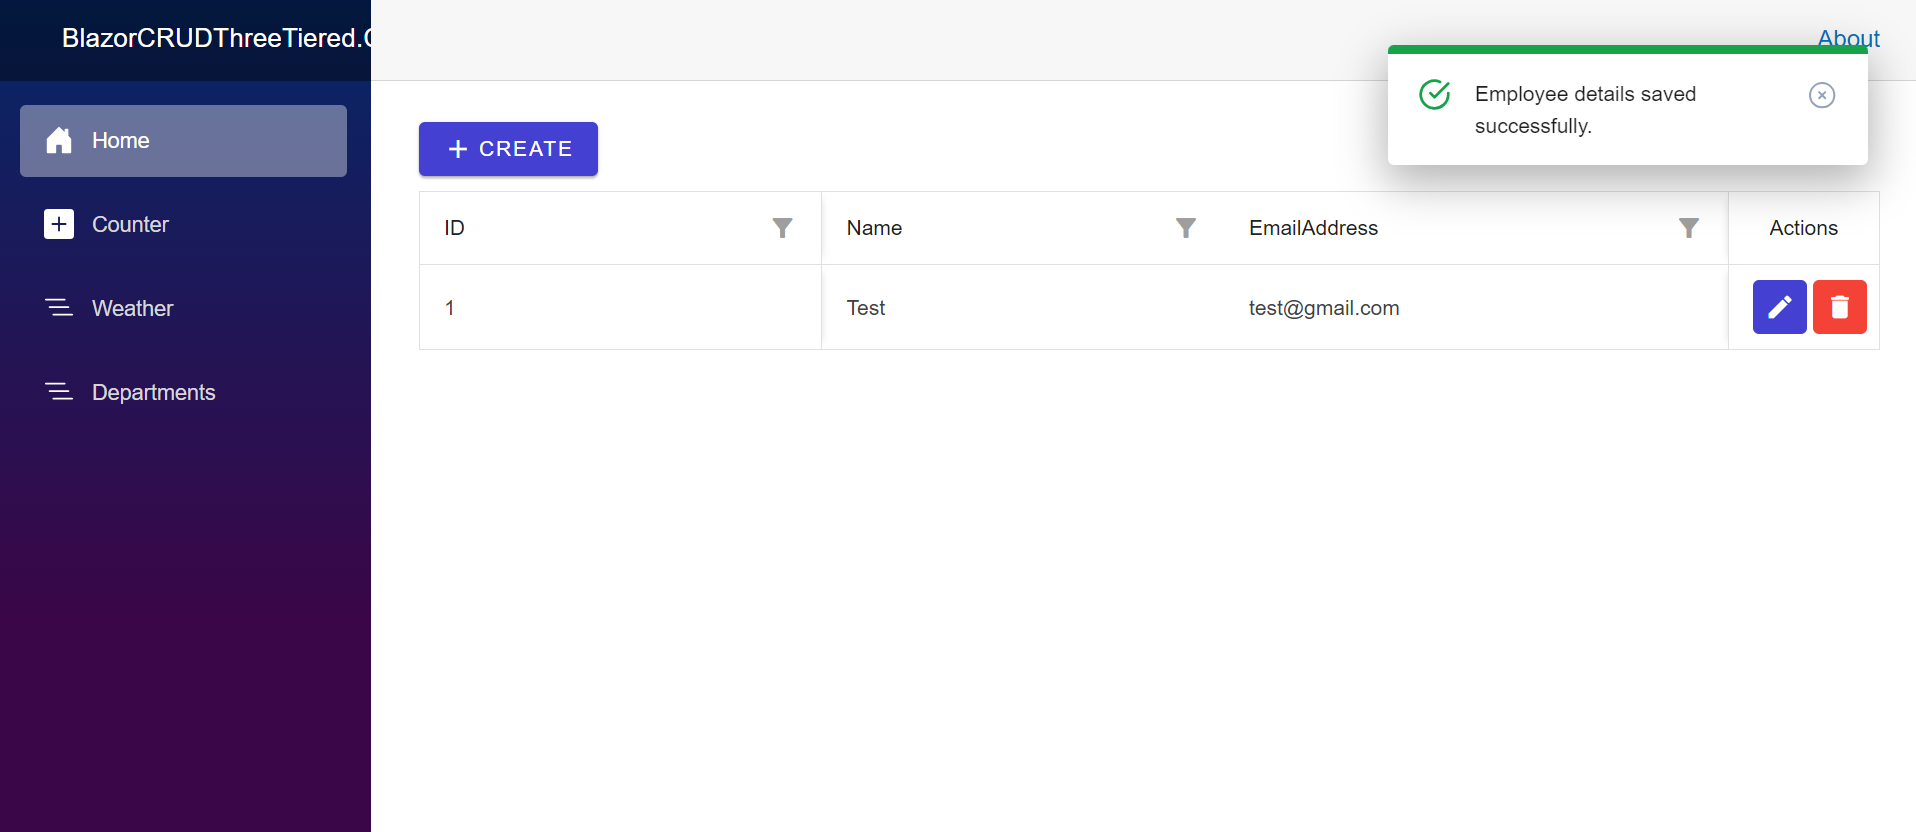
Will utilize the home page of our application. Open the home page and the code for the CRUD which is similar to the department except for a few changes.

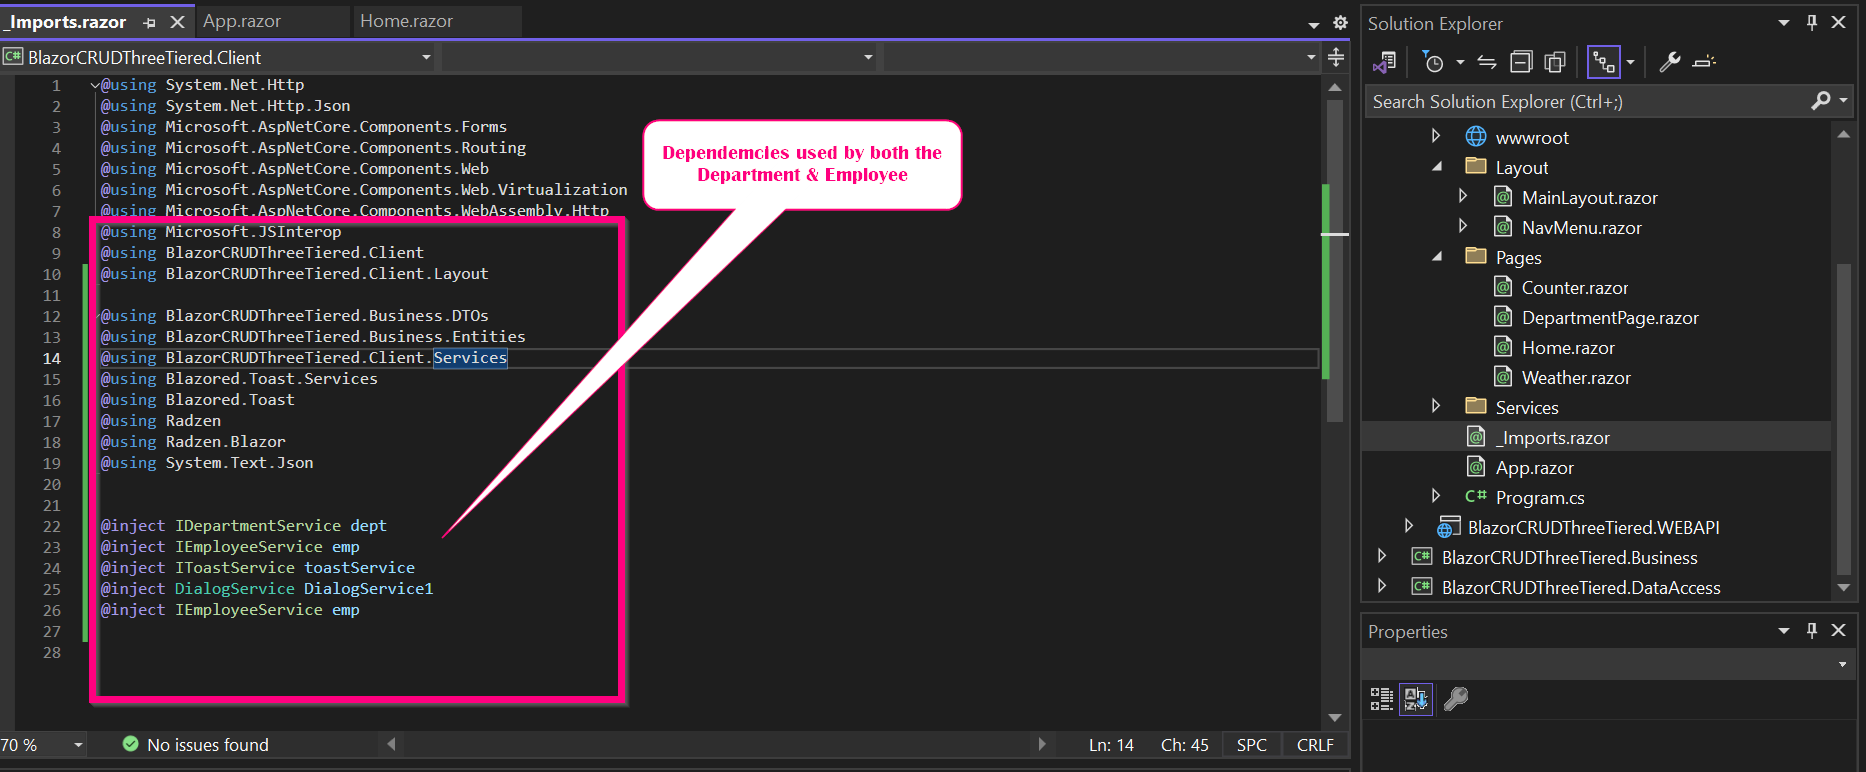
The dependencies used in the department page are similar to what the employee page needs. This can be simplified by moving the dependencies to the _Imports.razor file as below
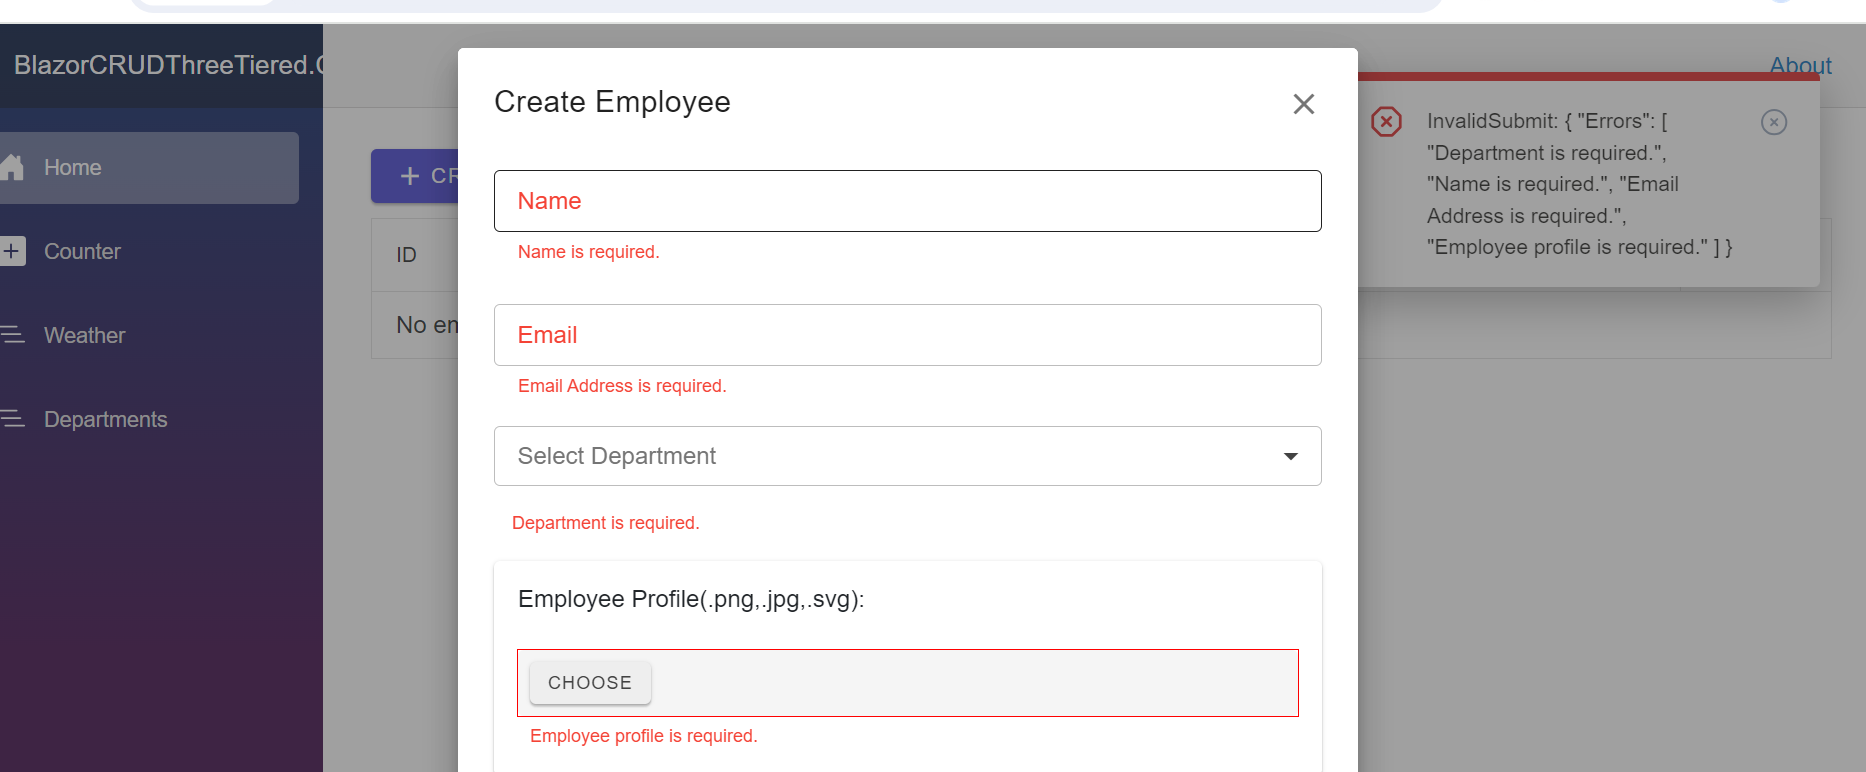
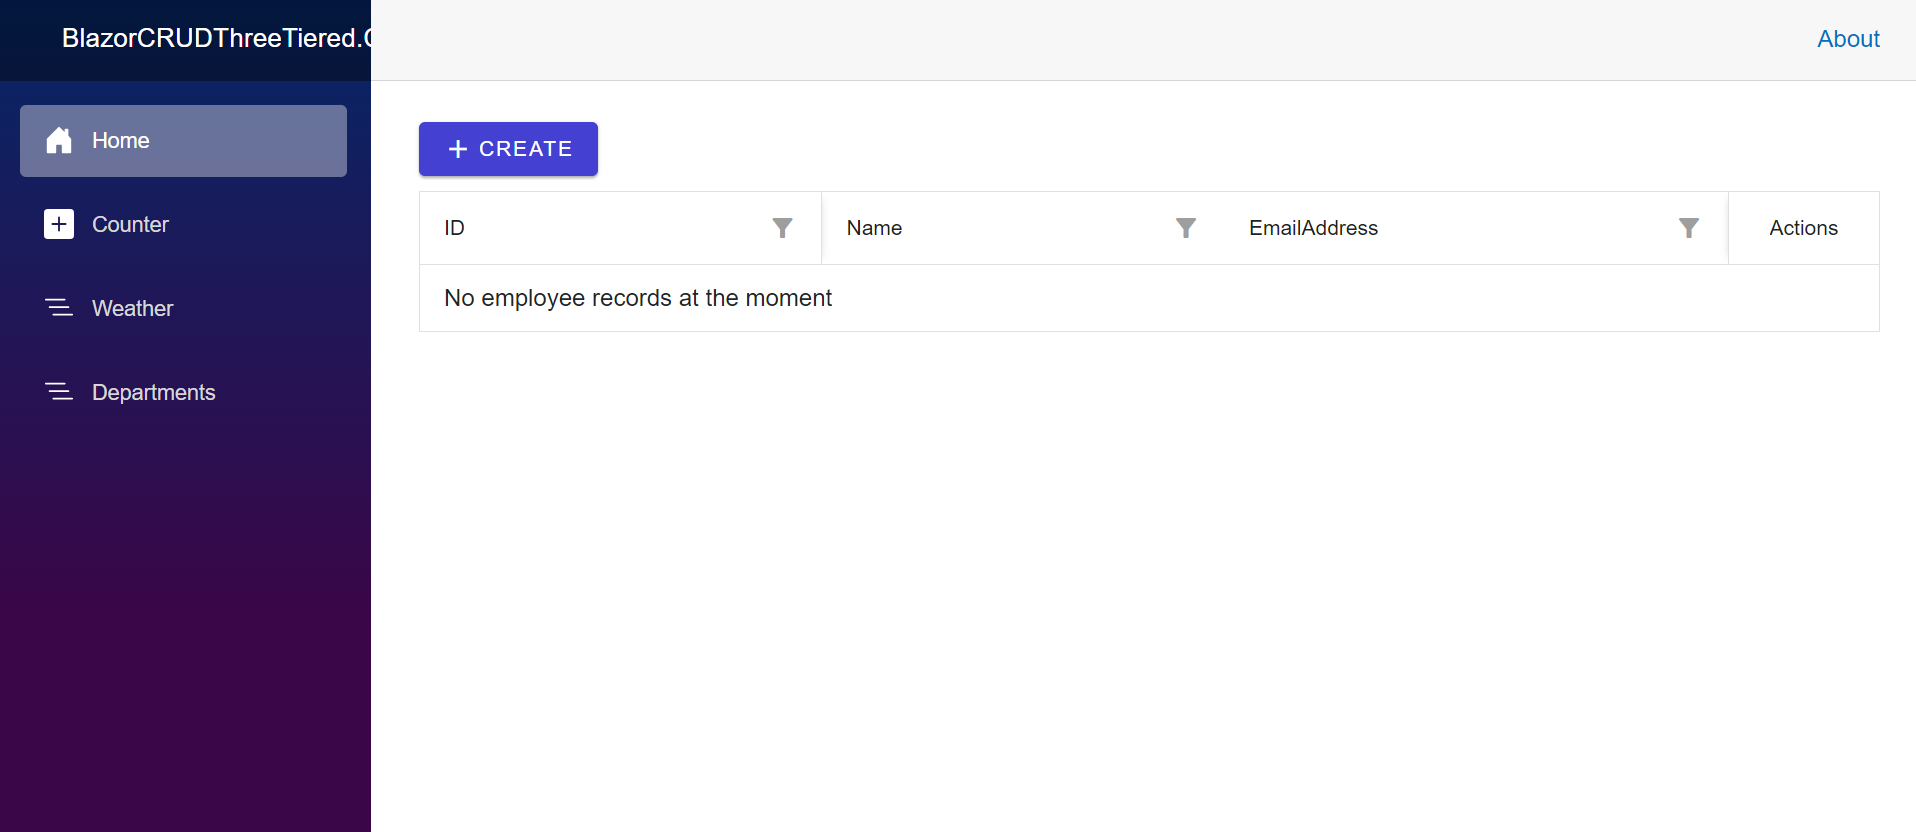
When this is completed. The below should be able to displayed.
With this we have out CRUD for Employee that can be integrated to any application design of choice. If you want to learn more step-by-step please check out YouTube video.